
Appearance
How to share posts immediately with Revive Social
This feature allows you to share posts to your connected social media accounts after Publishing a new post or custom post type.
📝 Note: Instant Sharing and the automated recurring schedule are independent mechanisms. Instant Sharing fires once when you publish or manually trigger a share. The recurring schedule runs separately on its own interval and may share the same post again later if it is eligible. If you want each post shared only once, see Share each post only once on publish below.
Here are the steps on how to do this.
1. Make sure that you've connected and turned on your Social Media accounts of choice.
2. From your WordPress Dashboard > Revive Social Dashboard > General Settings.
- Check the tickbox for Enable Instant Sharing Feature (Post on Publish)

- Click on Save at the bottom.
Once done, you should now see the option to Share Immediately when you create new posts or even on published posts.
Click on the Revive Social icon at the top of the editor, to access all the available options.
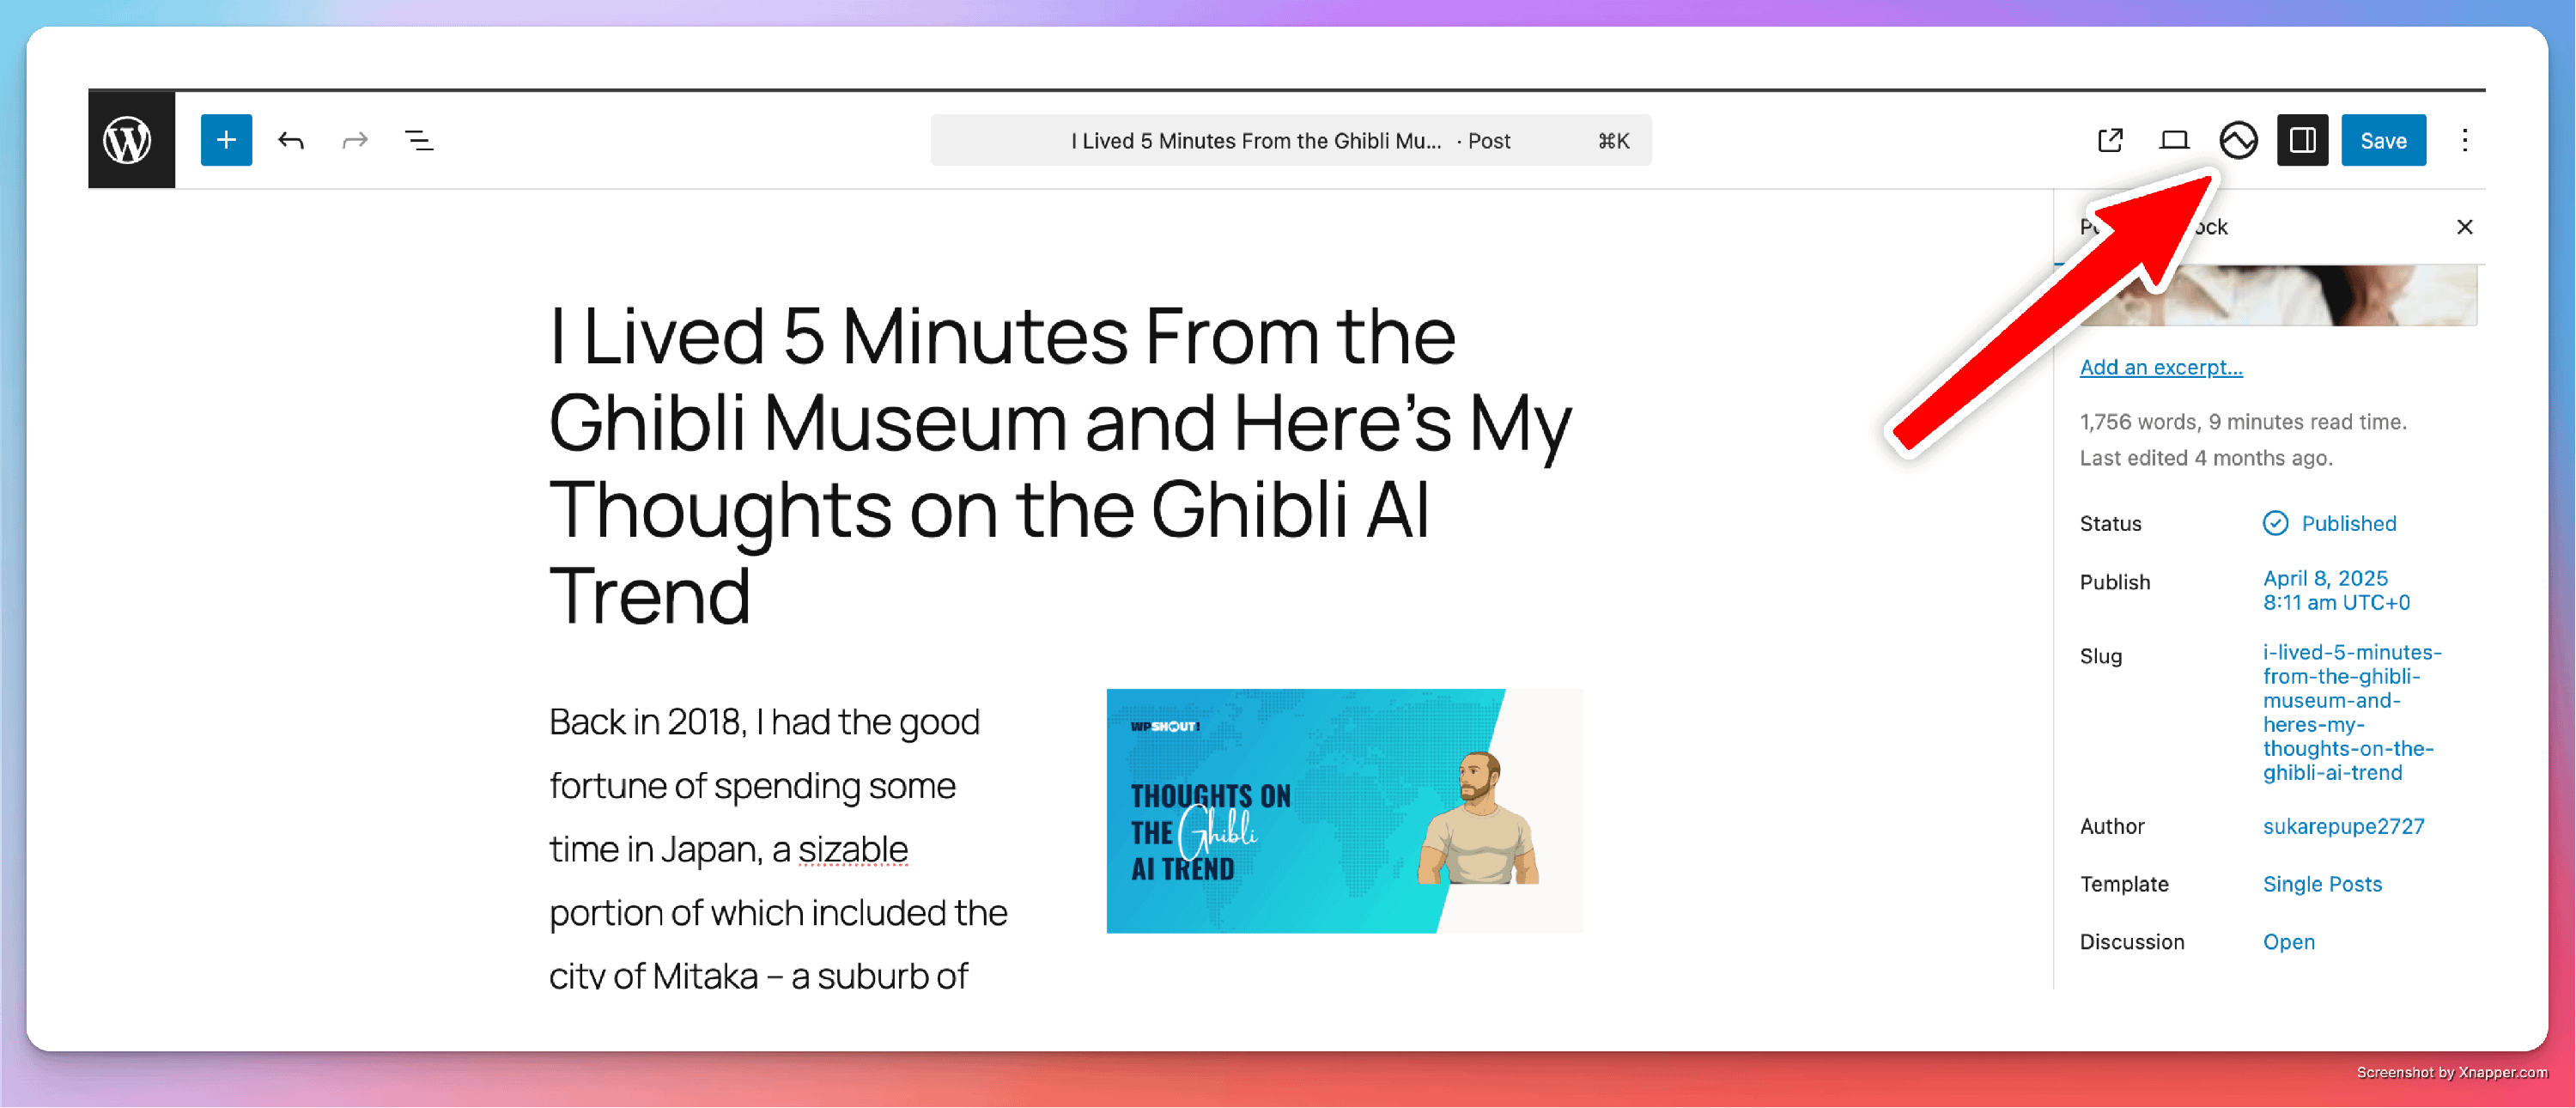
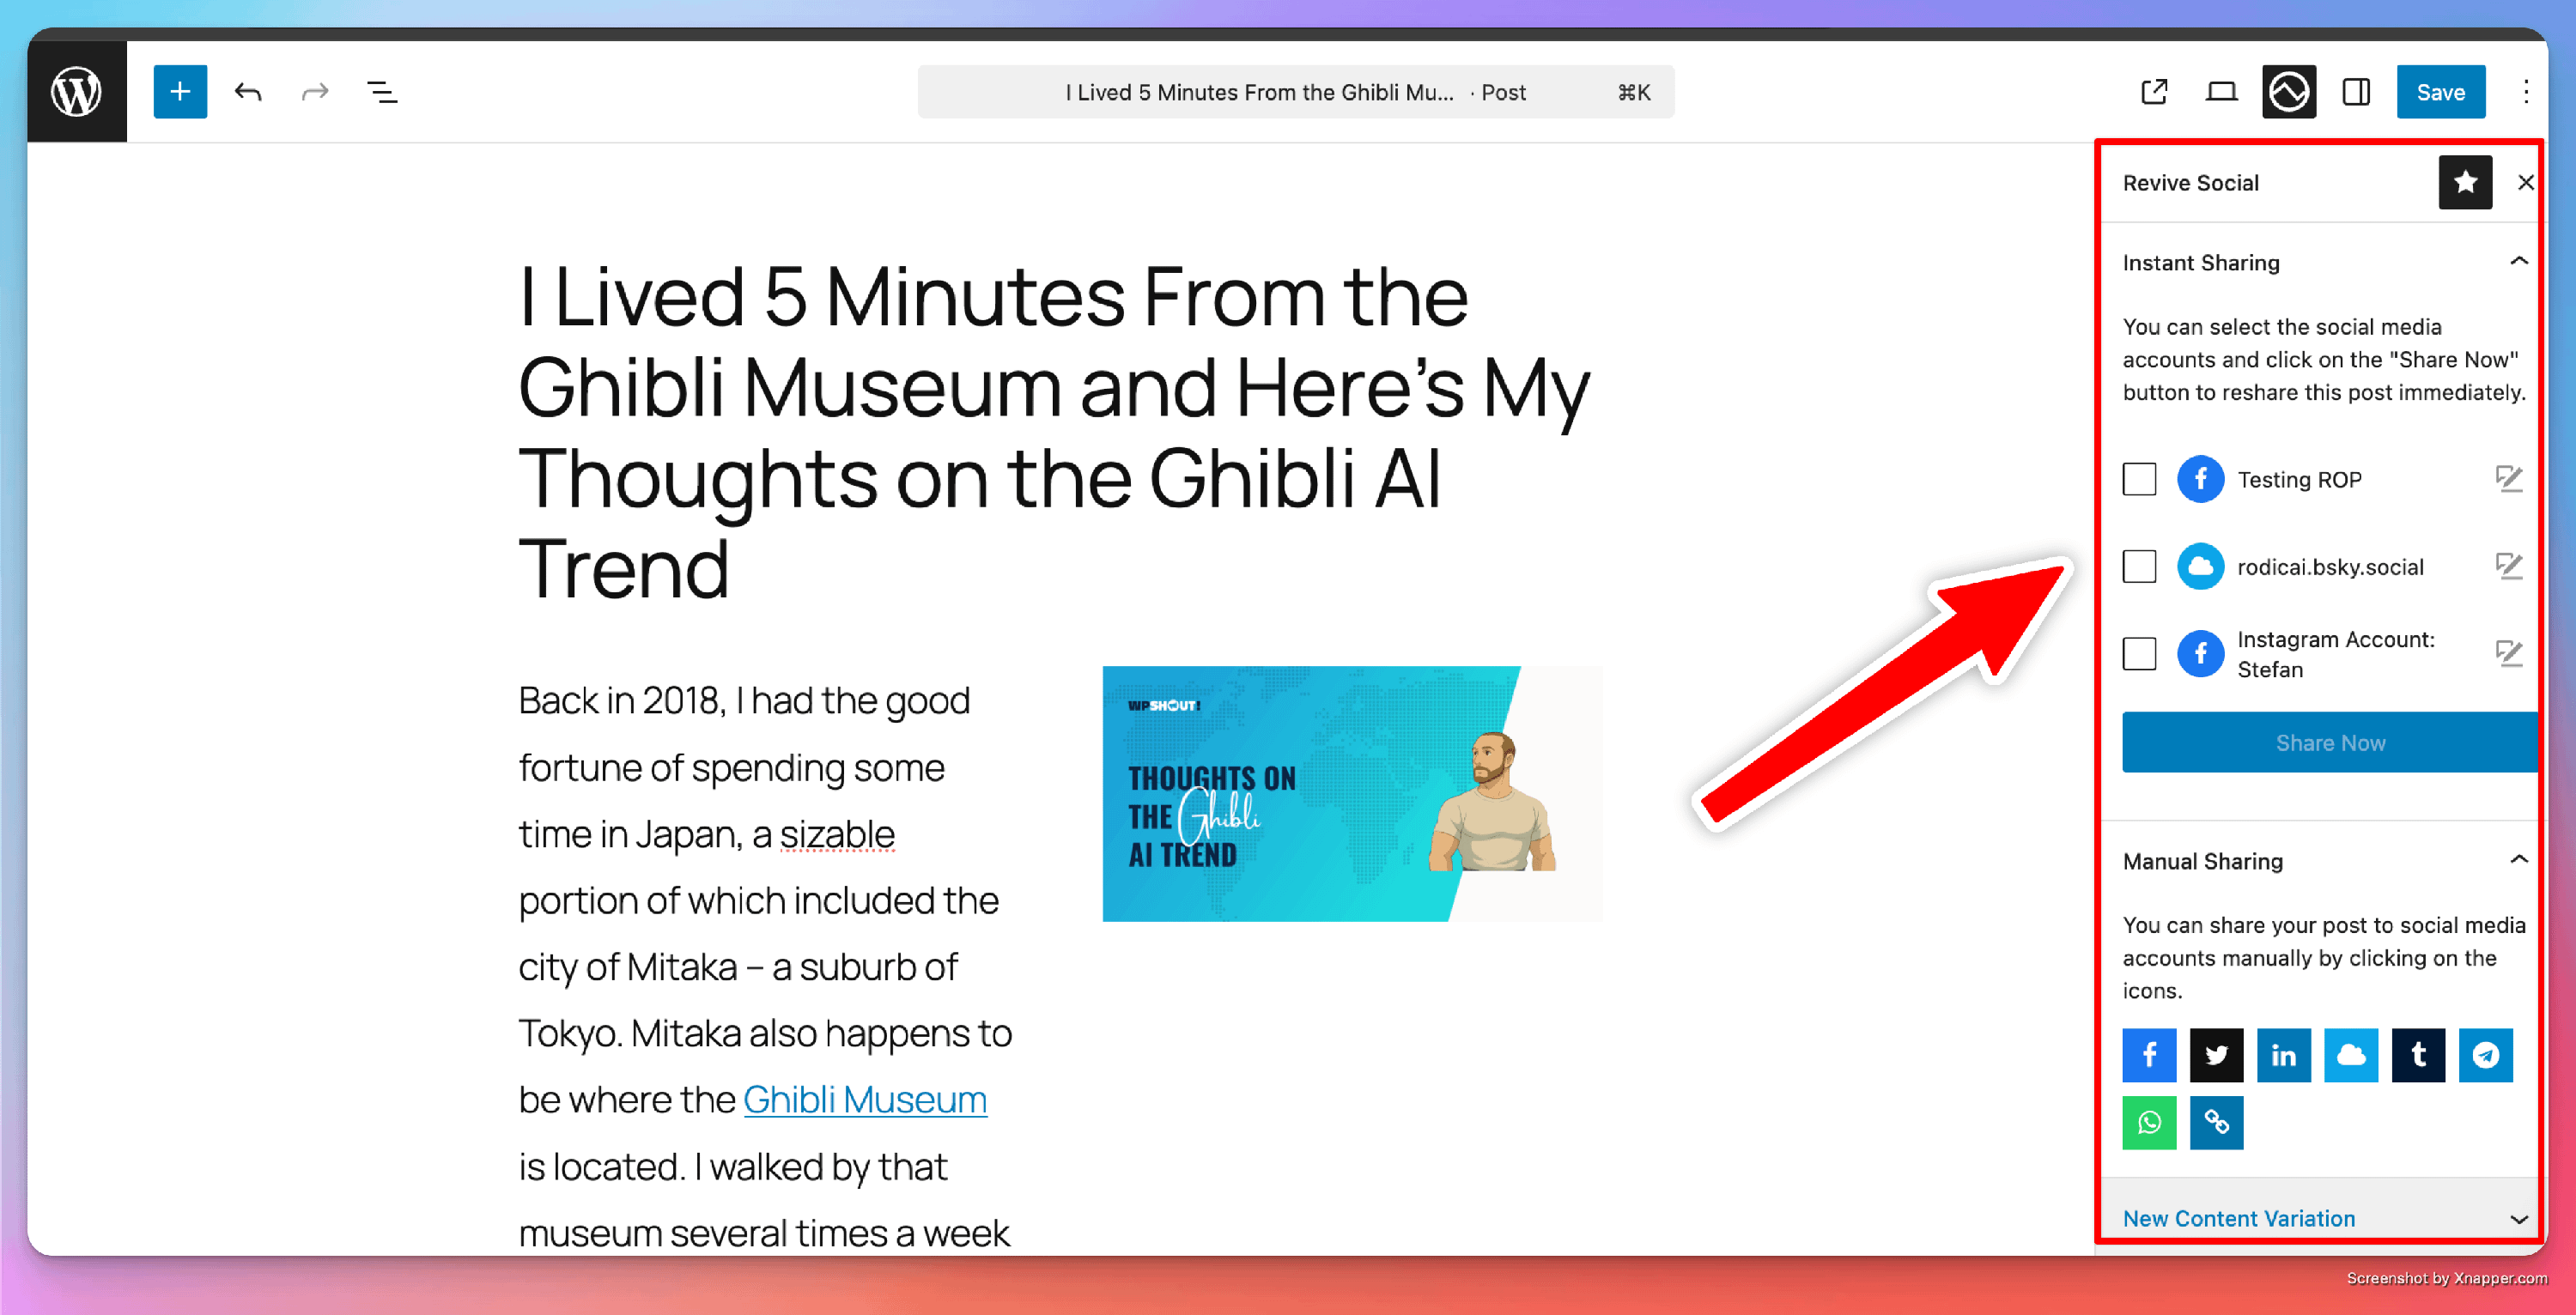
Note: If you are using the Classic Editor plugin, the options to Share Immediately will appear as in the screenshots below.
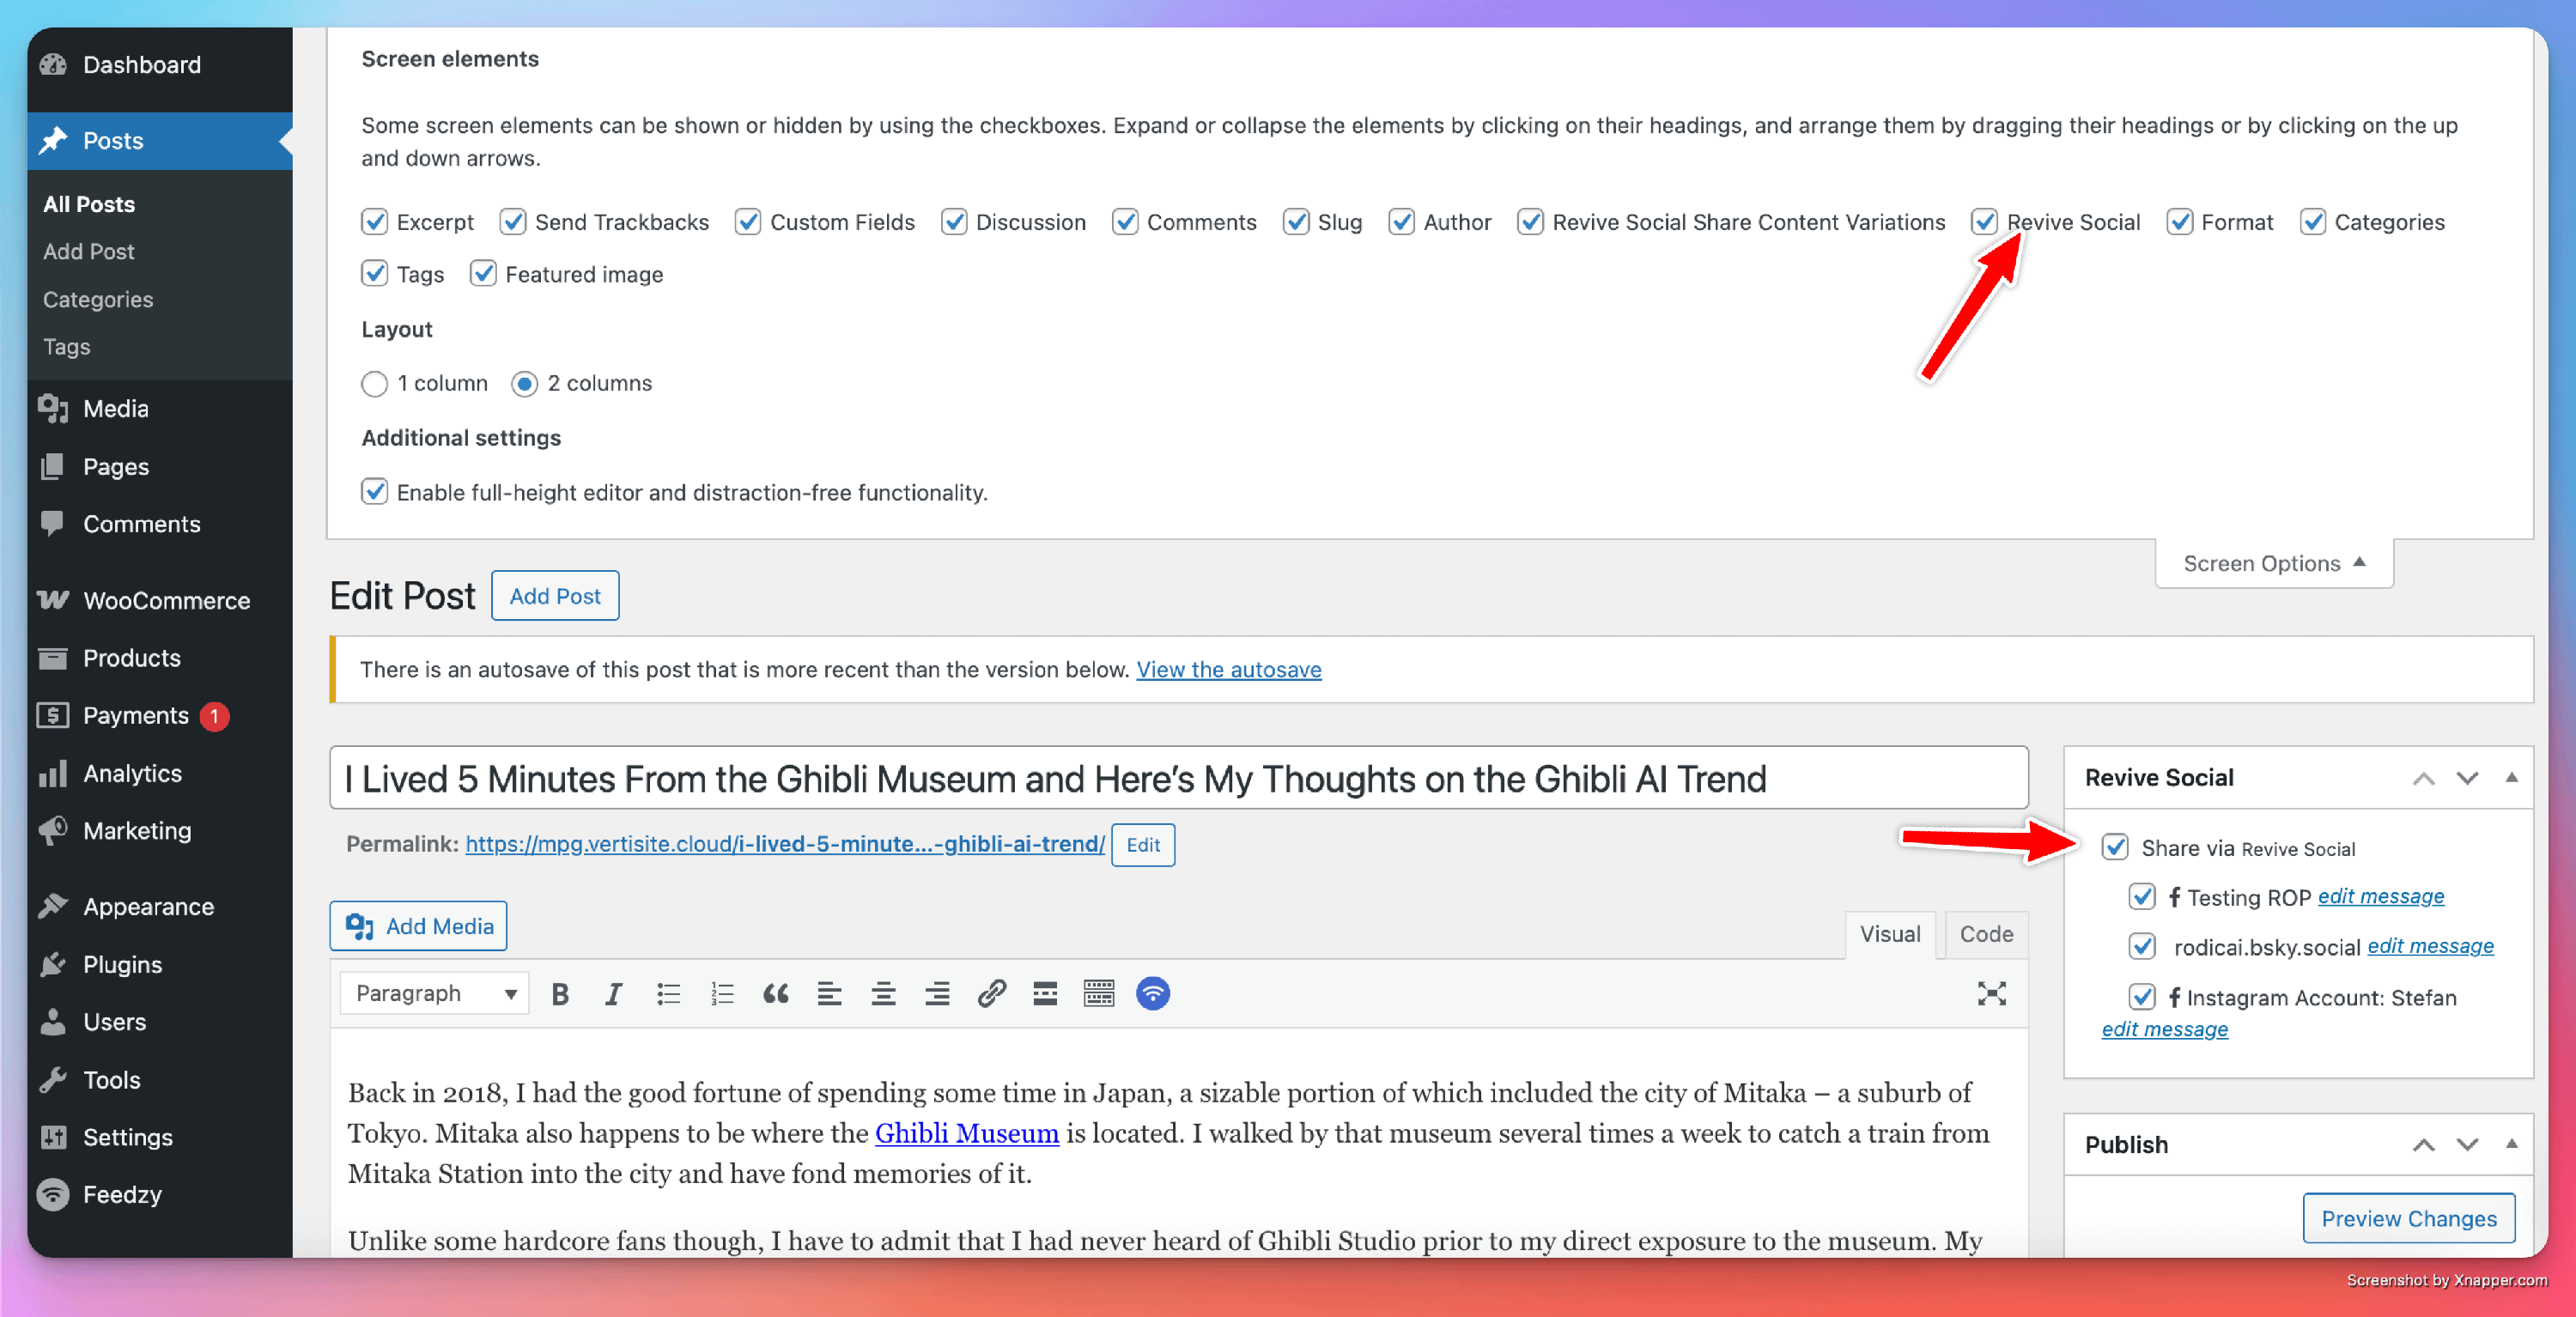
Clicking on the checkbox Share via Revive Social will display the list of social media accounts you have integrated with Revive Social. Choose your preferred platform where you would like to share the post. Click on Publish.
The checkboxes will remain checked until the posts are shared. Once shared, it will show up in the Sharing Logs tab, and the checkboxes will revert to their unchecked state.
Share each post only once on publish
If your goal is to share every new post exactly once when it is published — without the recurring schedule picking it up again later — follow these steps:
- Go to Revive Social > Dashboard > Accounts and confirm that each Facebook Page or social account appears only once in the list. If the same page or account is connected more than once, remove the duplicate entry.
- Go to Revive Social > General Settings and make sure Enable Instant Sharing Feature (Post on Publish) is checked.
- Disable Share More Than Once? in General Settings. This prevents the recurring schedule from recycling posts that have already been shared.
- If you do not want Revive Social to share any older posts on an automated schedule, pause or stop the plugin from the Dashboard.
- When publishing a post, open the Revive Social panel in the editor, confirm the share checkbox is selected only for the intended account, then click Publish.
⚠️ Important: If you leave the recurring schedule active and Share More Than Once? is enabled, posts that were already shared via Instant Sharing can be picked up by the automated schedule and shared again.
If the same post appears multiple times on Facebook or another network
Work through this checklist to find the source of duplicate shares:
- Check for duplicate account connections. Go to Revive Social > Dashboard > Accounts. If the same Facebook Page or social account appears more than once, remove the extra entry. Each connection counts as a separate share destination, so one publish event can trigger multiple posts.
- Check whether a Facebook Profile and a Facebook Page for the same account are both connected. Each connected account receives its own share independently, so having both linked will result in two posts to the same Facebook presence. Remove any account you do not intend to post to.
- Review the Sharing Logs. Go to Revive Social > Dashboard > Sharing Logs. The log shows the timestamp, account, and mechanism (Instant Share or scheduled share) for each entry. Look for two log entries for the same post to identify which mechanism fired twice.
- Disable recurring resharing. If only a publish-time share is wanted, turn off Share More Than Once? in General Settings and consider pausing the recurring schedule from the Dashboard.
Love this feature? We'd love to hear from you! Leave us a review on the free plugin on WordPress.org.