
Appearance
How to fix Revive Social not posting
If Revive Social does not share posts to social media for your website, then the issue might be with WordPress' Cron. This can be due to your website not having enough visitors or something is wrong with WordPress Cron, such as it being turned off without a replacement.
There are two ways to go about addressing this issue; the first one( Method 1) is the simplest, and the second(Method 2) involves creating a "True Cron" via your Cpanel account from your Web host.
If you are having trouble implementing Method 2, then please forward this document to your Web host support personnel. They will be able to implement the true cron for you. A recommended interval for the cron job would be once every 10 minutes.
In this article
Check whether any posts are eligible to be shared
Before troubleshooting WP-Cron, check whether Revive Social has any posts it can actually share.
Revive Social only queues posts that match your sharing filters from Revive Social > Dashboard > General Settings. If no posts match those filters, nothing will be shared even when your accounts are connected and your schedule is active.
How Minimum Post Age and Maximum Post Age work together
The Minimum Post Age and Maximum Post Age settings define one date window for eligible posts:
- Posts newer than your Minimum Post Age are skipped.
- Posts older than your Maximum Post Age are skipped.
For example, if Minimum Post Age is 1 day and Maximum Post Age is 4 days, Revive Social shares only posts published between 1 and 4 days ago. Newer and older posts are excluded.
Custom Schedule does not override eligibility settings
The Custom Schedule tab controls when Revive Social tries to share posts. It does not change which posts are eligible.
Even with a correct recurring or fixed schedule, Revive Social cannot post if no content matches your current age window and filters.
What to do if no posts match the age window
- Go to Revive Social > Dashboard > General Settings.
- Review your Minimum Post Age and Maximum Post Age values.
- Compare those values with the publish dates of your WordPress posts.
- Widen the age window (for example, lower Minimum Post Age or increase Maximum Post Age) so at least some posts are eligible.
- If needed, publish content that fits your configured age range.
📝 Note: If you already have eligible posts and Revive Social is still not posting, continue with the WP-Cron and Action Scheduler checks below.
Action Scheduler Support
Revive Social supports Action Scheduler, a more robust and scalable background processing library. If your site already uses a plugin that includes Action Scheduler (such as WooCommerce), Revive Social will automatically detect it and use it instead of the default WP-Cron system. This can improve the reliability and performance of scheduled posts.
If no such plugin is present, Revive Social will continue to function normally using WP-Cron, with no additional setup required.
Check whether the Revive Social cron event exists
If your Sharing Queue still contains posts but nothing is being shared and the Sharing Logs stay empty, check whether Revive Social's rop_cron_job event is scheduled.
- If your site has a Tools > Scheduled Actions page, open it and search for
rop_cron_job. - If your site does not have Tools > Scheduled Actions, inspect your WordPress cron events with a plugin such as WP Crontrol and search for
rop_cron_jobthere.
Here is how to interpret the result:
- If
rop_cron_jobis present and Pending, the scheduler exists and is waiting for its next run. - If
rop_cron_jobis present but Failed, open the most recent entry and check the log message. - If
rop_cron_jobis missing entirely, WordPress cron may not be firing, or it may be disabled without a replacement. In that case, the queue can still contain posts, but no new shares or Sharing Logs are generated because the scheduler never runs.
If rop_cron_job is missing
- Follow Method 1 or Method 2 below to replace unreliable or disabled WP-Cron with a real cron job.
- Set the cron interval to once every 10 minutes.
- Go to Revive Social > Dashboard and click Start Sharing if sharing is not already active.
- Wait for the next cron interval, then check again for
rop_cron_job.
⚠️ Warning: If the Sharing Logs already show a social network, API, or credential error, troubleshoot that connection instead of changing WP-Cron. If no posts are eligible to share, adjust your Minimum Post Age, Maximum Post Age, and other sharing filters first.
Sharing stops with "Unknown error occurred" in Scheduled Actions
If Revive Social reverts to Sharing Not Started on its own and the Scheduled Actions log shows "Unknown error occurred," the cause is usually Action Scheduler's built-in 300-second safety timeout cancelling the rop_cron_job background task.
To confirm the cause:
- Go to Tools > Scheduled Actions in your WordPress admin.
- In the search box, enter
rop_cron_joband press Enter. - Click the Failed tab.
- Open the most recent failed entry. If the log reads action marked as failed after 300 seconds, the timeout is the cause.
Why this happens:
Each time the sharing schedule fires, Revive Social processes all connected accounts in a single background task. Sites with many connected social accounts, or sites where social network APIs respond slowly, can exceed the 300-second limit. When that happens, Action Scheduler cancels the task automatically and sharing resets.
To fix it:
Ask your hosting provider to increase the following PHP settings:
max_execution_time: set to300or highermemory_limit: set to at least512M
After the change, restart sharing by going to Revive Social > Dashboard and clicking Start Sharing. Monitor the Failed tab under Tools > Scheduled Actions for two to three days. If no new rop_cron_job failures appear, the issue is resolved.
📝 Note: If the error message in the Failed tab is different from "action marked as failed after 300 seconds," or if failures continue after increasing the PHP limits, contact support and include the exact text of the failed action log entry.
How to confirm the scheduler is working again
- Search again for
rop_cron_joband confirm it now appears in Scheduled Actions or in your cron events list instead of being missing. - Wait for the next scheduled run.
- Return to Revive Social > Dashboard and open Sharing Logs.
- Confirm that new log entries appear and that posts start leaving the Sharing Queue.
- If
rop_cron_jobis still missing after you set up a real cron job and restart sharing, ask your hosting provider to confirm that the cron job is reachingwp-cron.phpsuccessfully. If needed, contact support with screenshots of your queue, your cron event search, and your cron configuration.
Check Sharing Logs for social network errors
If only one social network (such as LinkedIn) is failing while others continue to post, check the Revive Social Sharing Logs before troubleshooting WP-Cron. A platform-level API error requires a different fix from a cron problem.
To view the Sharing Logs, go to Revive Social > Dashboard and click the Sharing Logs tab.
LinkedIn error: NONEXISTENT_VERSION / Requested version is not active
If the Sharing Logs contain a line similar to:
Cannot share to linkedin. Error: Array ( [status] => 426 [code] => NONEXISTENT_VERSION [message] => Requested version YYYYMM is not active )This means Revive Social is requesting a LinkedIn API version that LinkedIn no longer accepts. The fix is a plugin update - do not reconnect your LinkedIn account or create a new LinkedIn App, as those steps will not resolve this error.
To fix:
- Go to Plugins > Installed Plugins in your WordPress dashboard.
- Update Revive Social and the Revive Social Pro Add-on to the latest available versions.
- Retry sharing to LinkedIn.
If the error persists after updating, open a support ticket and include:
- The exact text of the Sharing Logs entry.
- Revive Social version and Revive Social Pro Add-on version.
- WordPress version and PHP version.
- Whether the failure happens on scheduled shares, instant shares, or both.
Method 1.
You can create a Cron job for Revive Social using Cronjob.org:
Step 1.
Turn off the default WP Cron by editing the wp-config.php file (located in the root of the folder where WordPress is installed). Open the wp-config.php file, add a new line after define('WP_DEBUG', false); then add the following code on the new line:
define('DISABLE_WP_CRON', true);
Save your changes after you've added the new line.
If you are not sure how to navigate to this file via your Cpanel or FTP, you can install the following plugin, which will allow you to edit the files on your server directly from within WordPress: https://wordpress.org/plugins/file-manager-advanced/
Once the plugin is installed, you should have a new option called File Manager inside your dashboard. Click the menu item to bring up the files:

Right-click on wp-config.php and select Editor to start editing the file. Add the following line:
define('DISABLE_WP_CRON', true);Inside the file after define('WP_DEBUG', false); So it looks like below_:_

(Be sure to save your changes when you're done editing the file and then delete the File Manager plugin if no longer needed).
Step 2.
Create an account on https://console.cron-job.org/signup, then log into your account on the website.
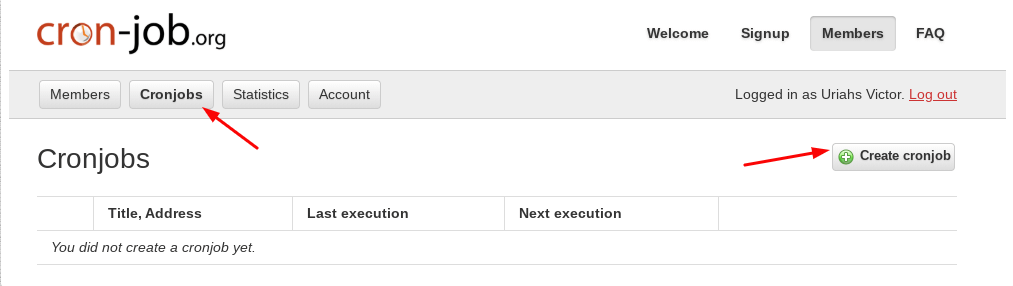
Step 3.
Click the Create Cron Job button to create a new cron job.
Step 4.
Fill out the details of the Cron job. For Title, enter anything you wish; for Address, enter your website domain suffixed with /wp-cron.php?doing_wp_cron.
Example: https://yourwebsitedomain.com/wp-cron.php?doing_wp_cron
- Change yourwebsitedomain.com to your actual website domain.
- If your website does not have SSL, then change https to http

Step 5.
Set the Cron schedule; we recommend every 10 minutes:

Step 6.
Check the option to save responses so that you can see if the cron job is executed successfully, then click the Create Cronjob button.
That's it! Your cron job should now be created, and if you did Steps 4 & 5 correctly, then you should see success messages in the History section of https://cron-job.org, letting you know that the cron job ran successfully.
Method 2.
The other method to fix the issue is creating a true cron for your website. This requires you to have access to your cPanel account to make the following changes.
📝 Note: HostGator has gone ahead and created a pretty detailed document on how to create a true cron for WordPress, so we will use it. Please go here to view the document: How to create a true cron for WordPress. The screenshots from the article refer to HostGator, so the interface might be different according to the hosting provider.
If you are not comfortable with performing any of these methods, then we highly recommend you contact your web host for assistance. They will be able to perform either method for you in no time.
Still, having issues? Contact us here: Submit Ticket