
Appearance
Revive Social Documentation
Revive Social allows you to automatically share your WordPress posts on Facebook and X (formerly known as Twitter).
Want to share on multiple other networks like LinkedIn, Instagram, Telegram, Tumblr, GMB, Vk, Mastodon, Bluesky, or others? Check Revive Social PRO.
Summary
- Getting Started: Installation and Activation
- Connecting to your Facebook Account
- Connecting to your X (Twitter) Account
- Connecting to your Bluesky Account (Pro)
- Configuring the General Settings
- Customizing the Post Format
1. Getting Started: Installation and Activation
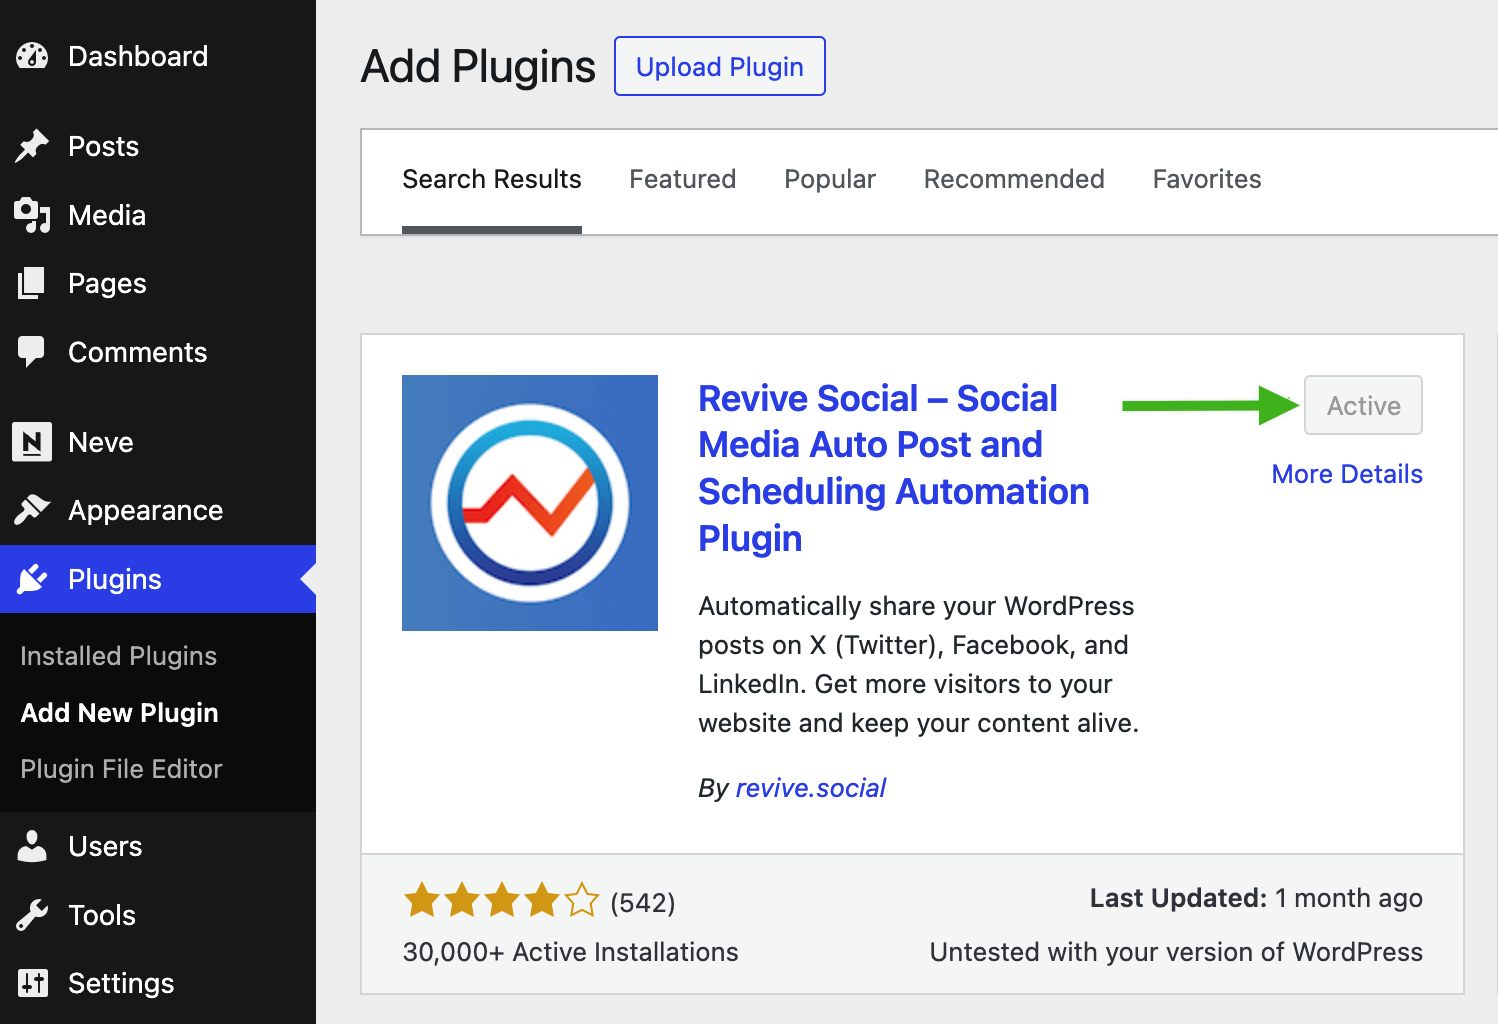
Navigate to Dashboard > Plugins > Add New, search for Revive Social, and install and activate the plugin.
Need your Revive Social license key?
Need your license key? See how to find and activate your Revive Social Pro license.
2. Connecting to your Facebook Account
Important note about sharing on Facebook Groups: Starting April 22nd, 2024, third-party applications are no longer accessible within Facebook groups, as noted in Meta's announcement - here. This change affected Revive Social’s integration, and currently, sharing on Facebook Groups is not possible anymore, only on Facebook Pages.
Important: Revive Social can share content on a Facebook Page, not on a personal account page. To connect your Facebook Account, please make sure you have one or multiple Facebook Pages connected to your account. There are online resources on how to create Facebook Pages - here.
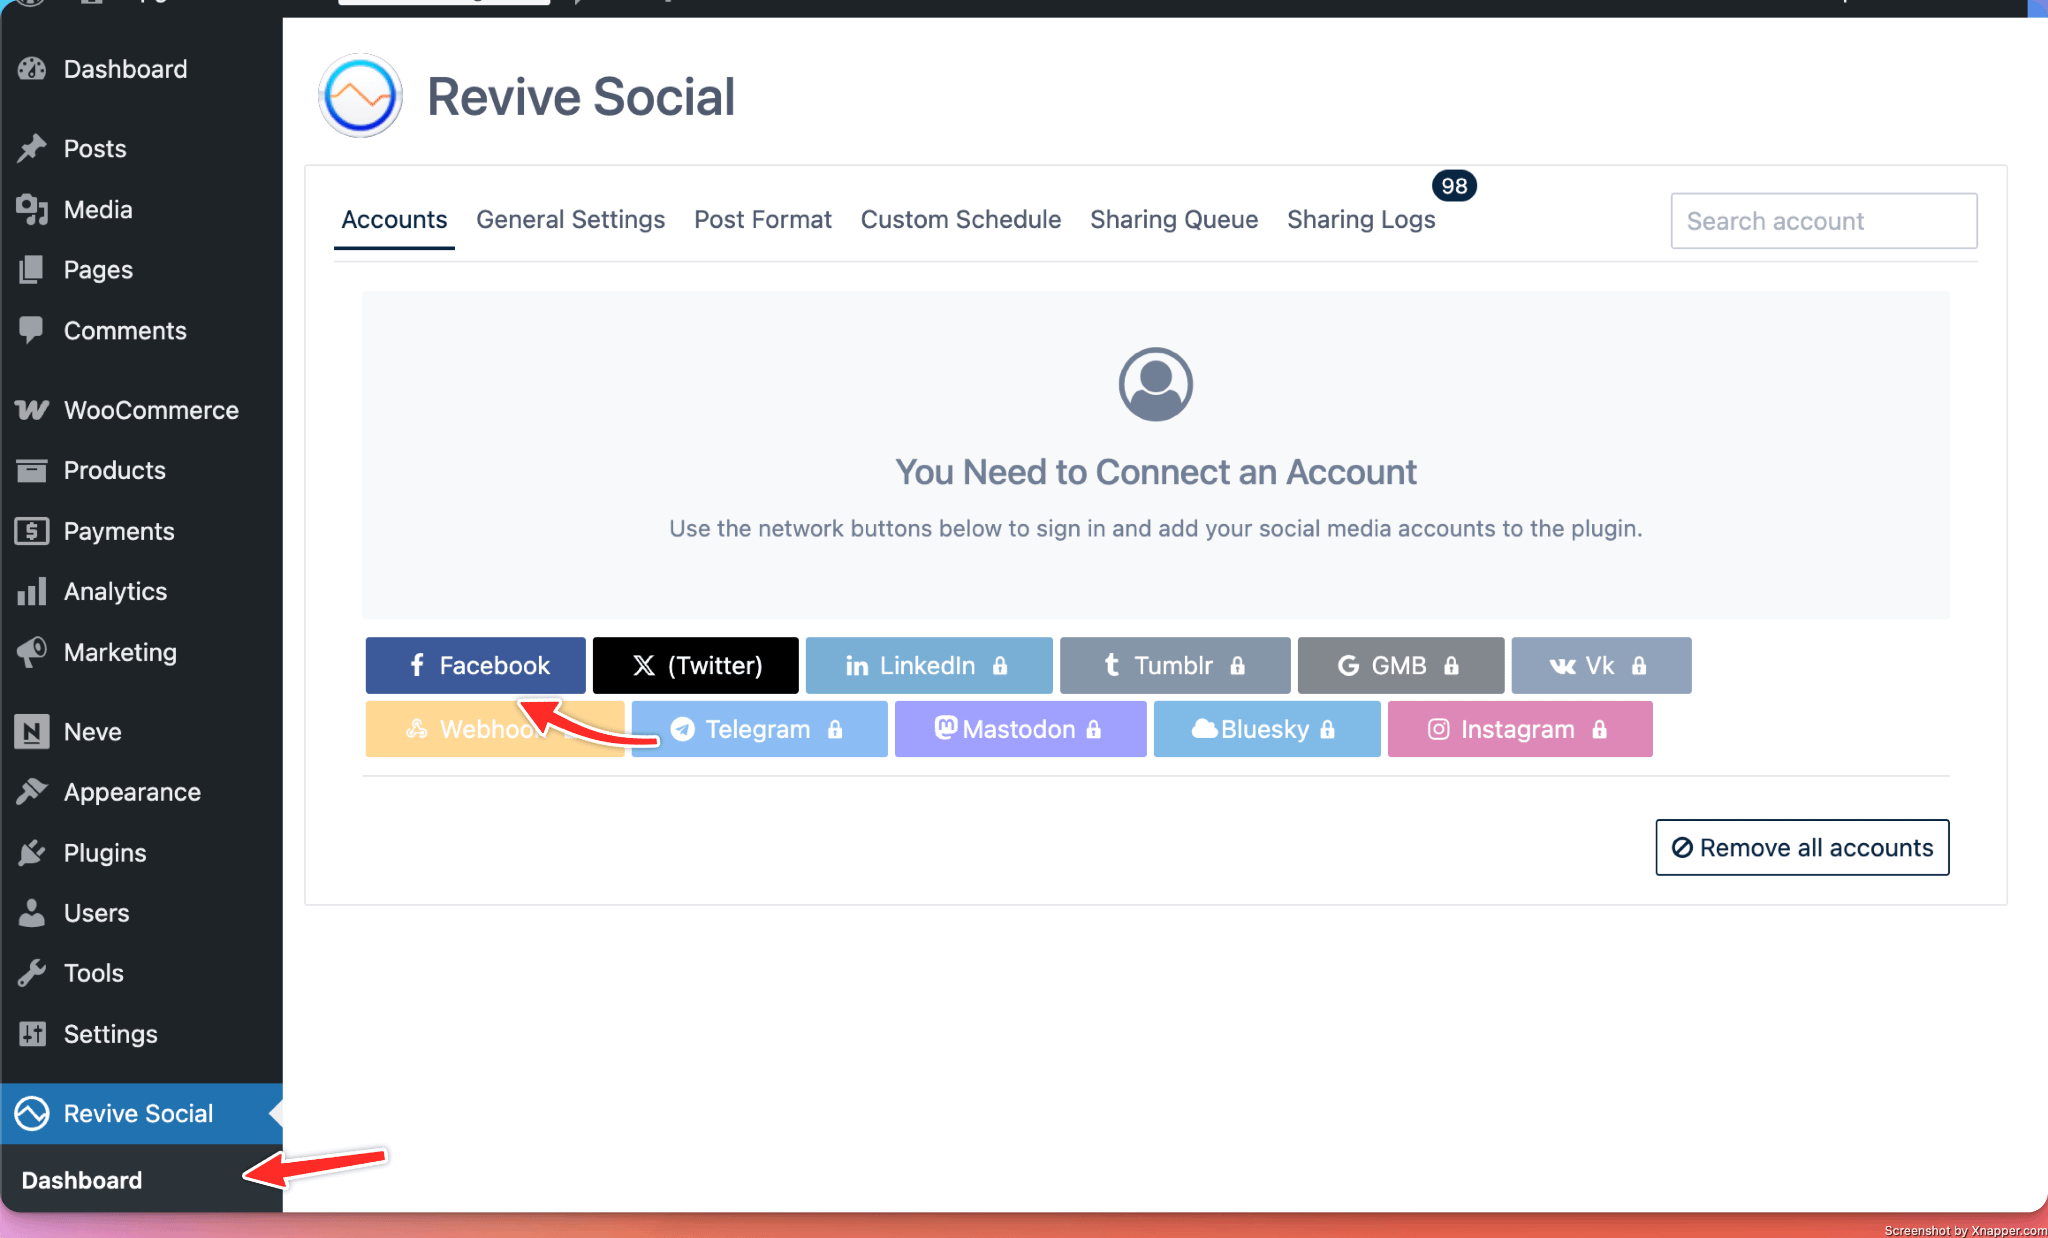
- Navigate to the Revive Social Dashboard and click on the Facebook button.
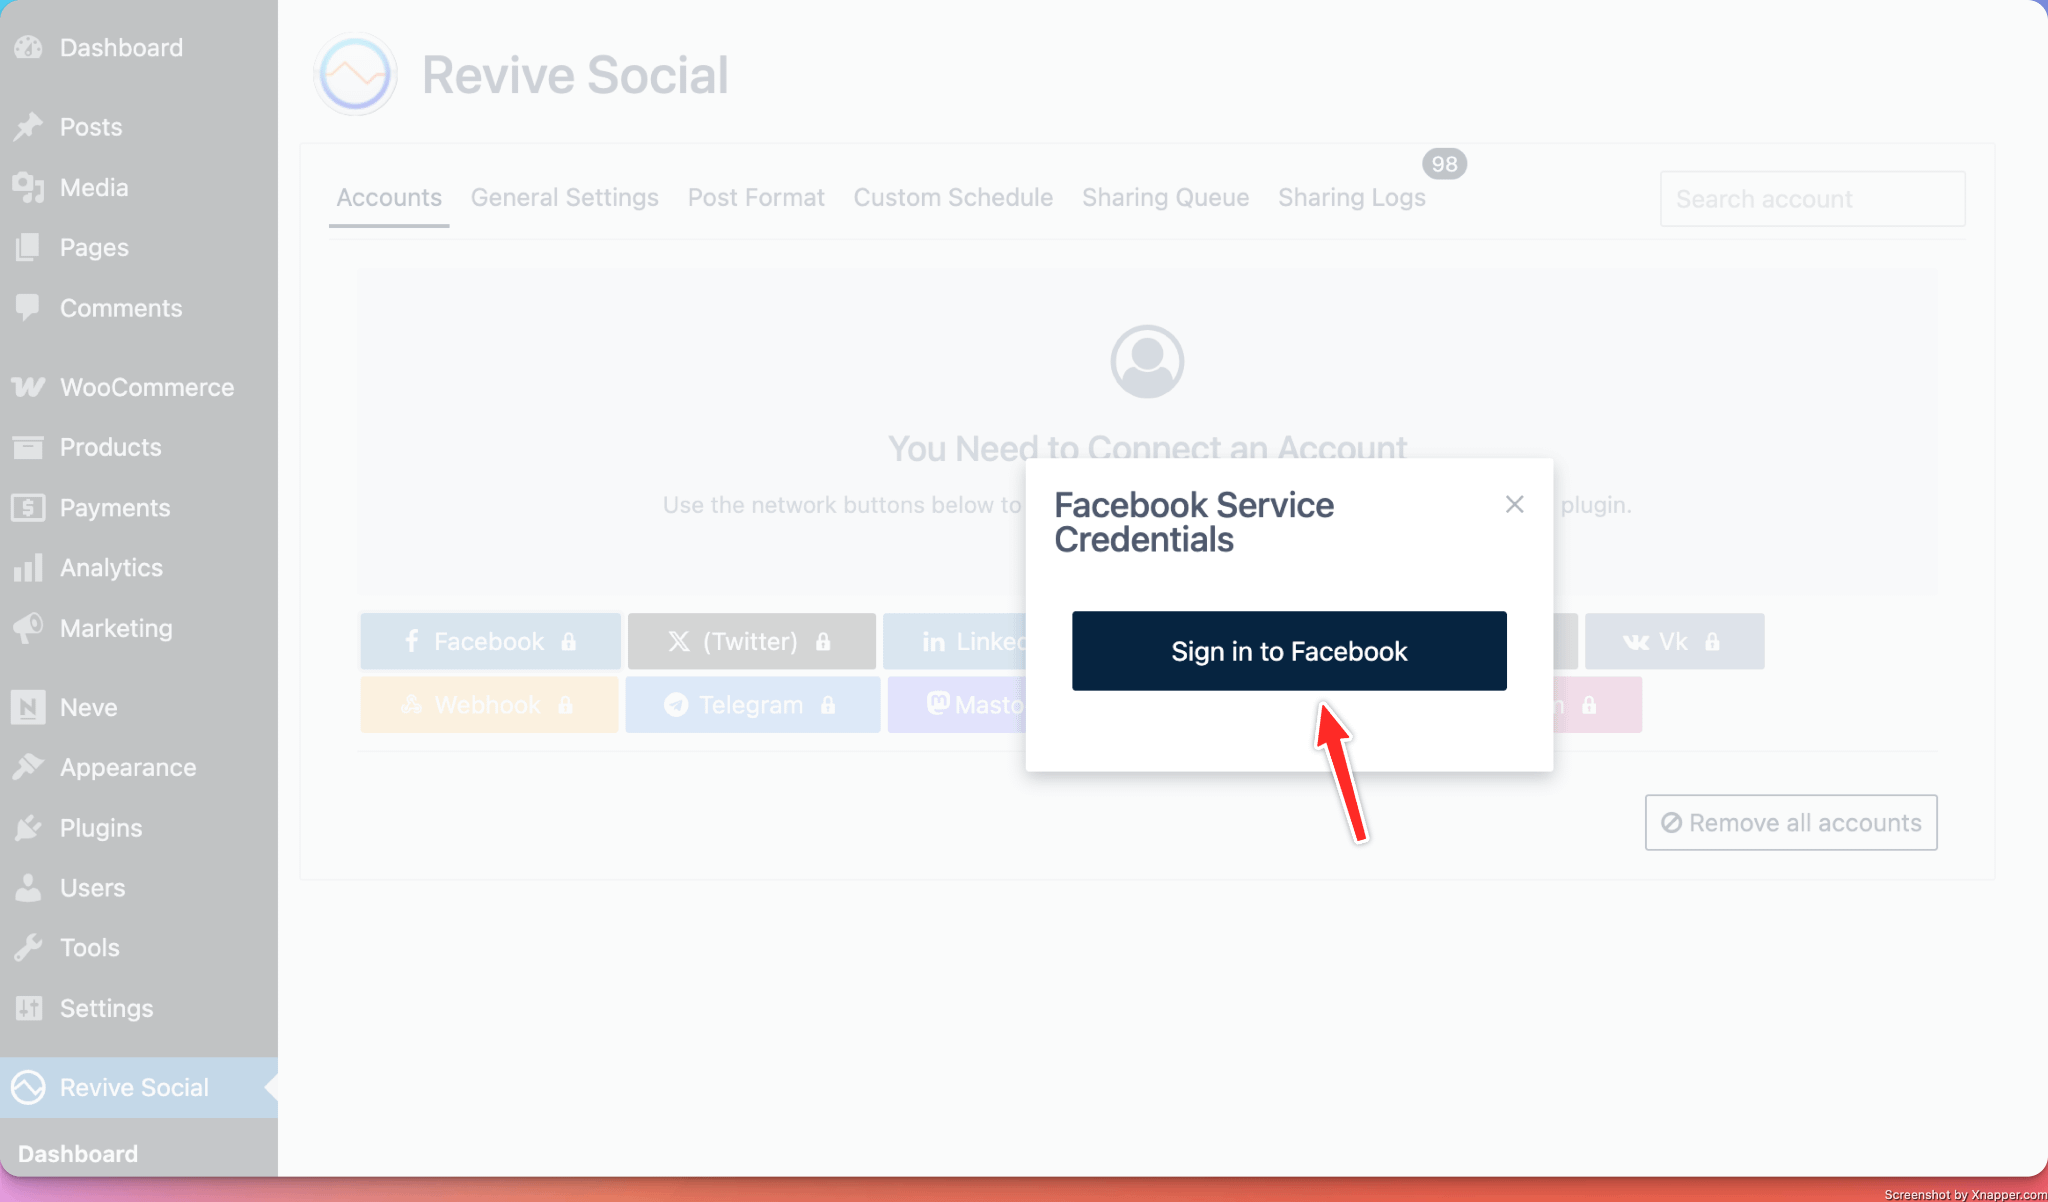
- Click on the Sign in to Facebook button.
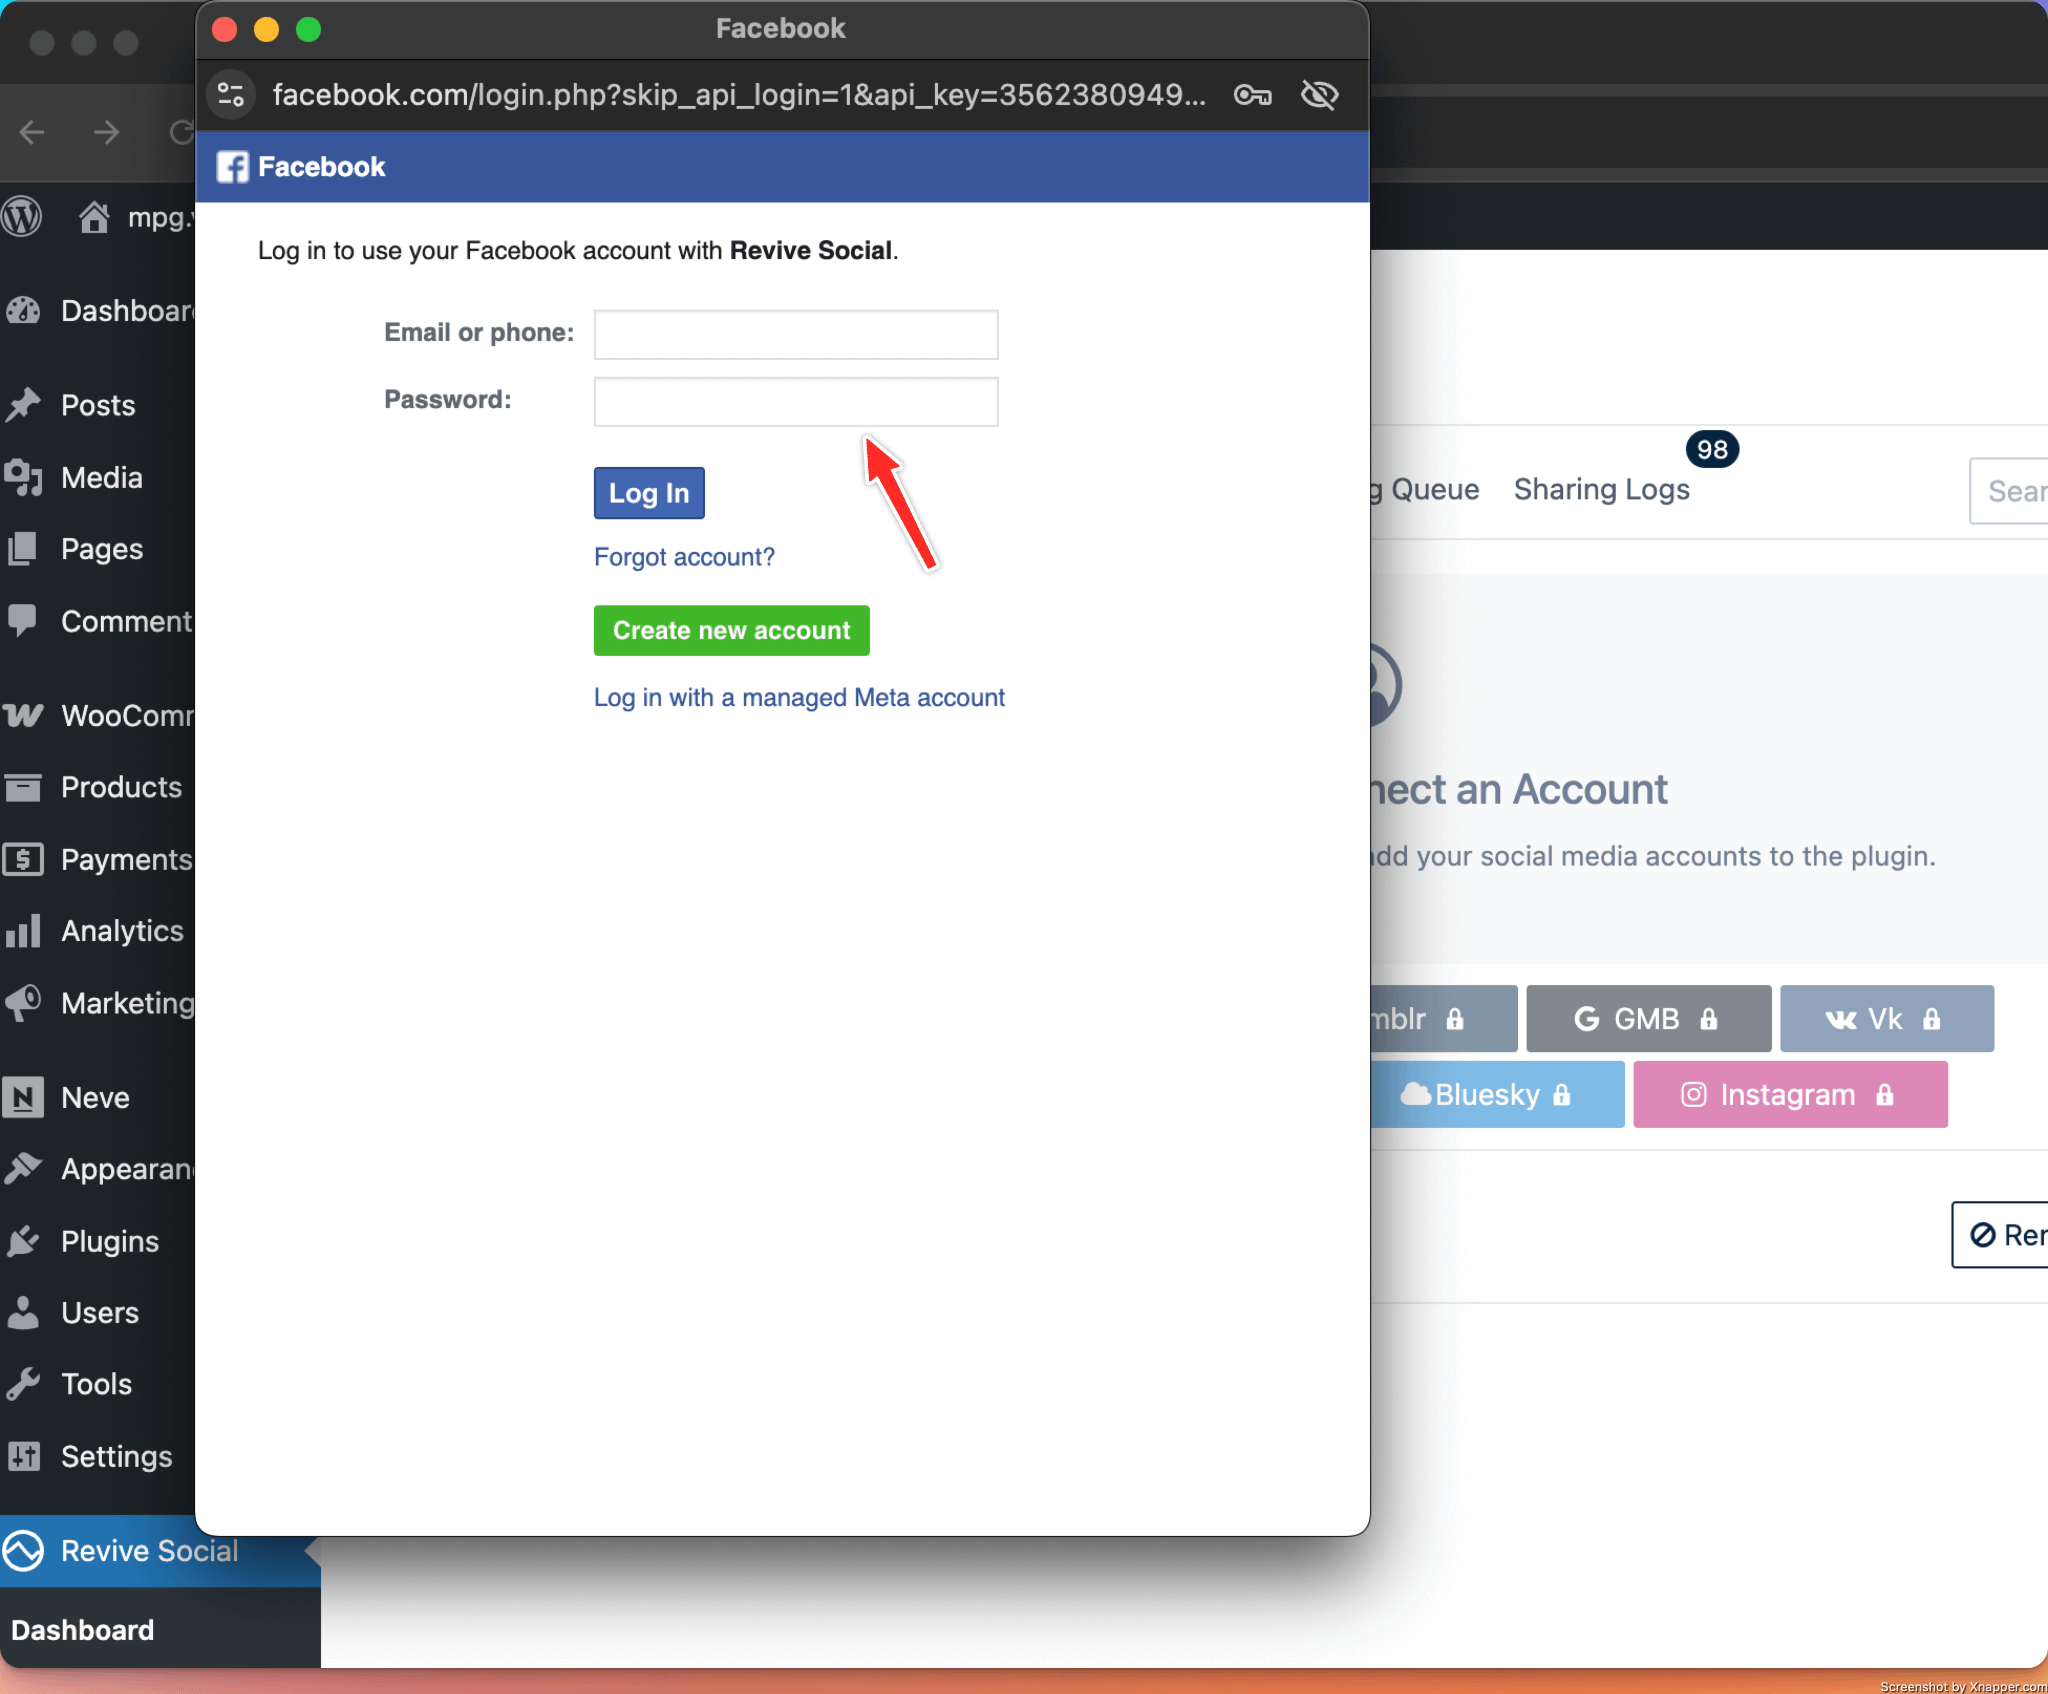
- In the new screen, add your Facebook credentials or choose your Facebook account, in case you are already logged in.
a) If you didn’t previously log in to your Facebook account in that browser, you will be asked to enter your credentials.
b) If you’ve previously logged in to Facebook in the current browser, you will be prompted with the current logged-in credentials.
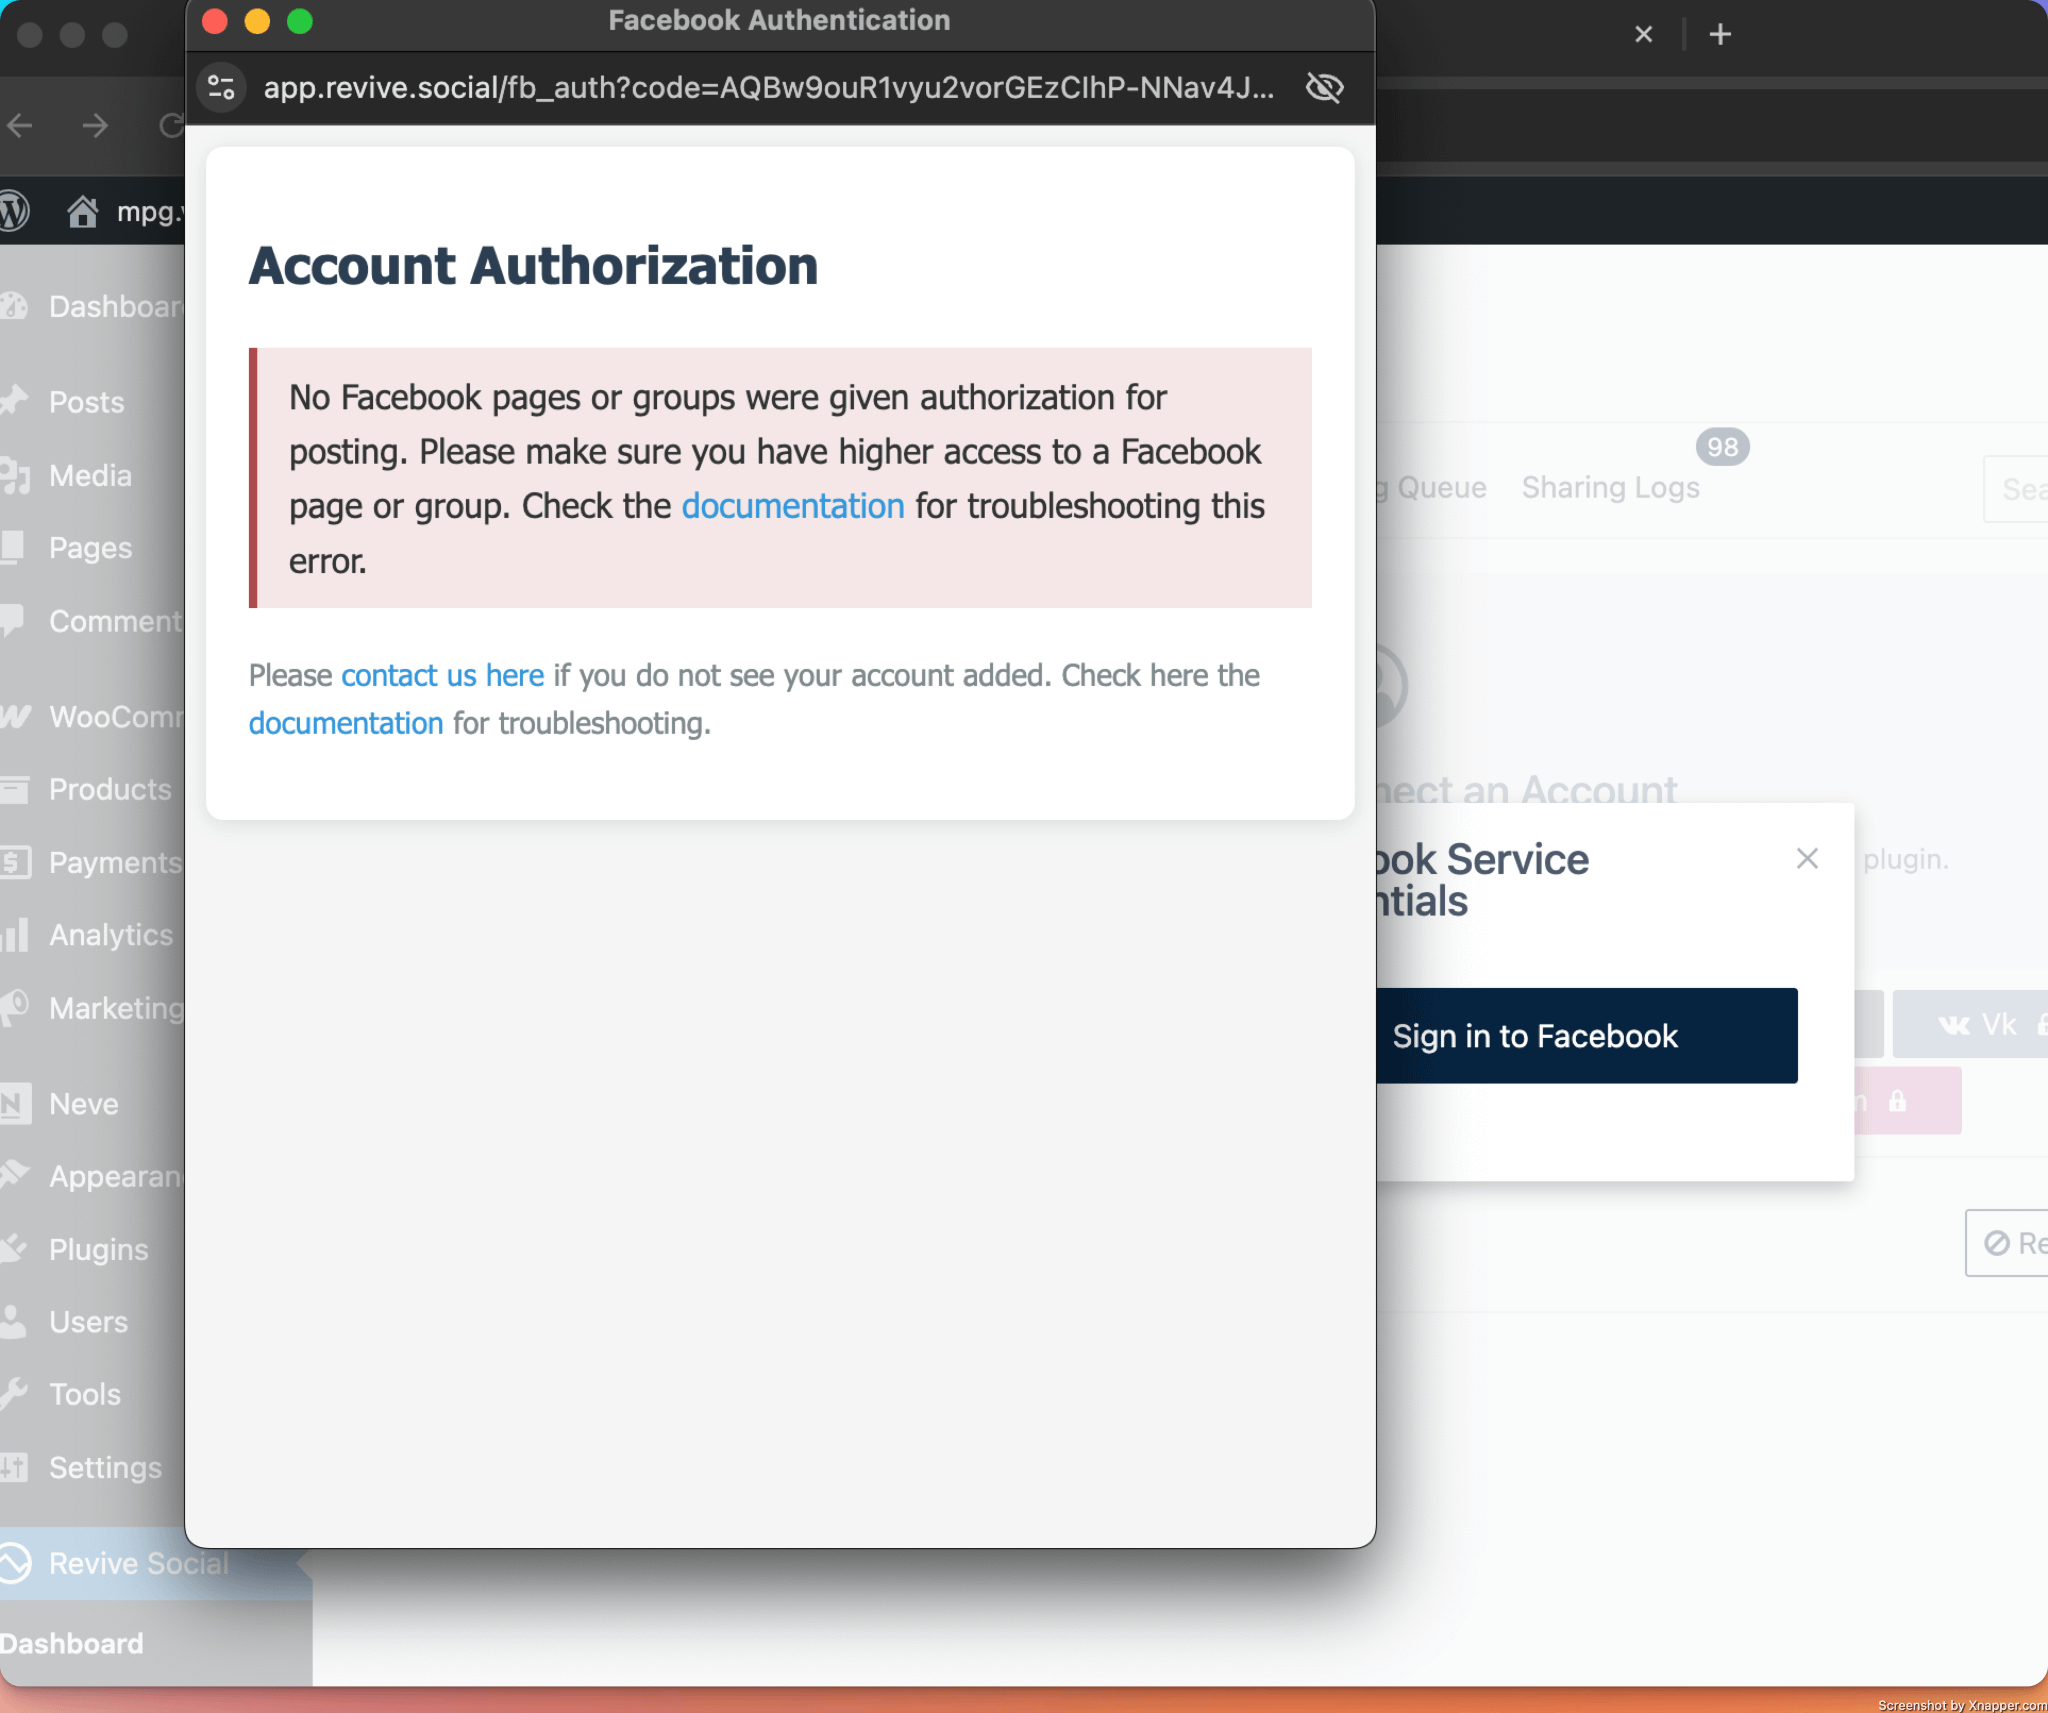
c) In case your Facebook account isn’t connected to any Facebook Page, the authorization will fail. Make sure you add one or multiple Facebook Pages, as mentioned here.
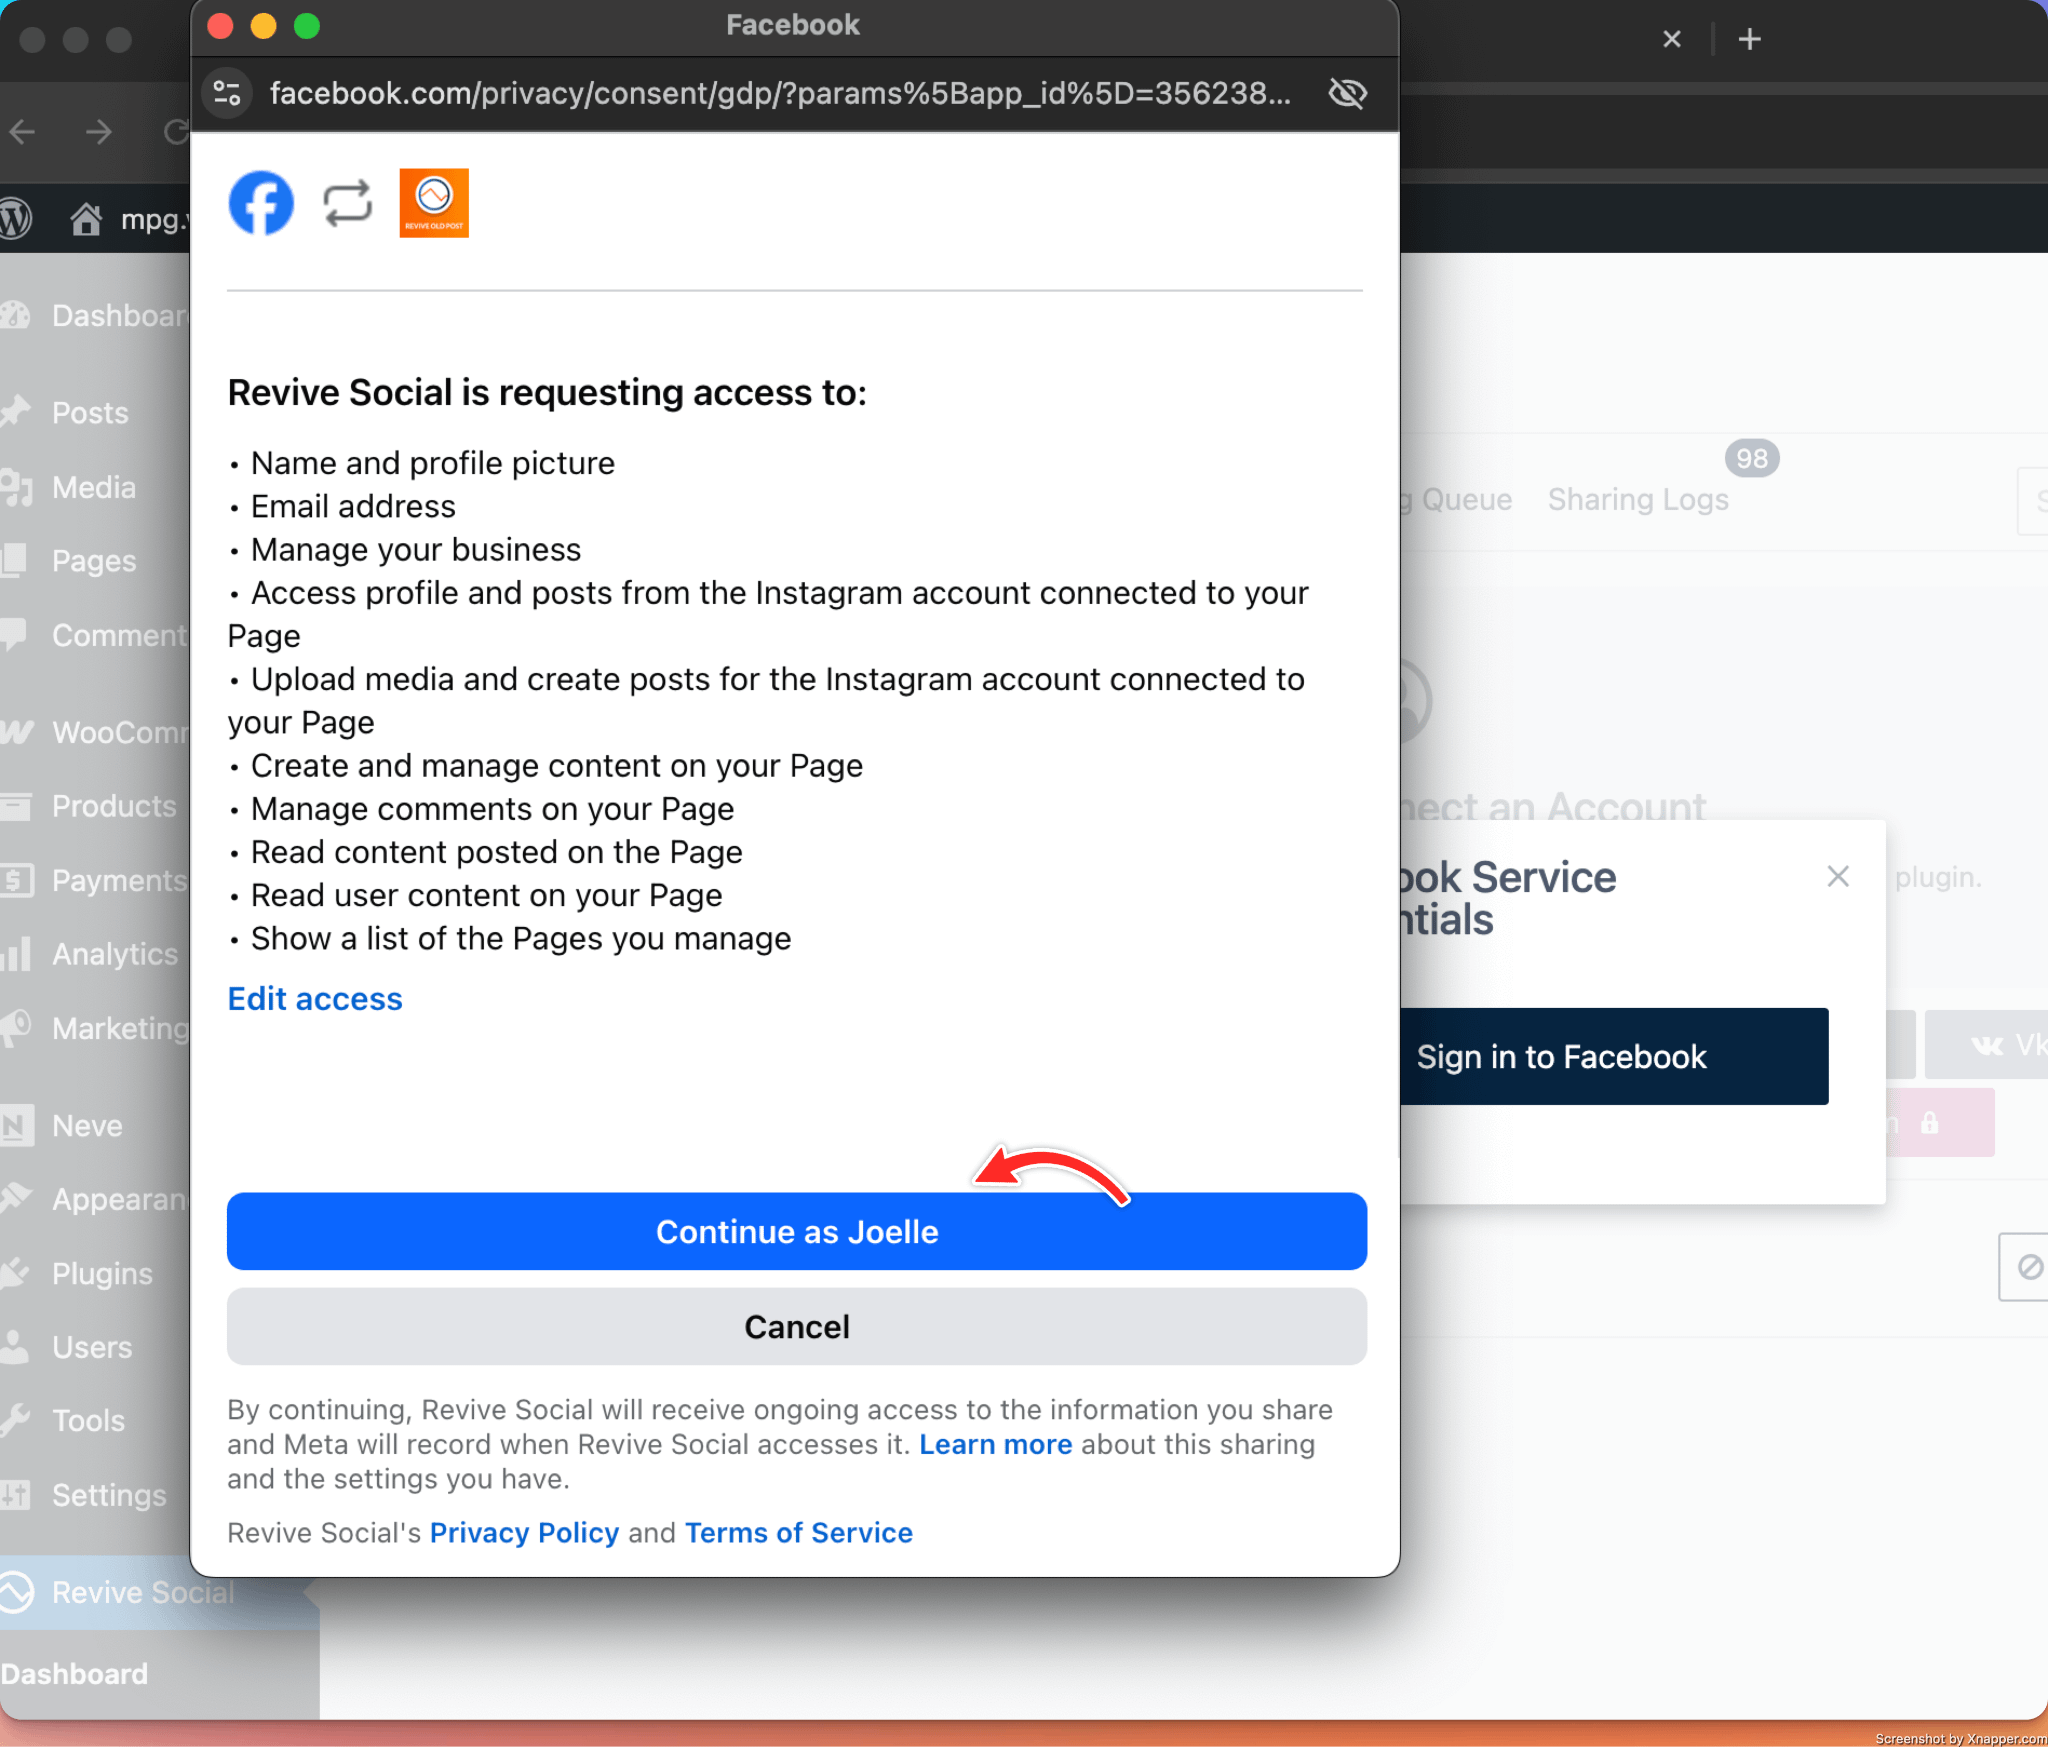
d) If your account is connected to one or more Facebook Pages, in the Authorization process, you will be prompted to select which Page/Pages you want to share to.

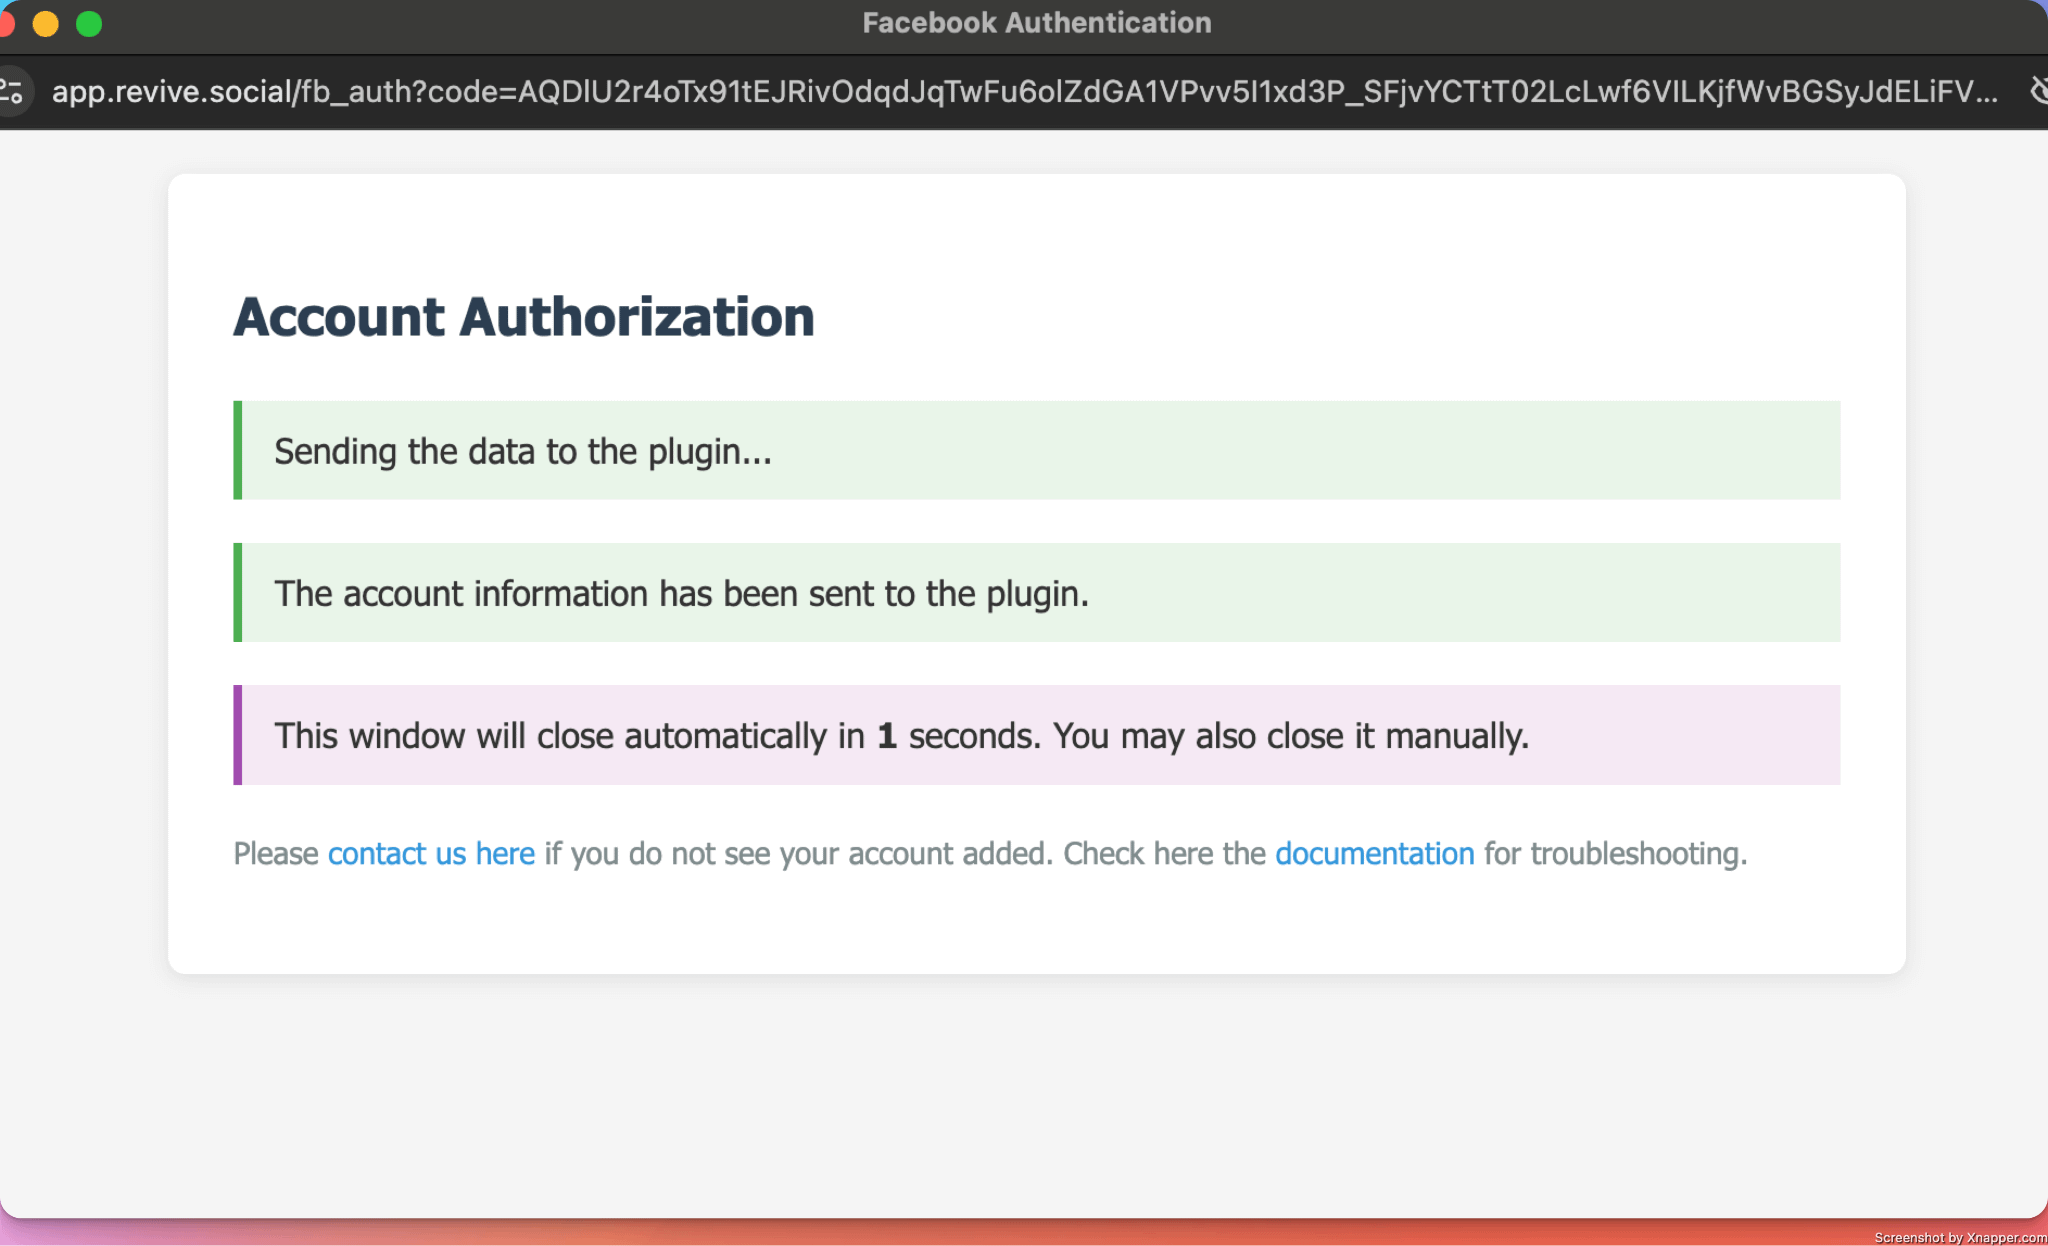
e) After that, the Authorization process should proceed, and the window should automatically close in a few seconds.
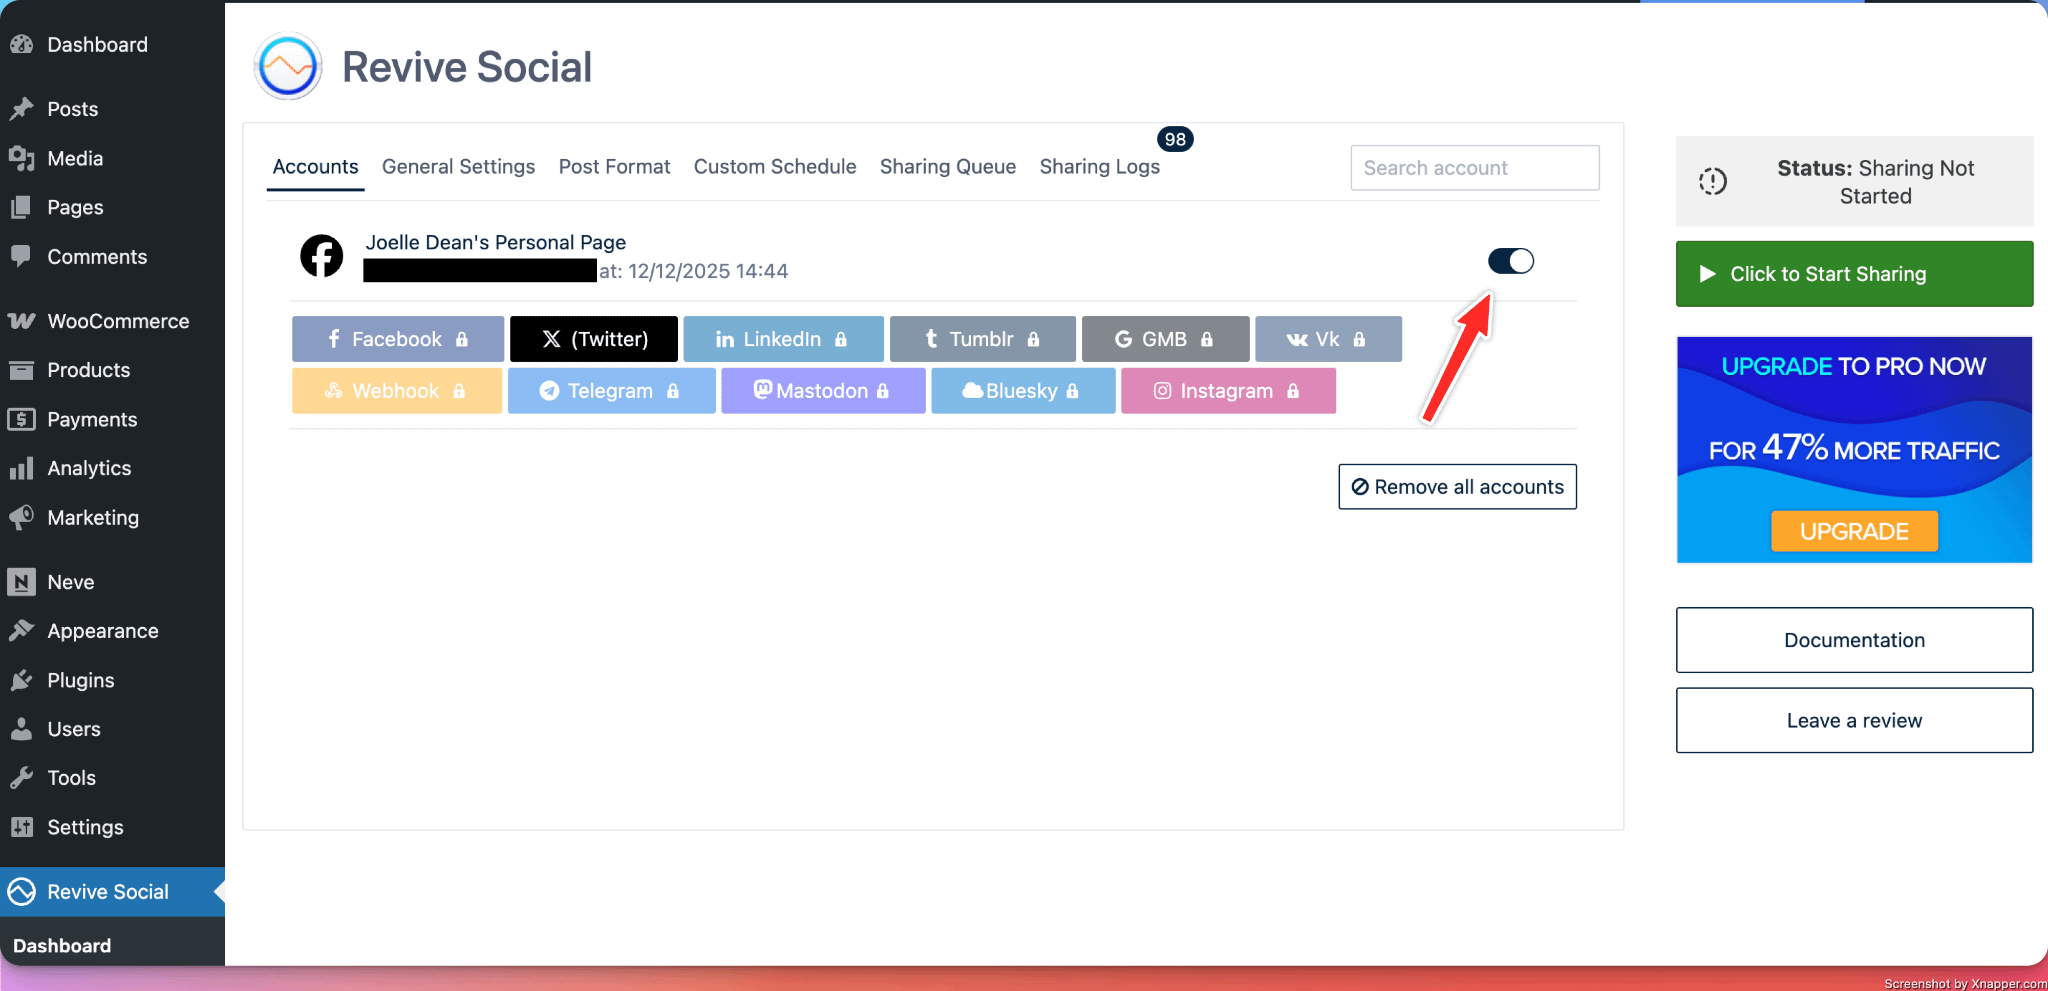
f) After the authorization is completed, you will be able to see the connected Facebook Pages in the Revive Social dashboard.
3. Connecting to Your X (Twitter) Account
⚠️ Important: Revive Social requires the API Key and API Secret Key from your own X developer app to connect your X account. Themeisle and Revive Social do not provide these keys.
- Navigate to the Revive Social Dashboard and click on the X (Twitter) button.
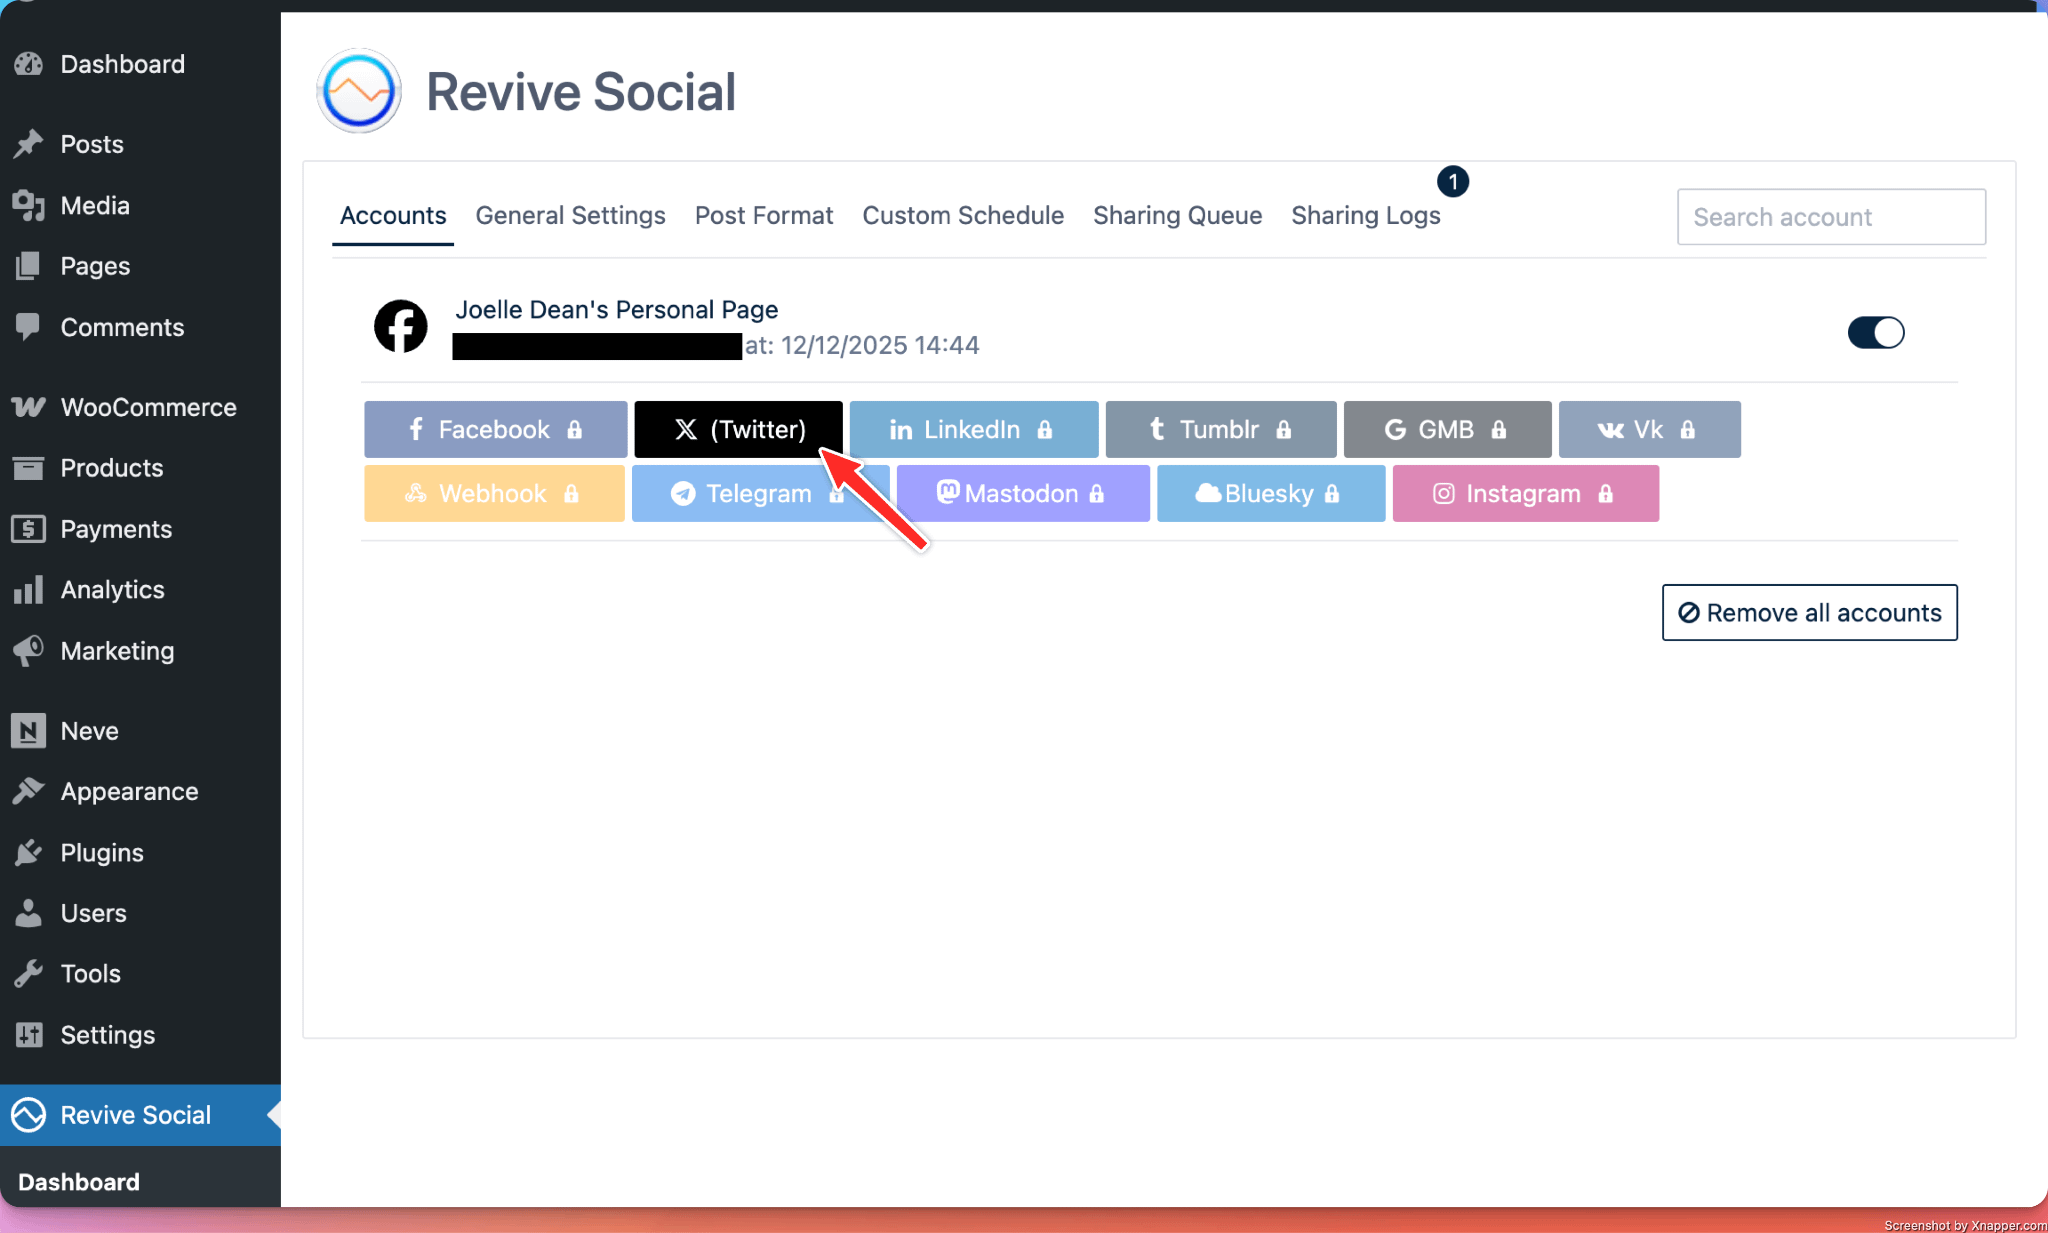
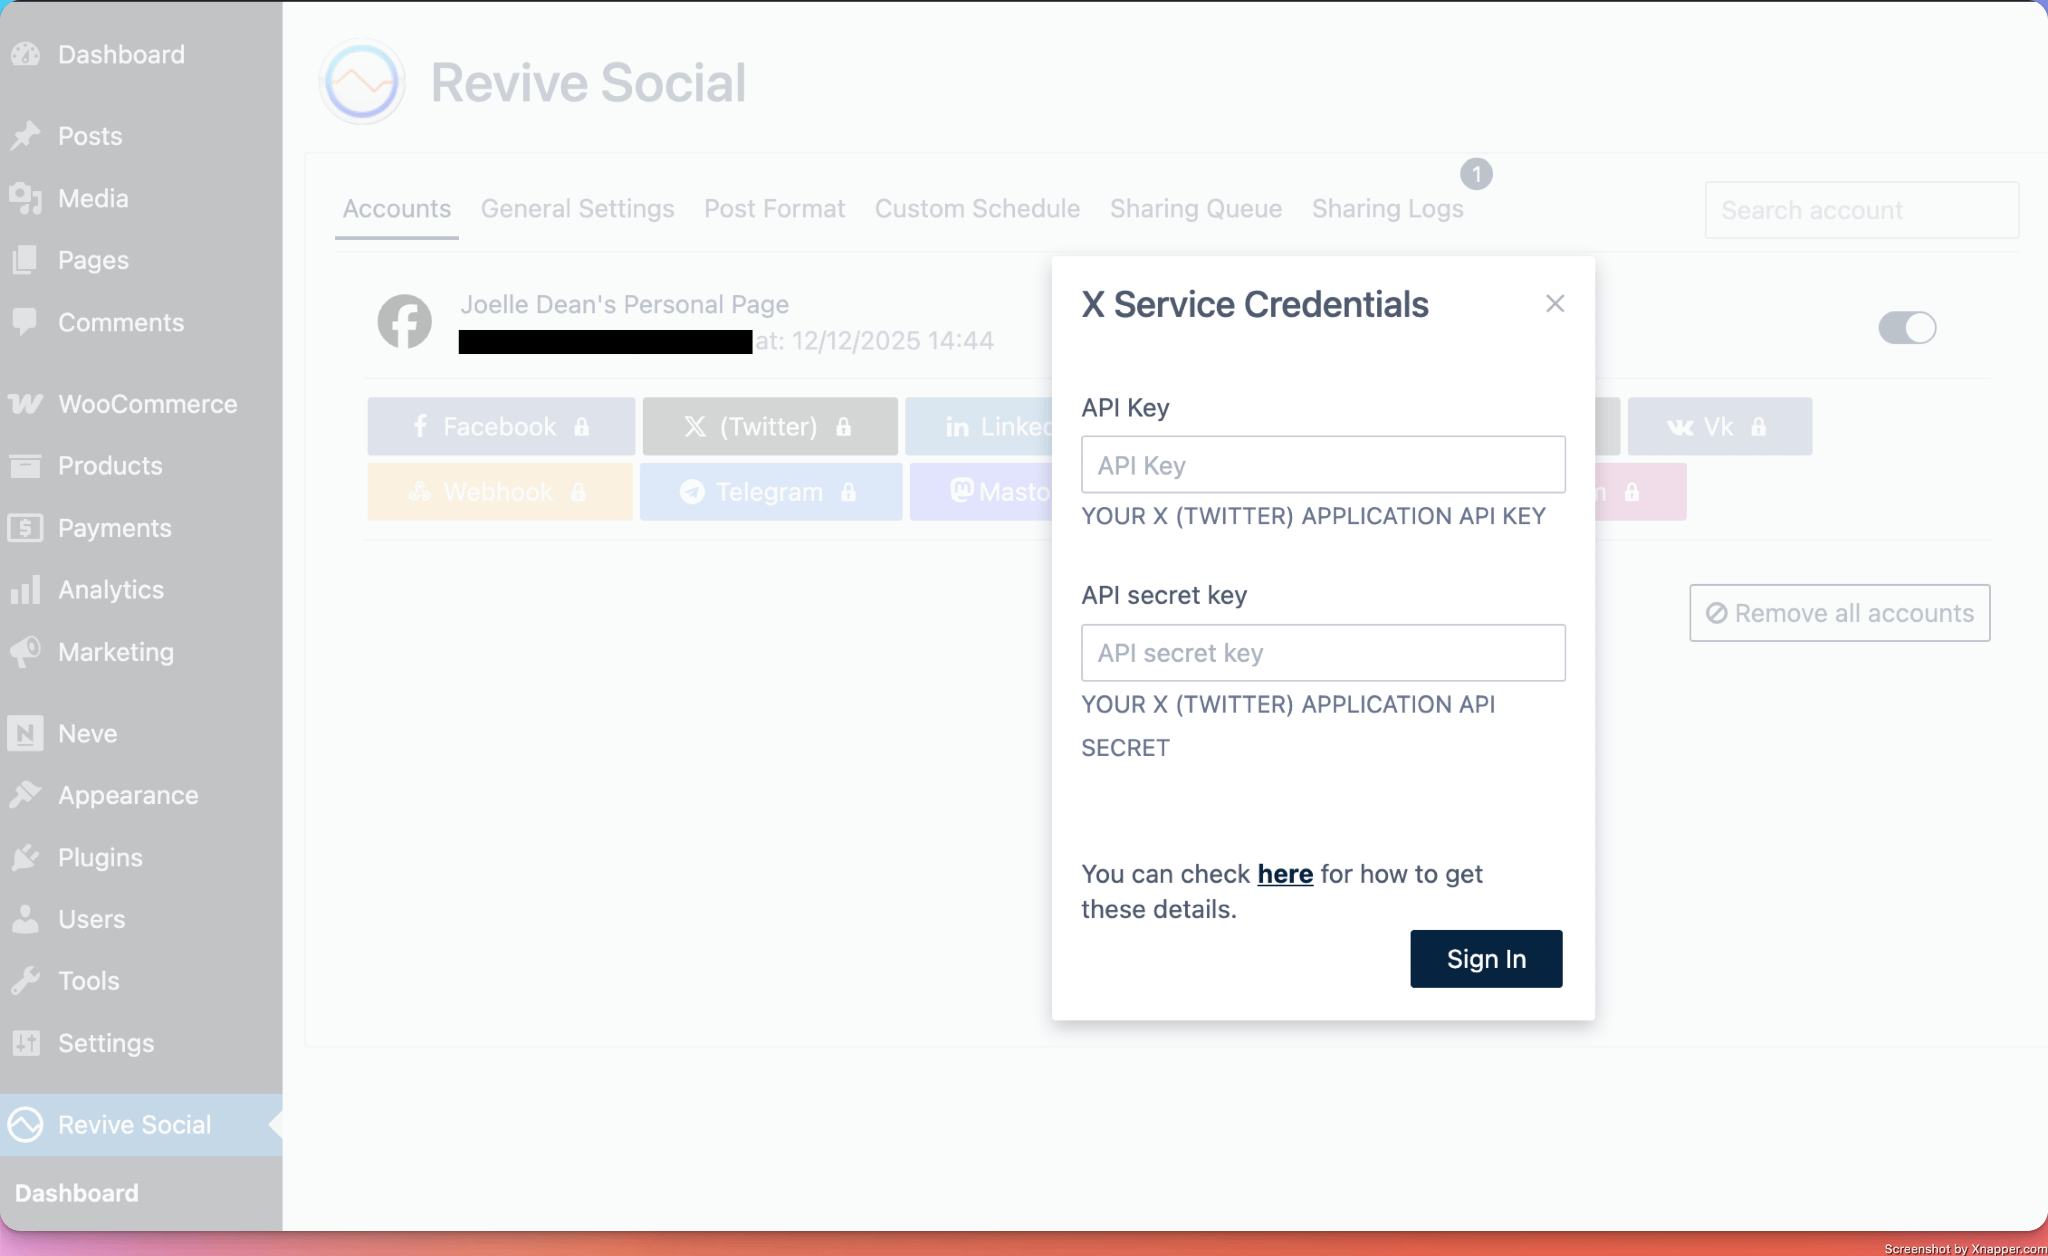
- You will be prompted to enter the API Key and API secret key from your X(Twitter) app. If you don’t have an app, follow the next steps to find out how to create one.
- Log in to X Developer Portal. Use the same credentials as for your X (Twitter) account.
- You will be prompted with some premium plans, but you also have the option to sign up for a free account at the bottom of the page. Click on that link.

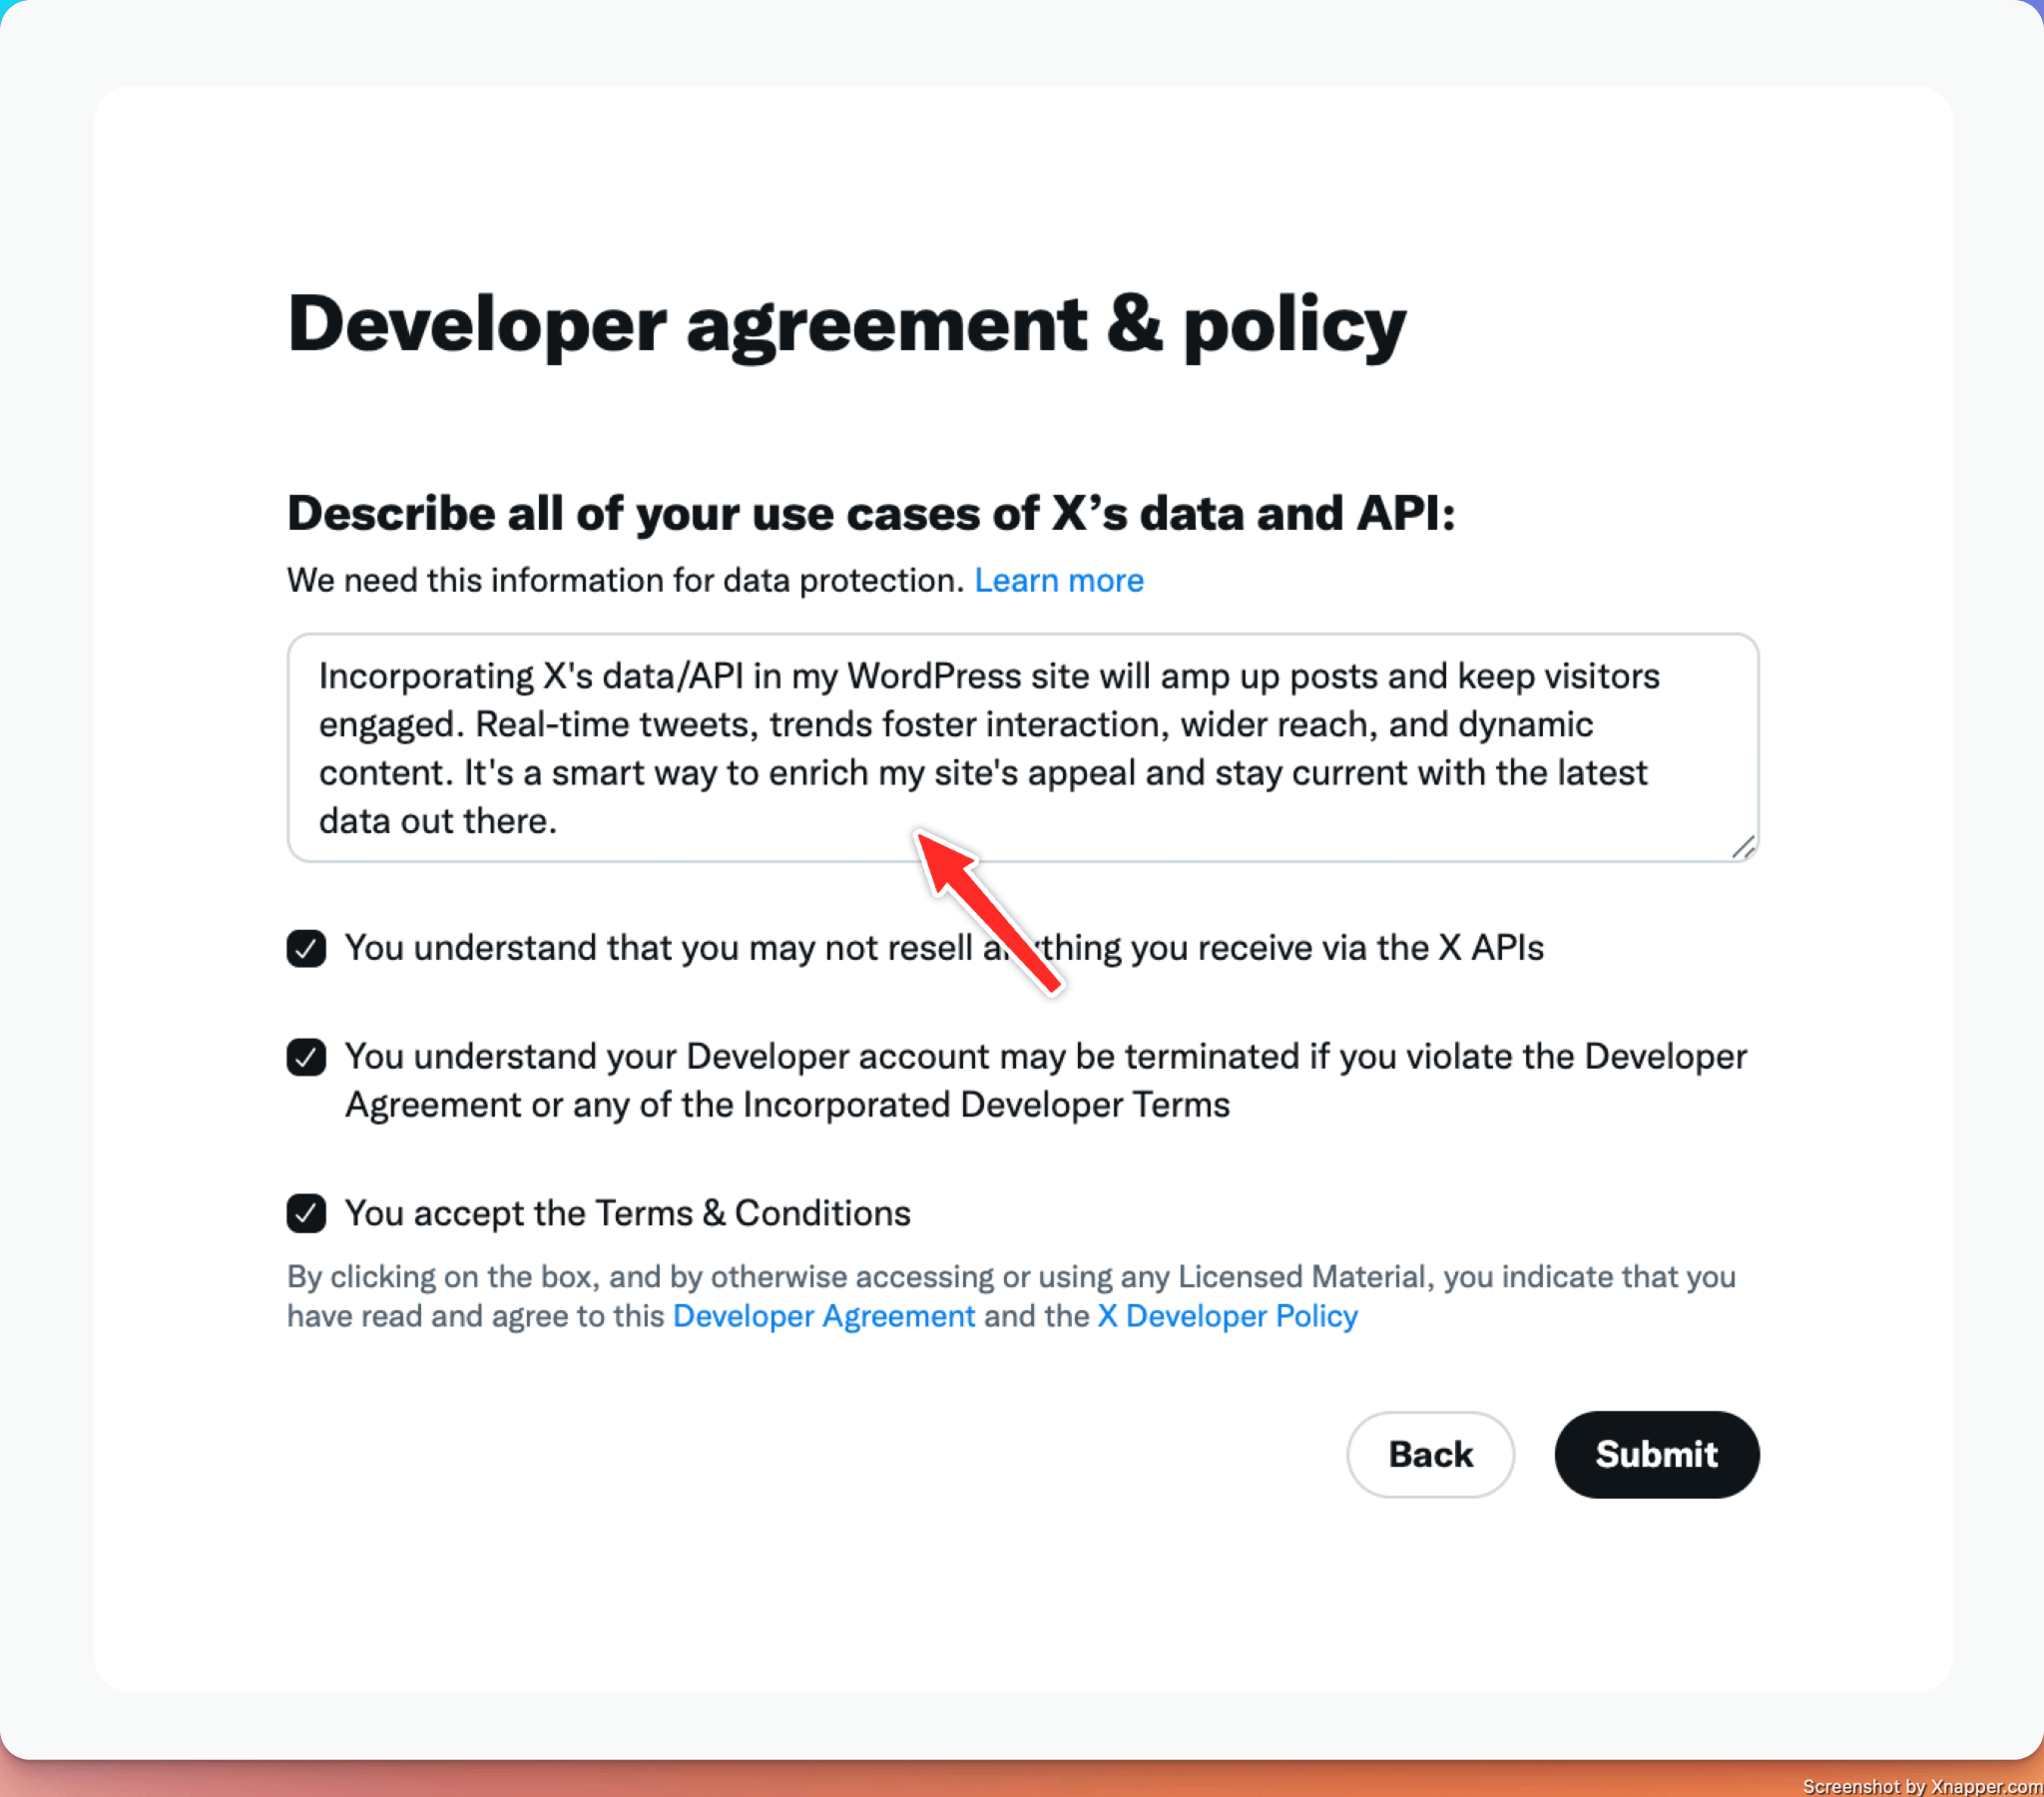
- Add your own use case for the app (there is no right or wrong answer here; it must be at least 250 characters long), toggle all required boxes, and click on the Submit button.
- Once the app is created, you need to use the default Project or create a new Project. For the Project of your choice, click on the Keys and tokens tab to get your API key and API secret key.

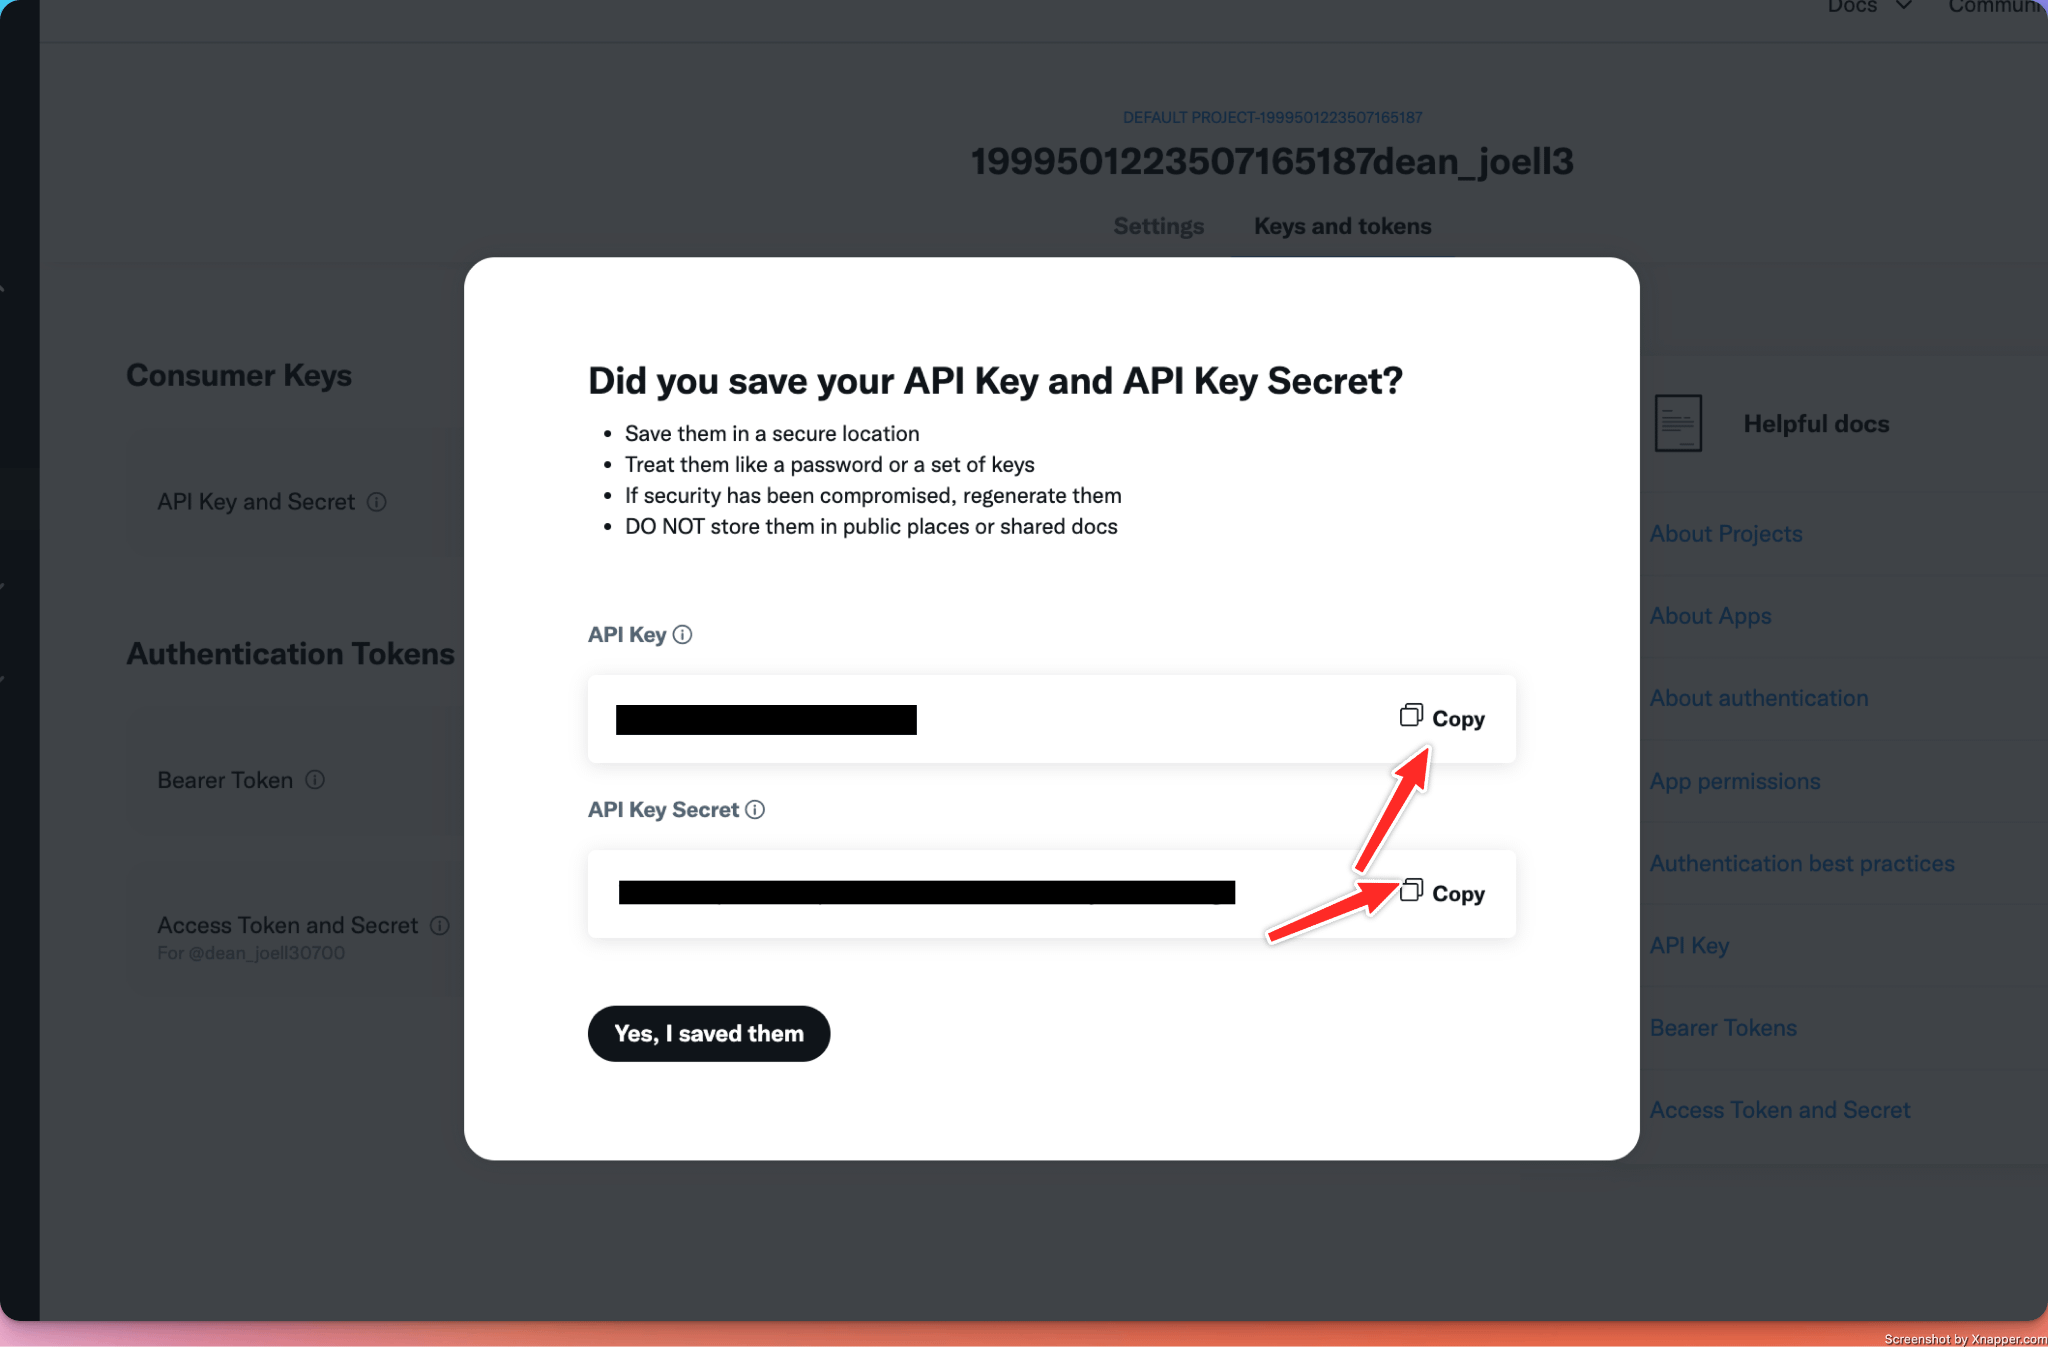
- Click on the Regenerate button, near the Consumer Keys.
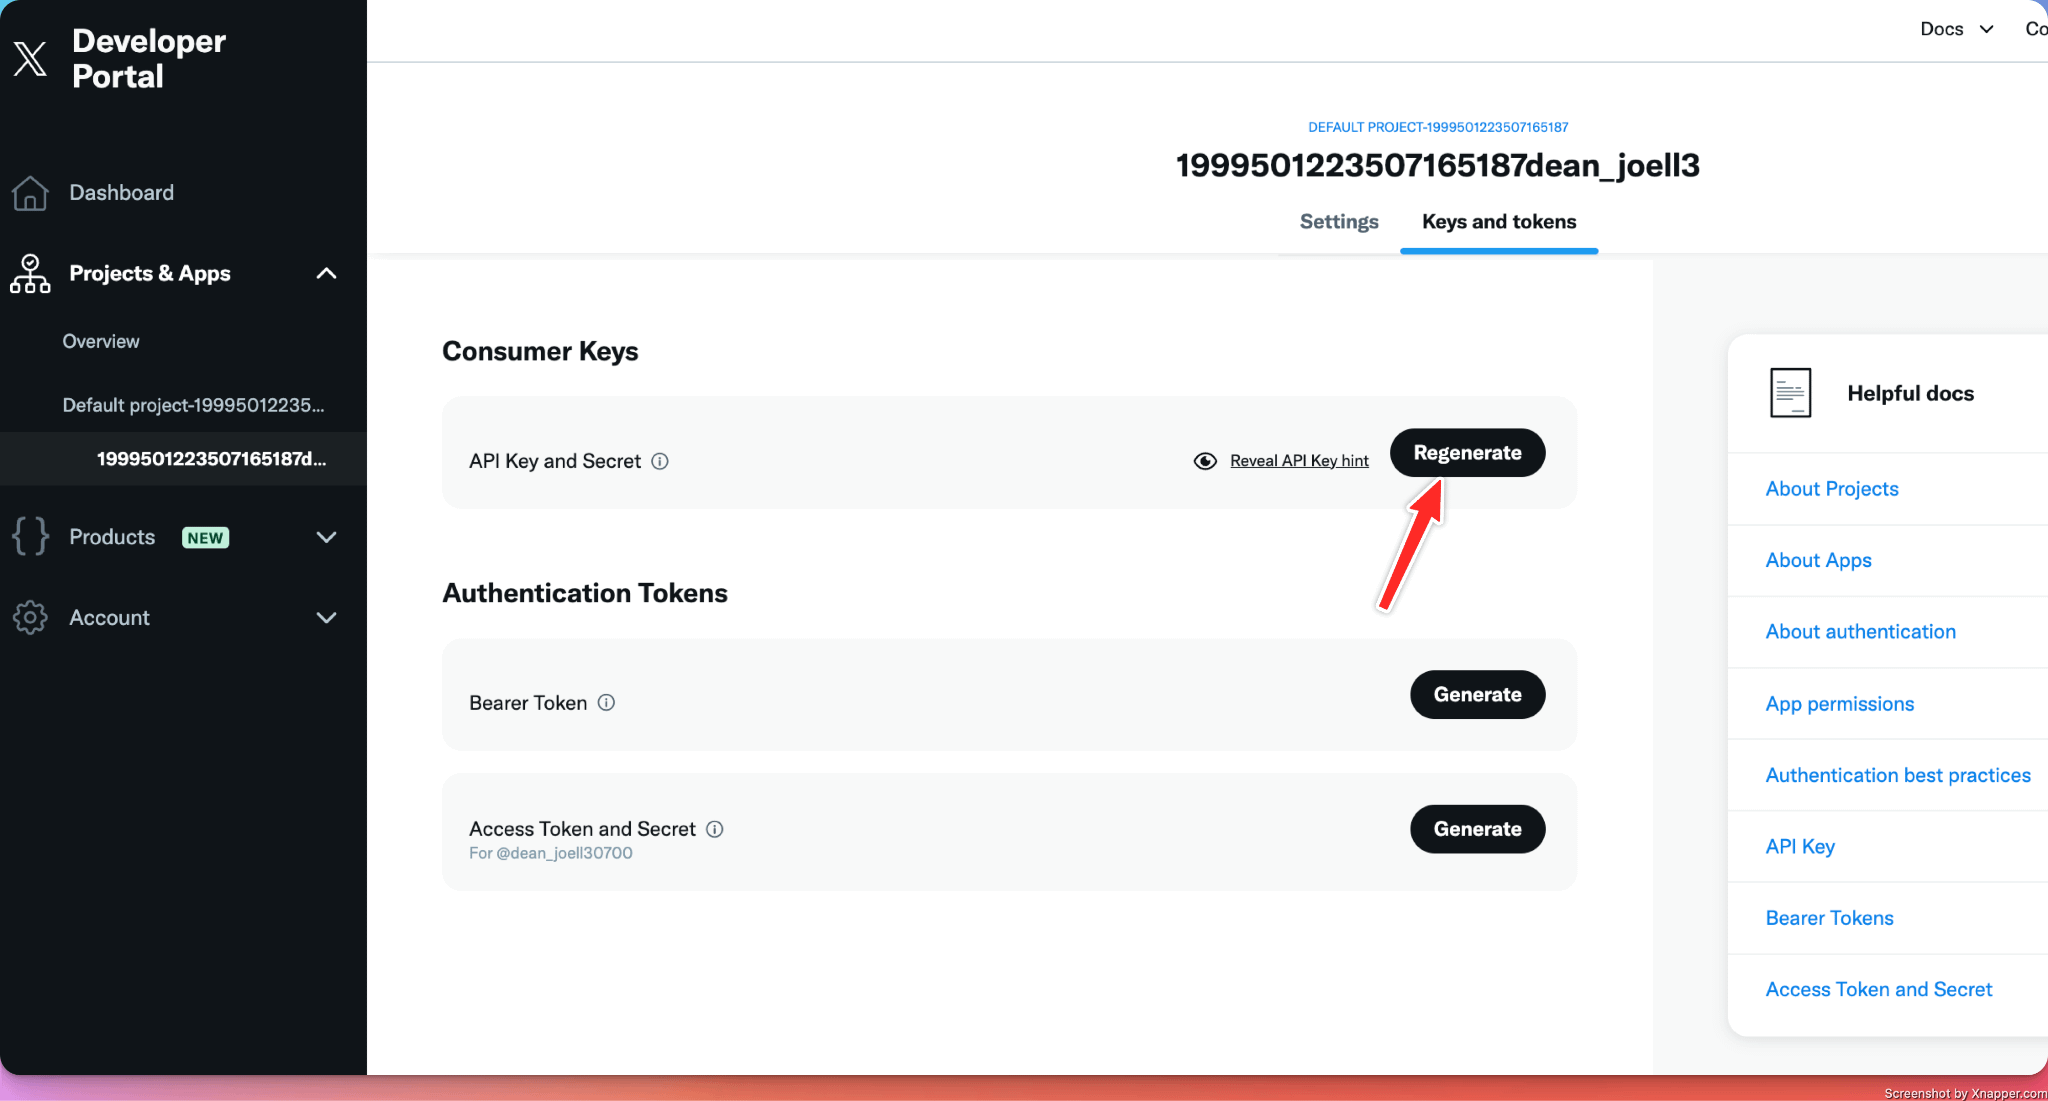
- Copy the API Key and API Key Secret values and click on the Yes, I saved them button.
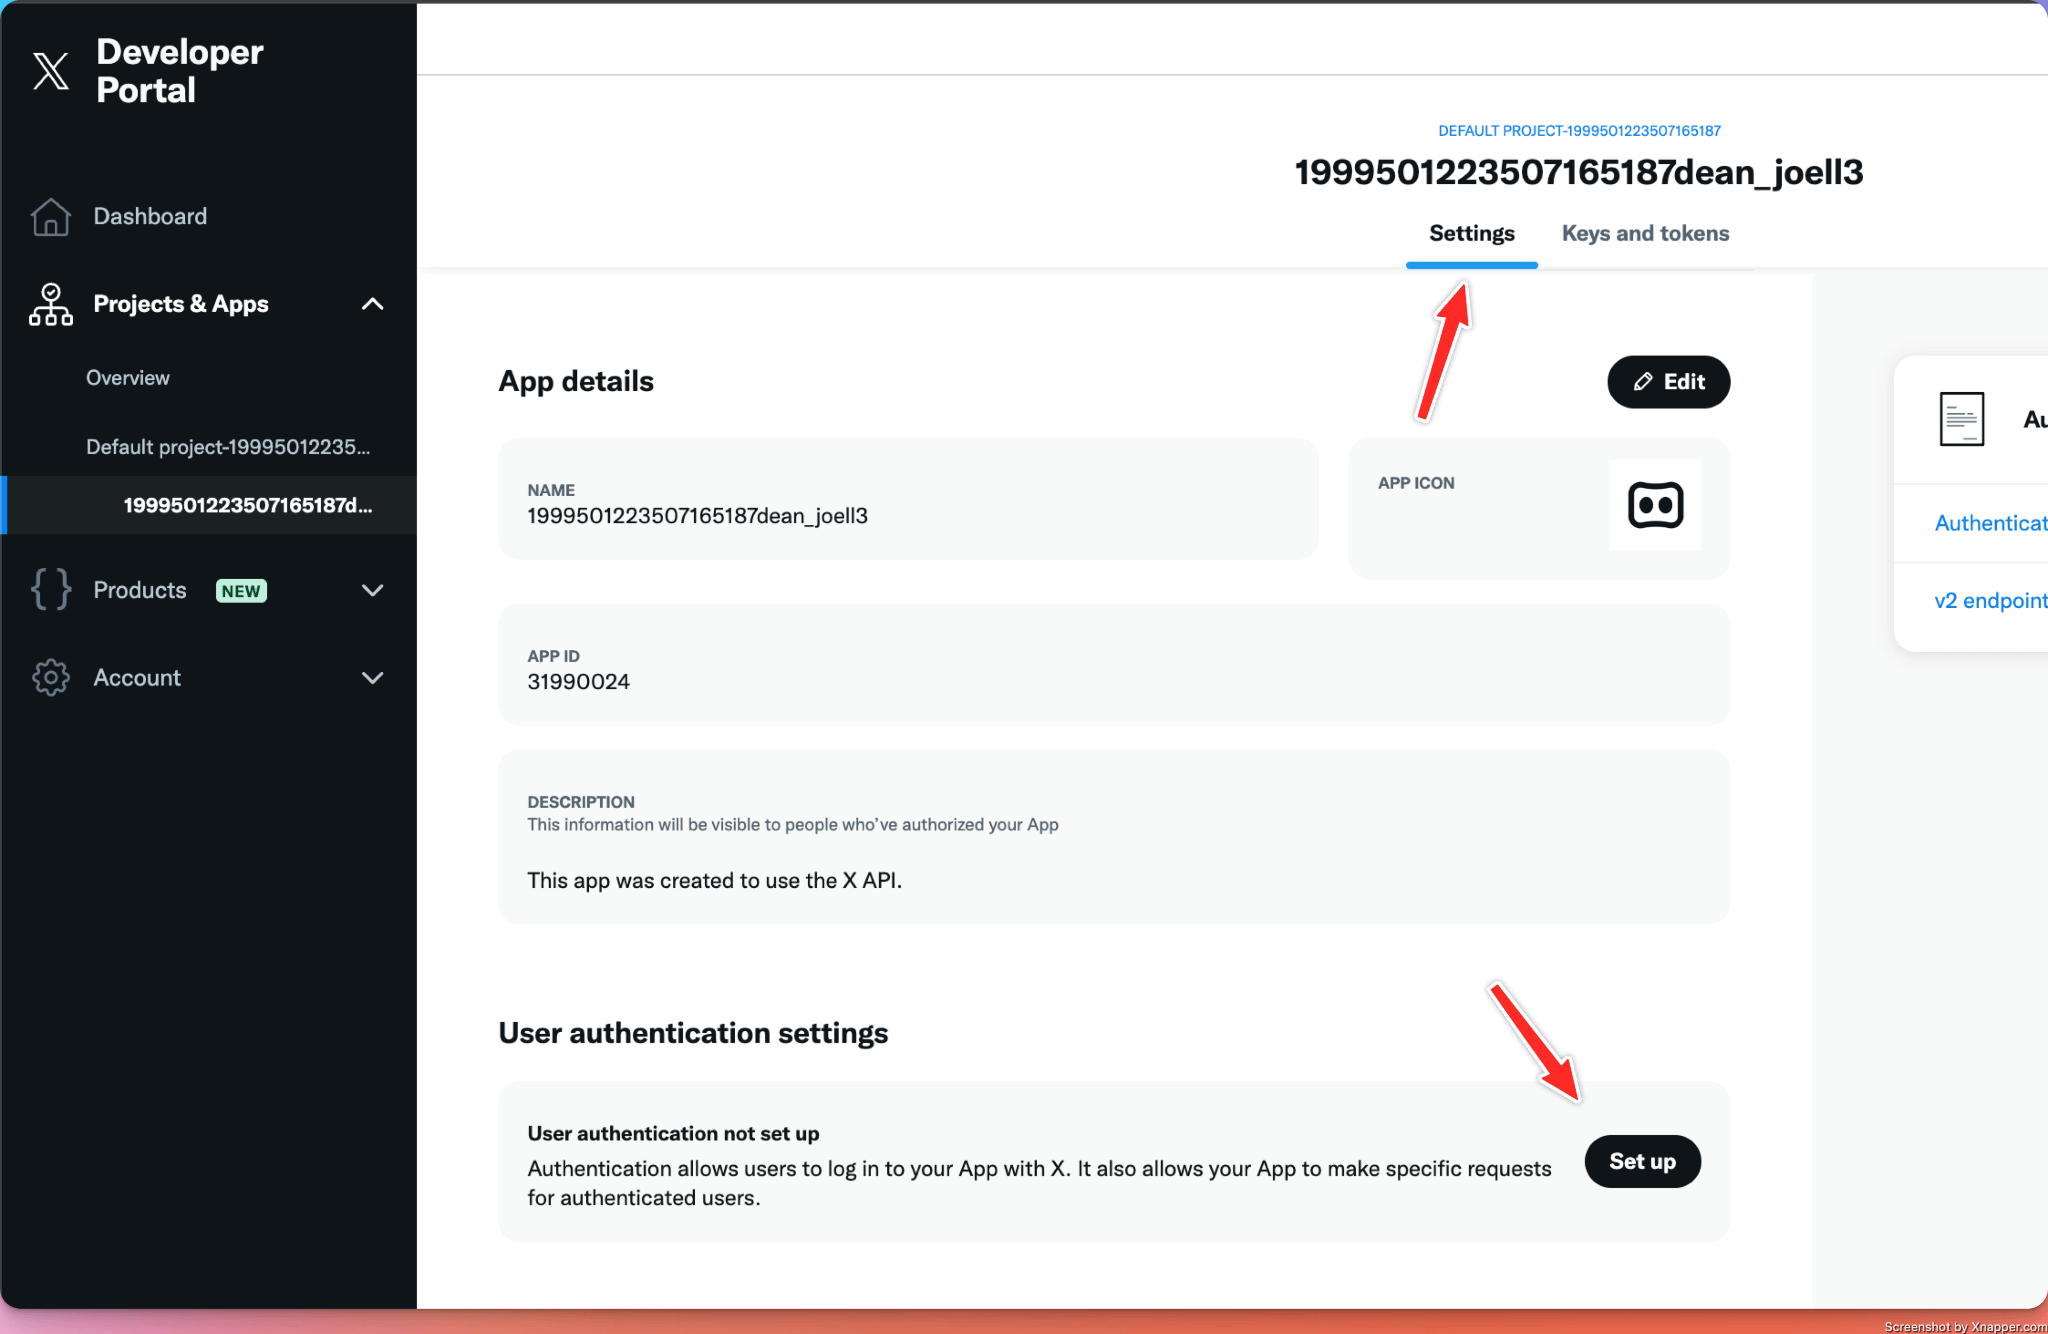
- Now, for the same Project, click on the Settings tab. Under authentication settings, click on the Set up button.
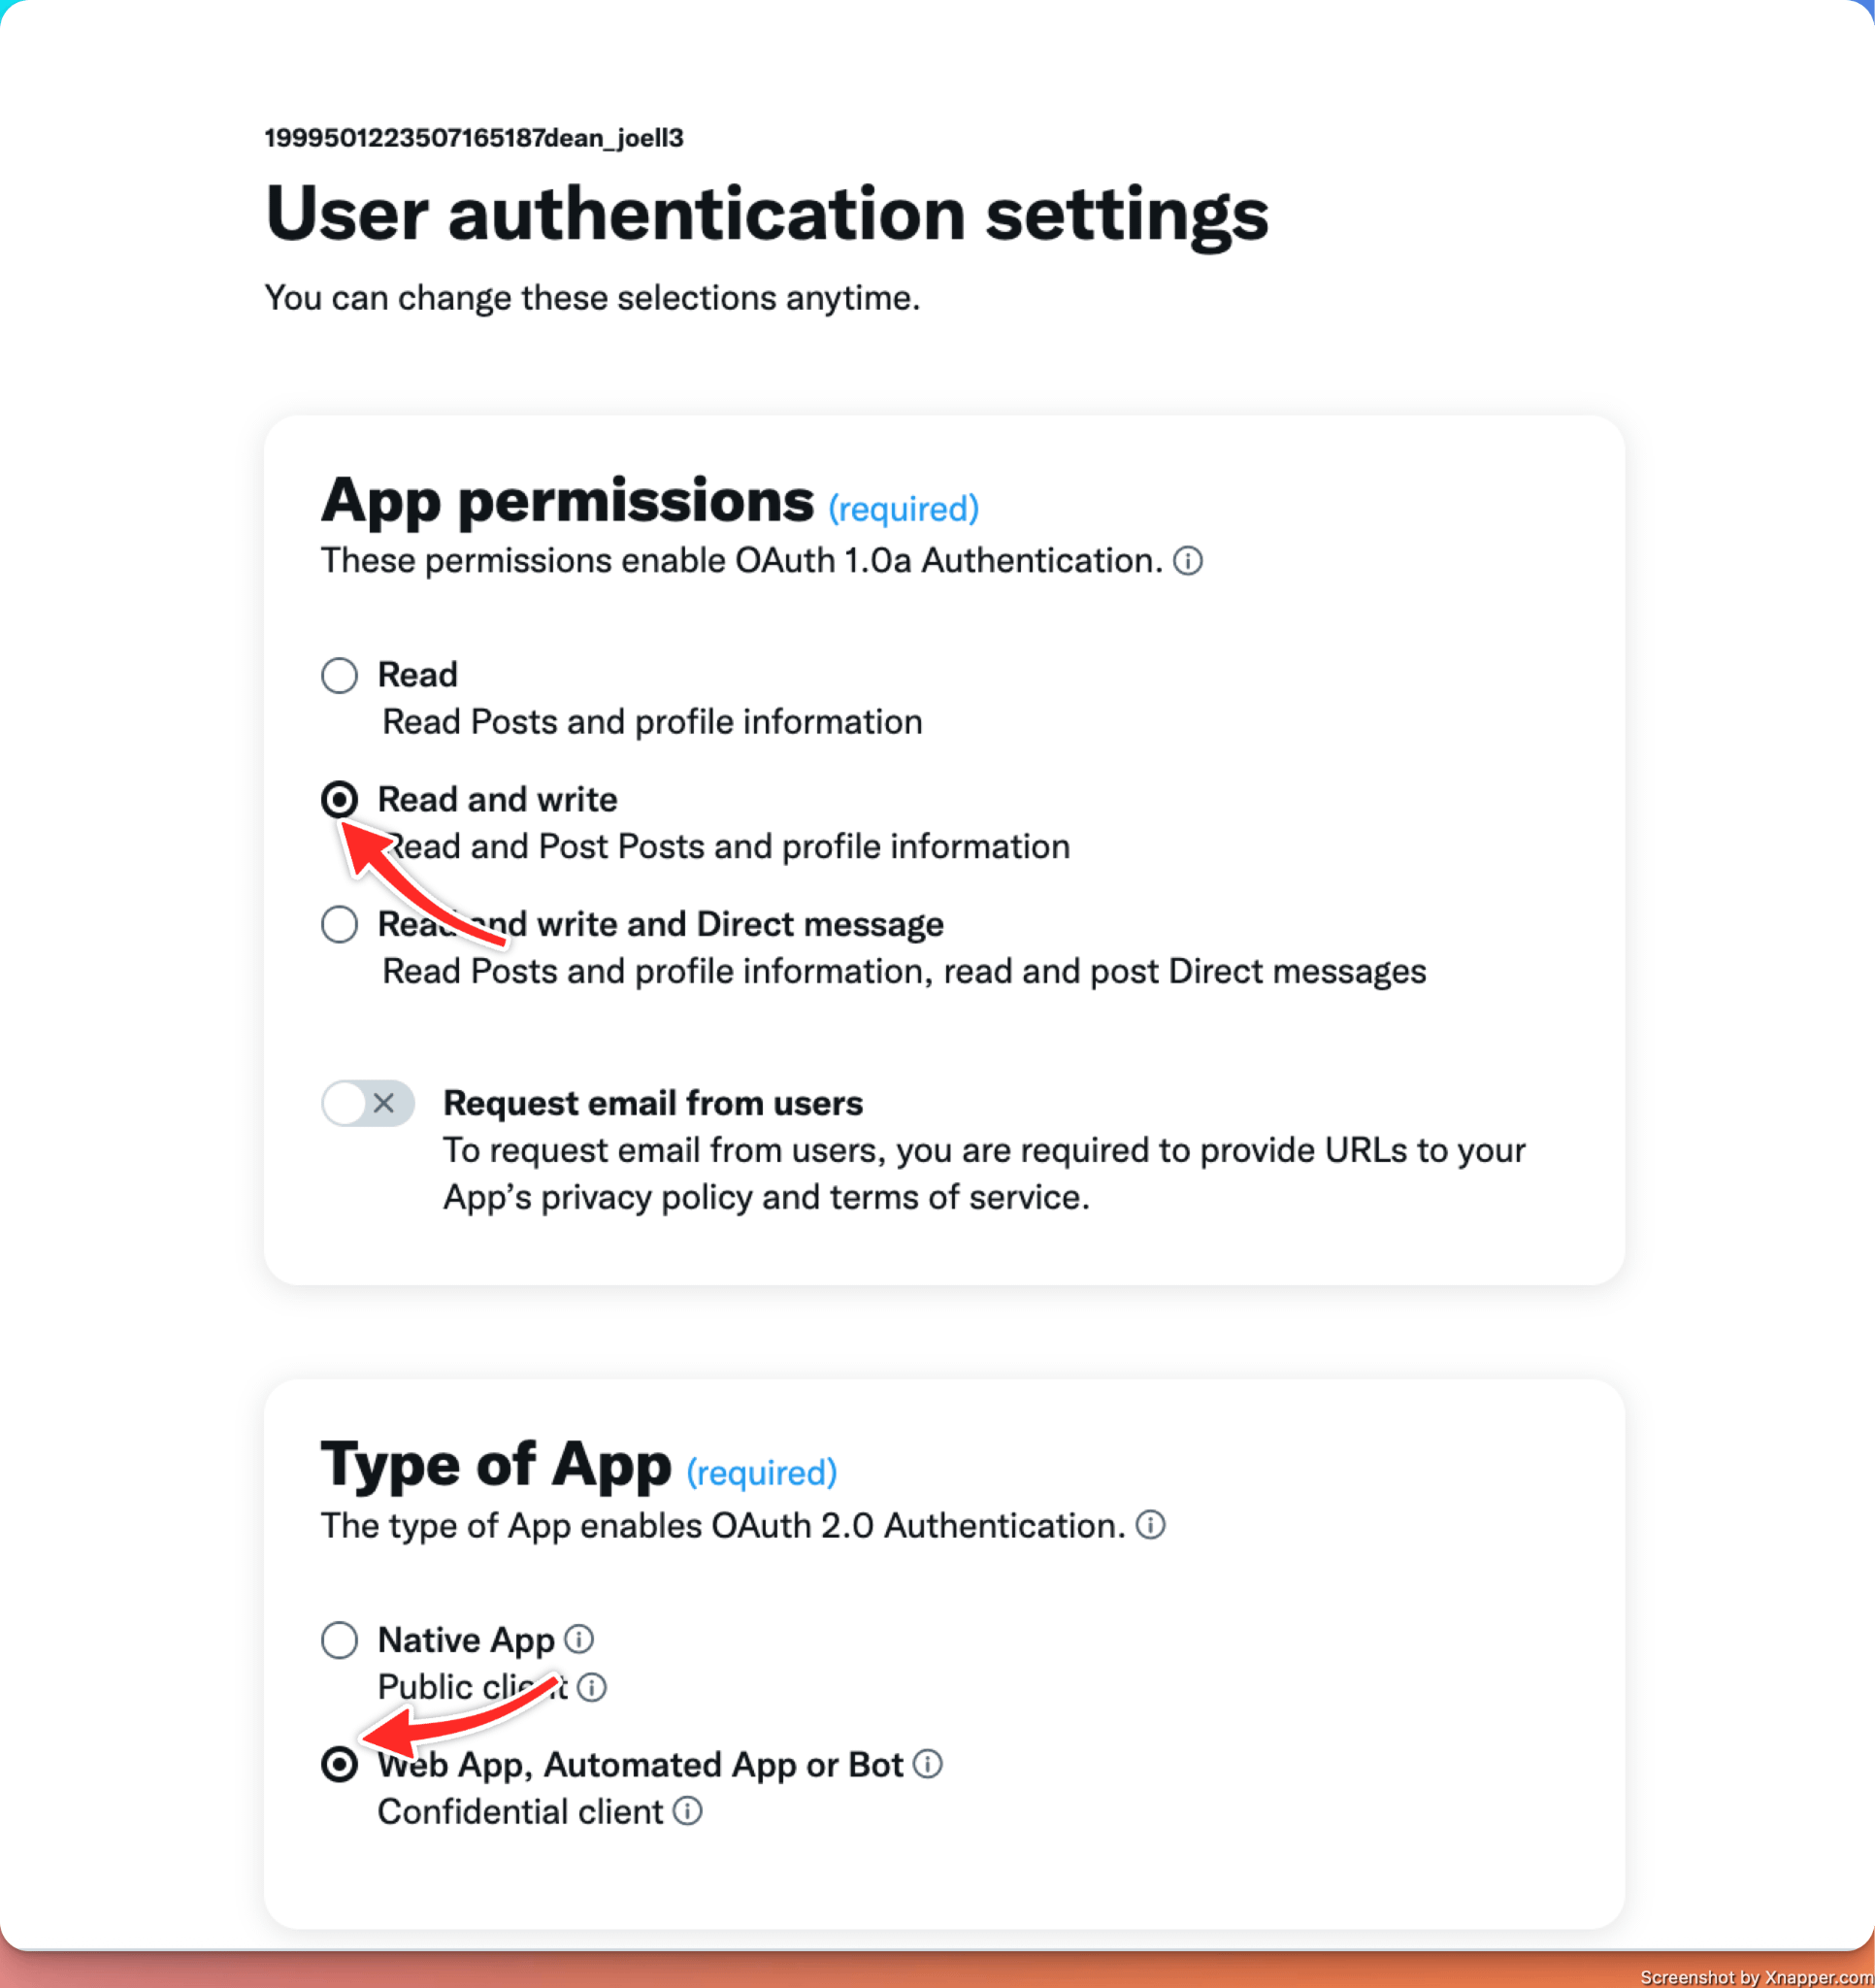
- For App permissions, choose Read and Write, and for Type of App, choose Web App, Automated App, or Bot.
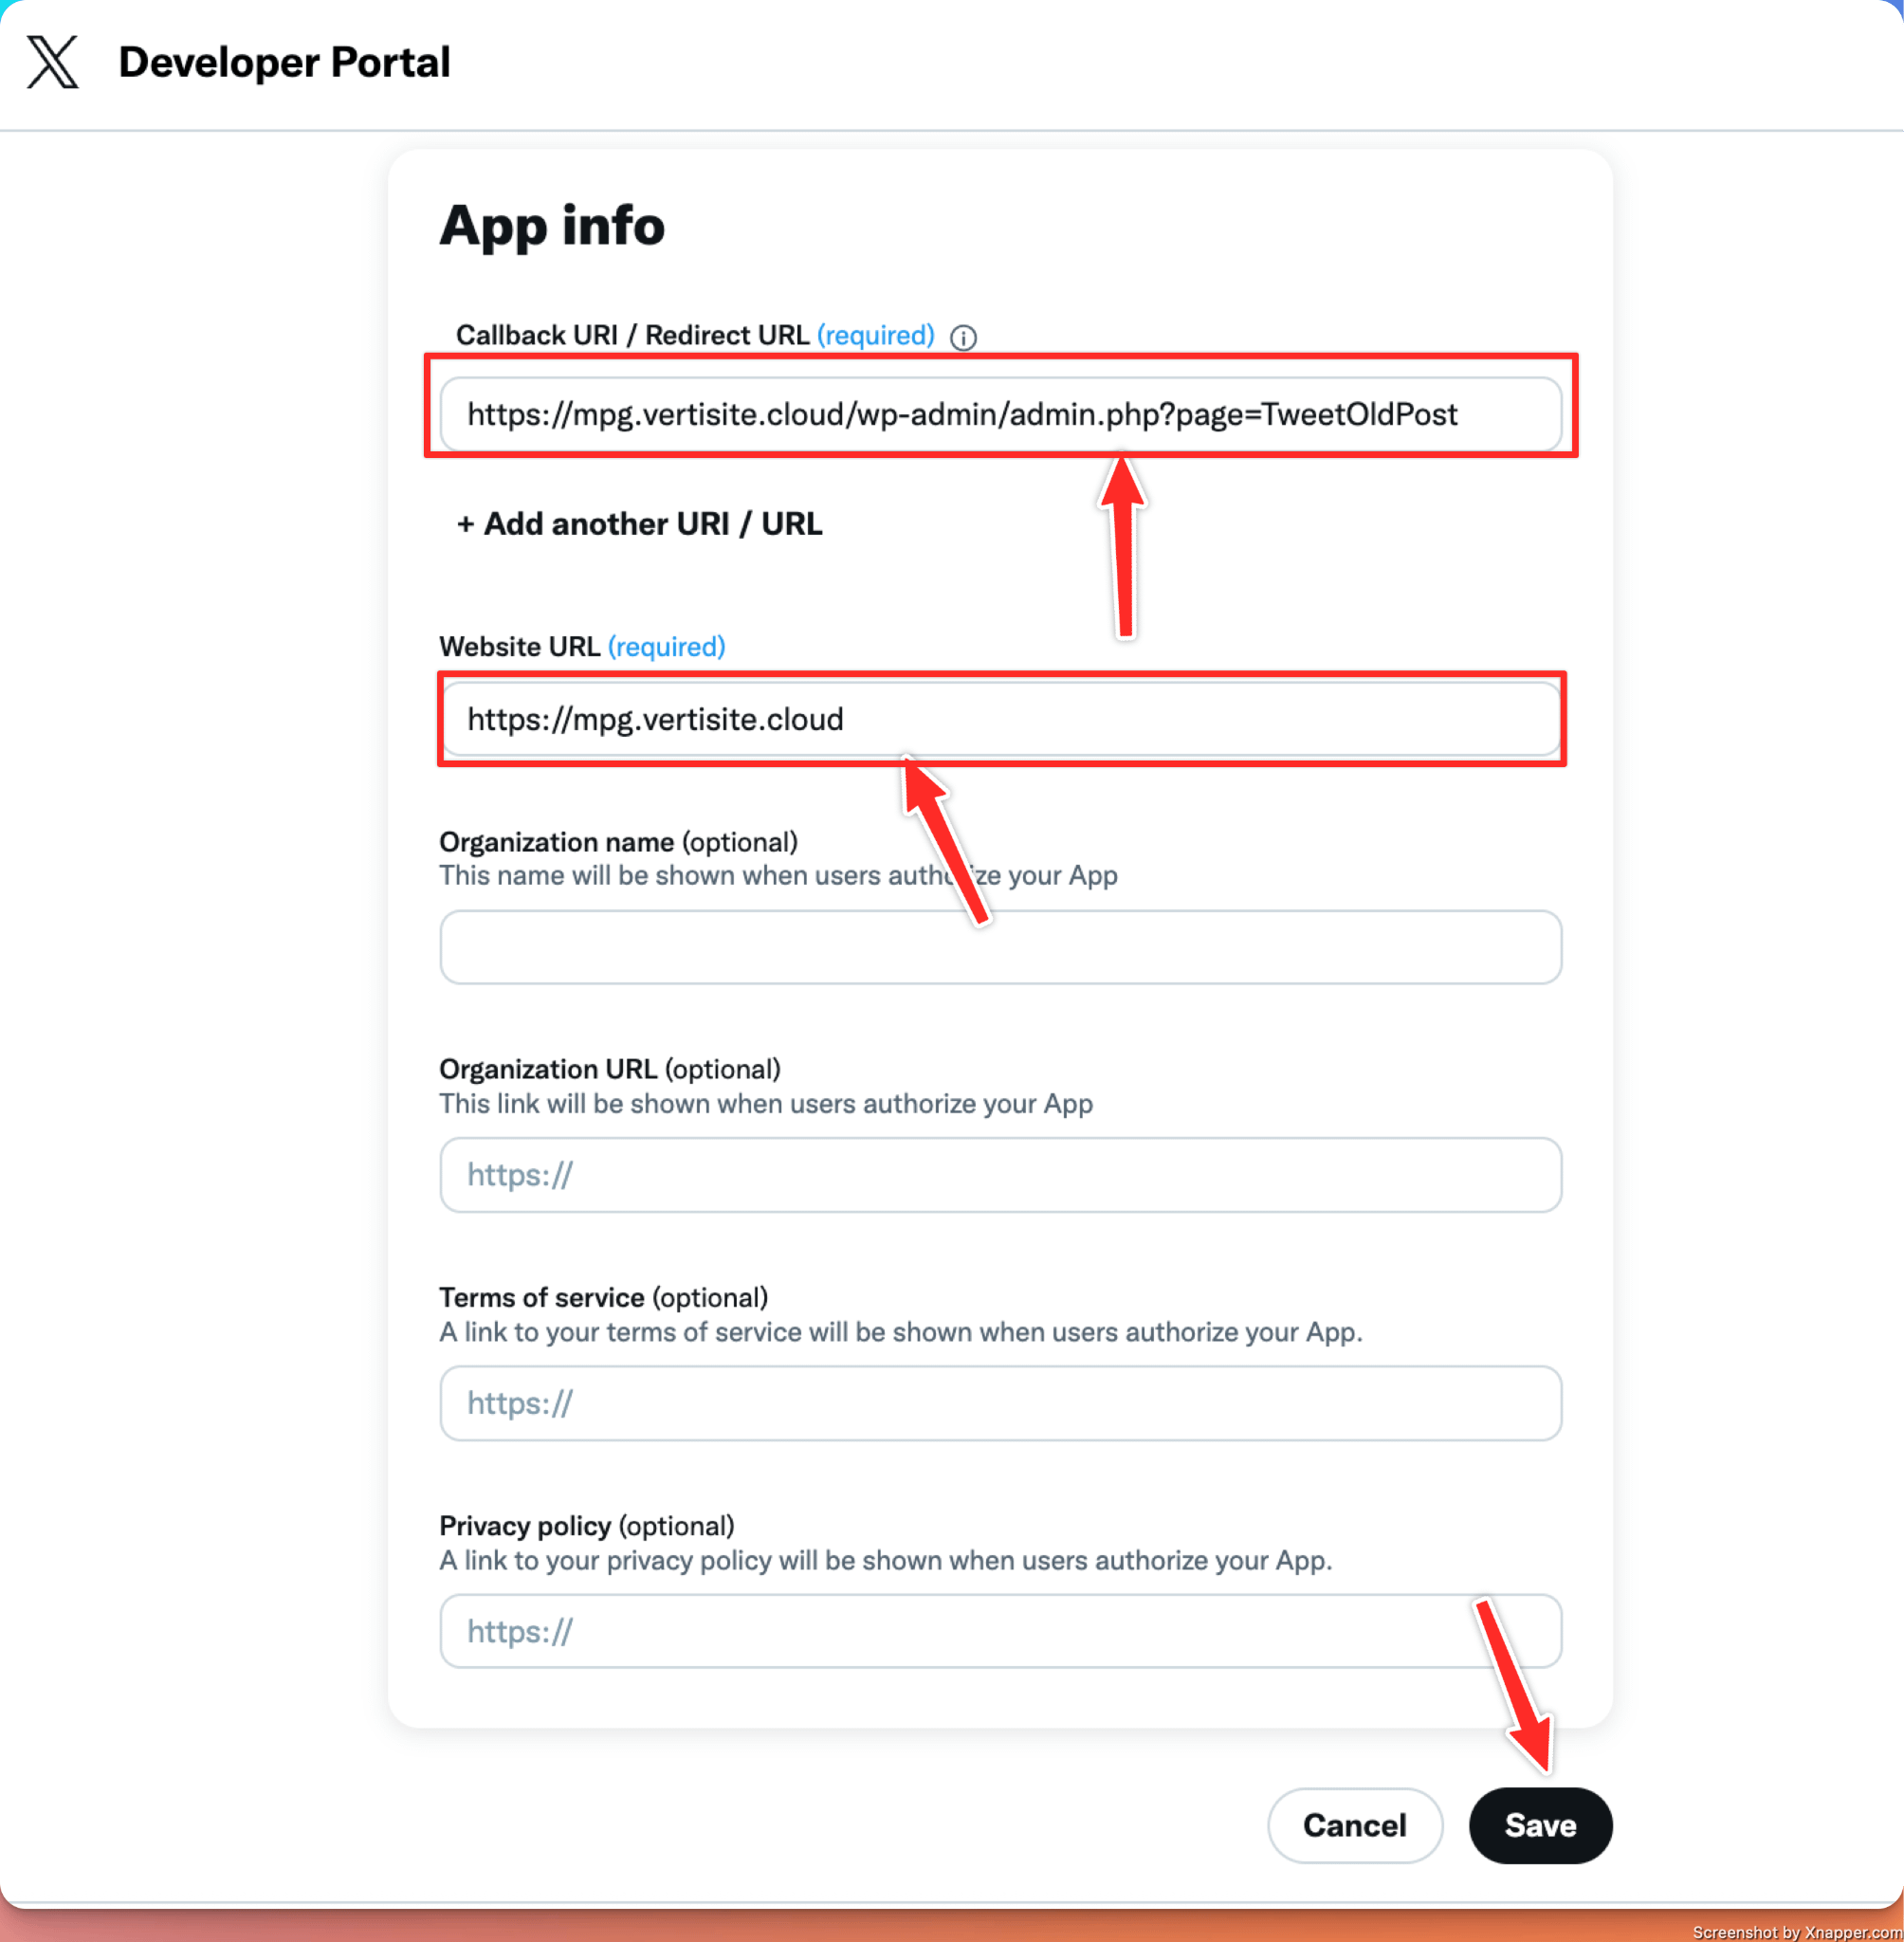
- Under App info, add your own site details, by following this exact structure:
Callback/Redirect URL: https://example.com/wp-admin/admin.php?page=TweetOldPost
Website URL: https://example.com
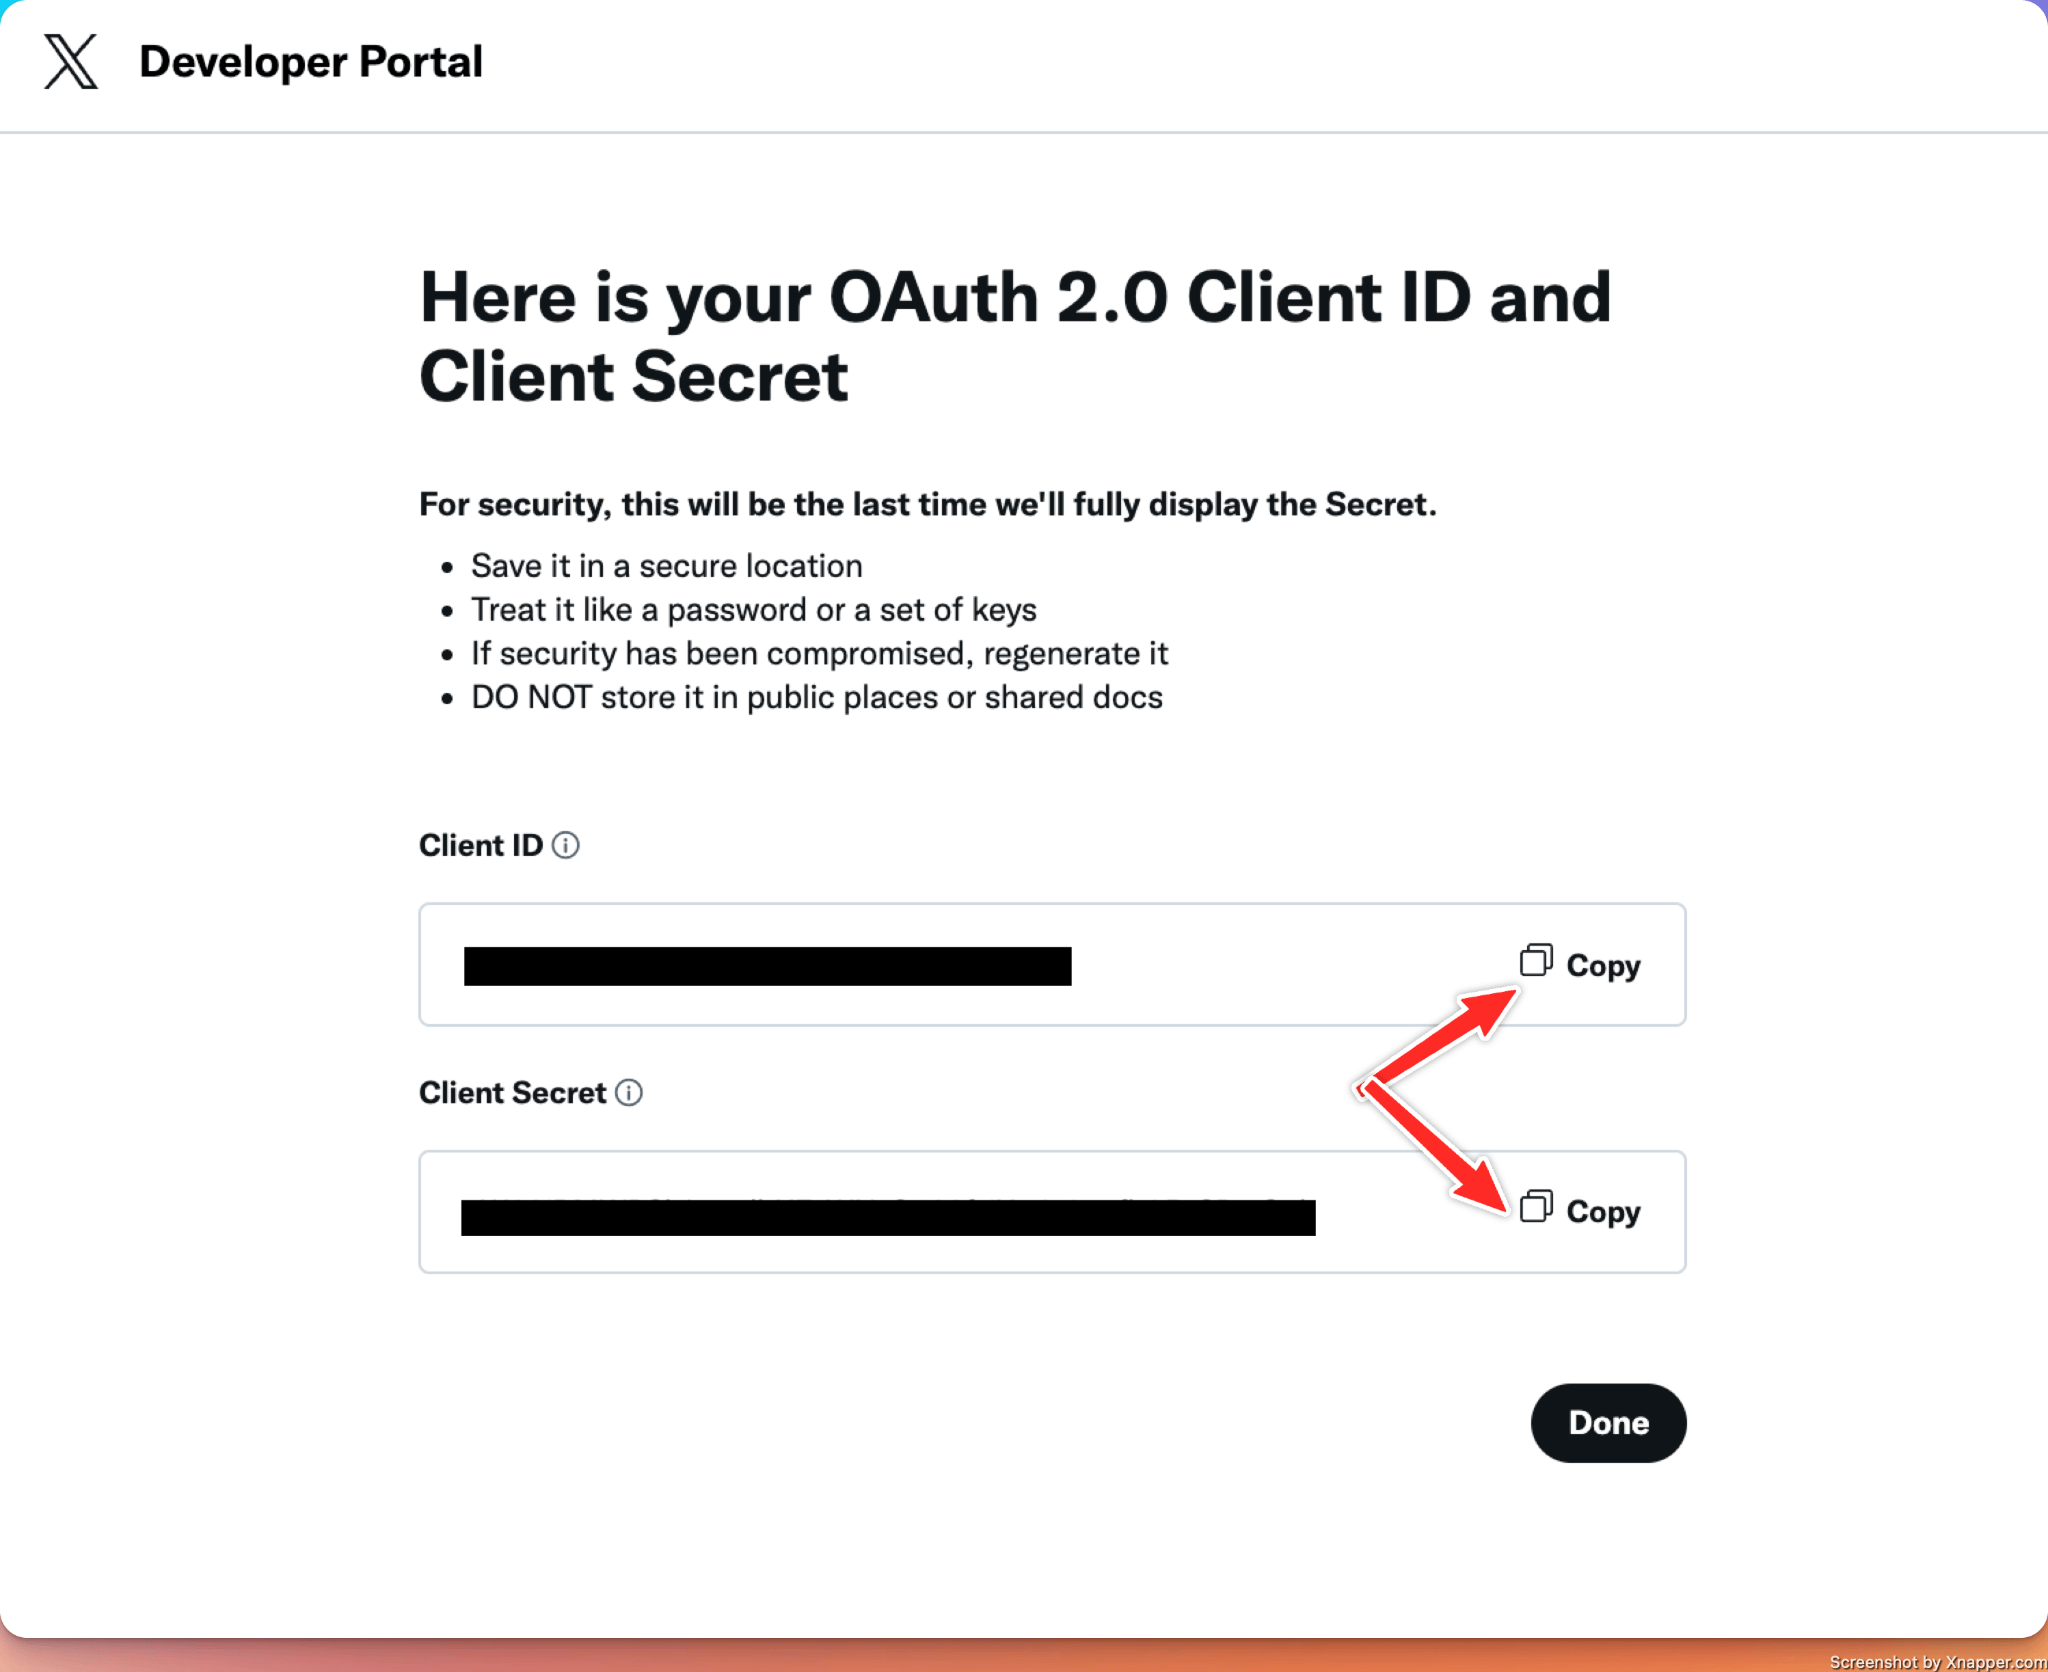
- Save the Client ID and Client Secret values and click on Done.
- Go back to the Revive Social dashboard and add your API Key and API Secret Key, from Step 8.

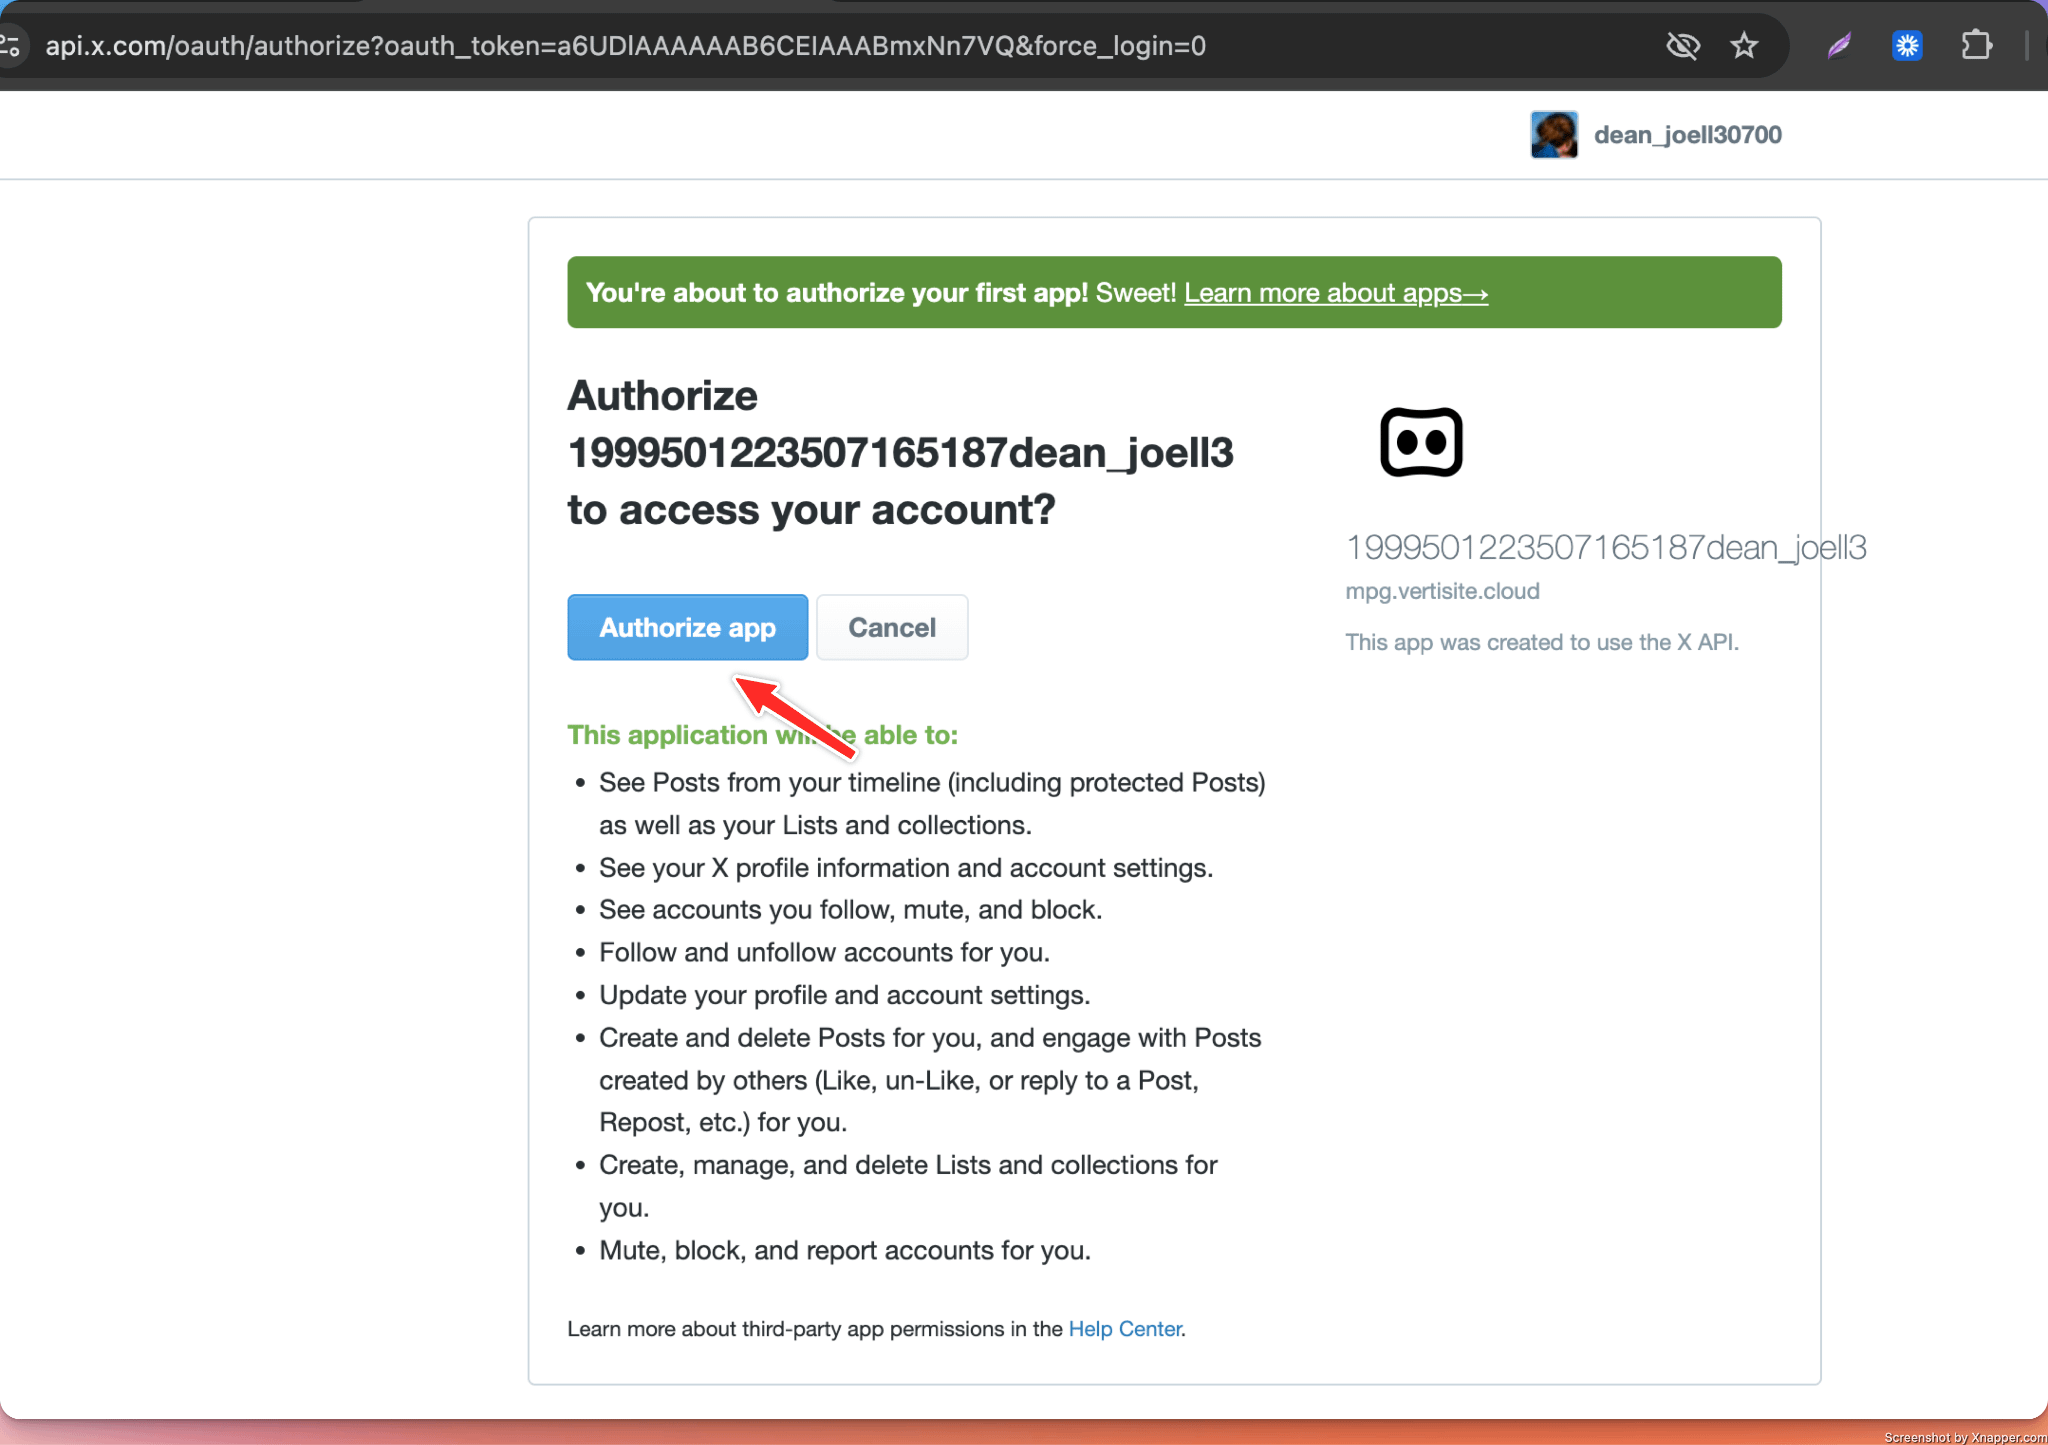
- Authorize the app in Revive Social.
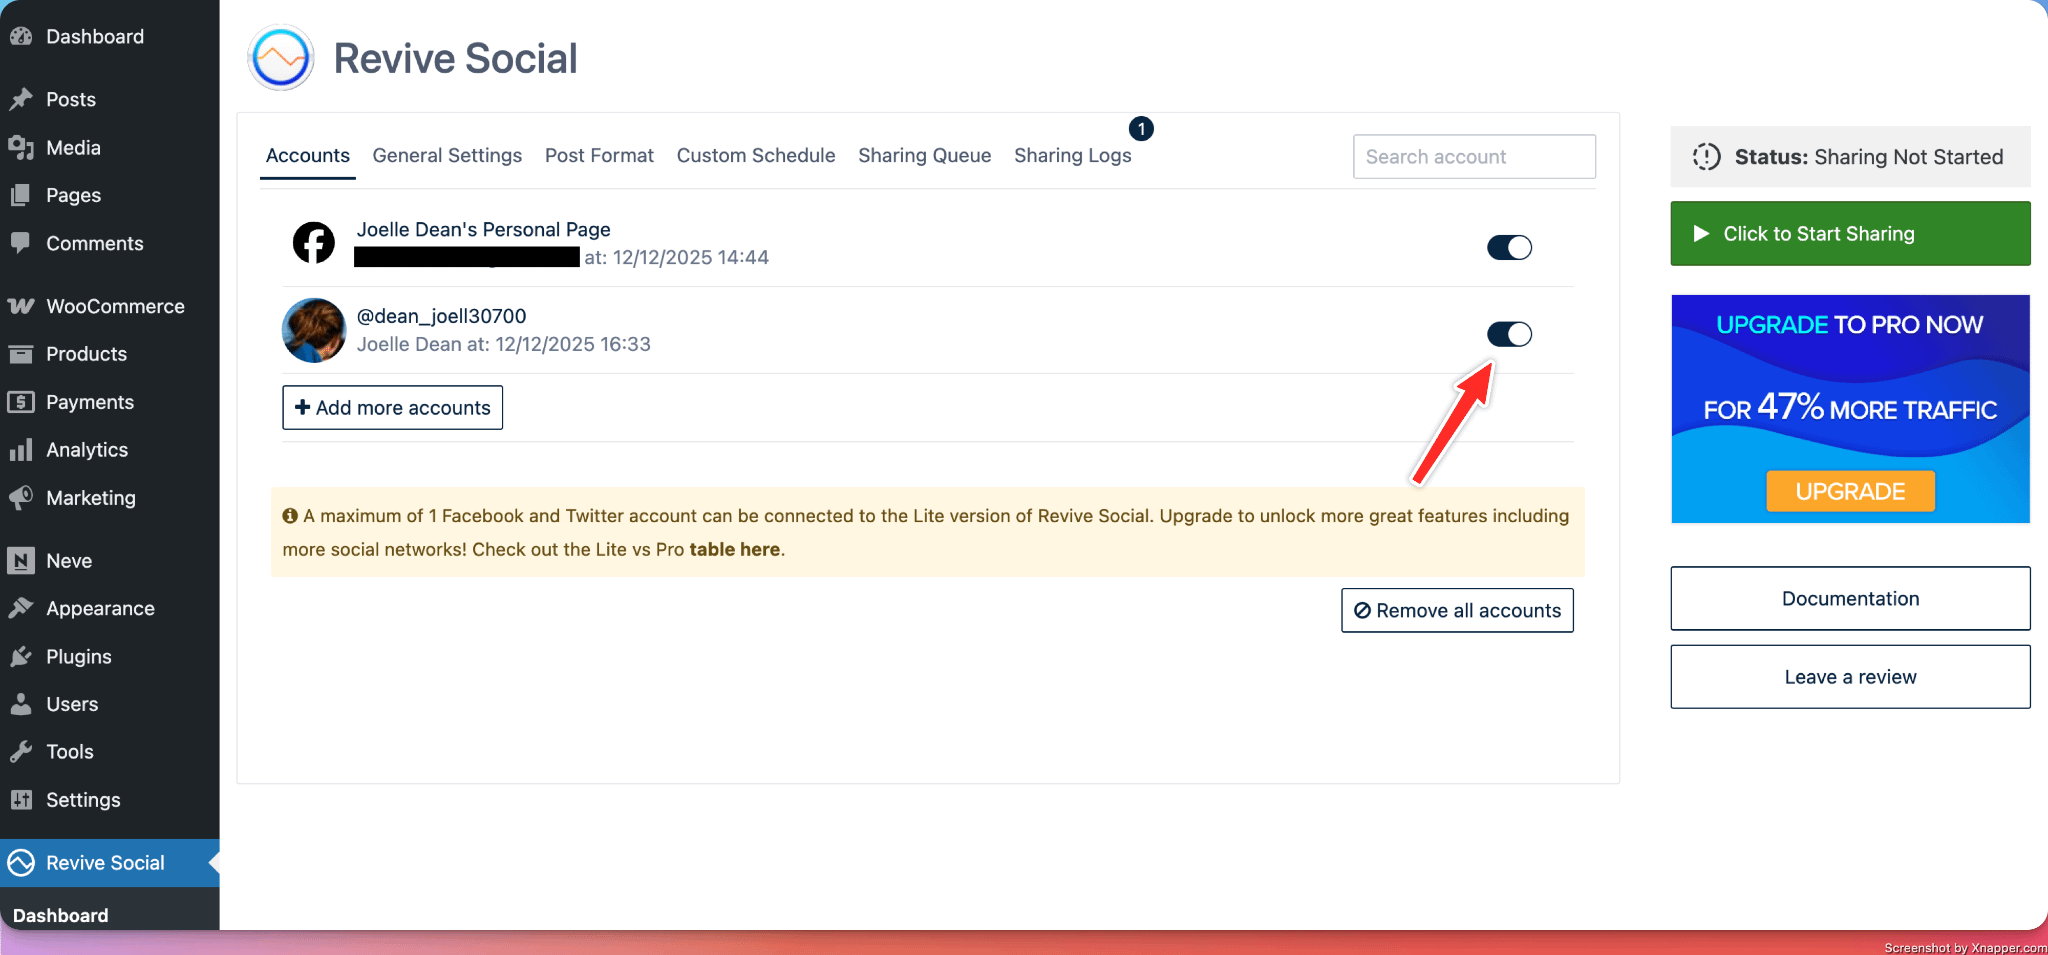
- Once the authorization is completed, your X ( Twitter ) should be listed in Revive Social’s dashboard.
If your X connection stops after account verification
If X requests identity verification, or if your X API access changes, the existing authorization in Revive Social can stop working.
- Complete any pending verification steps in your X account.
- Confirm your app and API access are still active in your X developer account.
- In Revive Social, reconnect your X account and authorize again using your current API Key and API Secret Key.
4. Connecting to your Bluesky Account (Pro)
To connect Bluesky, open Revive Social > Dashboard and stay on the Accounts tab.
- Click the Bluesky network button.
- Enter your Bluesky login credentials.
- In the email/login field, enter the full email address linked to your Bluesky account.
⚠️ Important: Do not use your Bluesky handle (for example, username.bsky.social) in the email/login field. Use the full account email address instead.
Troubleshooting: InvalidEmail when posting to Bluesky
If you see Bluesky create session API Error: InvalidEmail: Invalid email address: Address local part cannot be empty, the saved Bluesky credential is usually a handle or an invalid/blank email value.
To fix it:
- Go to Revive Social > Dashboard > Accounts.
- Disconnect the current Bluesky account from Revive Social.
- Reconnect the Bluesky account.
- Enter the full email address associated with your Bluesky account (not your handle).
- Save and test sharing again.
🧩 Plugin Tabs
- Accounts - Connect your desired social accounts.
- General Settings - Contains general settings of the plugin, such as the post types to share, categories and tags to exclude, etc.
- Post Format - Contains settings on how exactly posts are shared to your different social accounts, for example with or without hashtags.
- Custom Schedule (PRO) - Used to set a fixed sharing time or custom sharing intervals.
- Manage Queue (PRO) - Allows you to see your upcoming posts to be shared; it's also possible to edit these posts before they get sent out from this tab. Editing the posts in the Manage queue is only possible in PRO.
- Sharing Log - From this tab you could see the status messages from your shares and see if there were any errors during sharing.
⚙️ Plugin Settings Explained
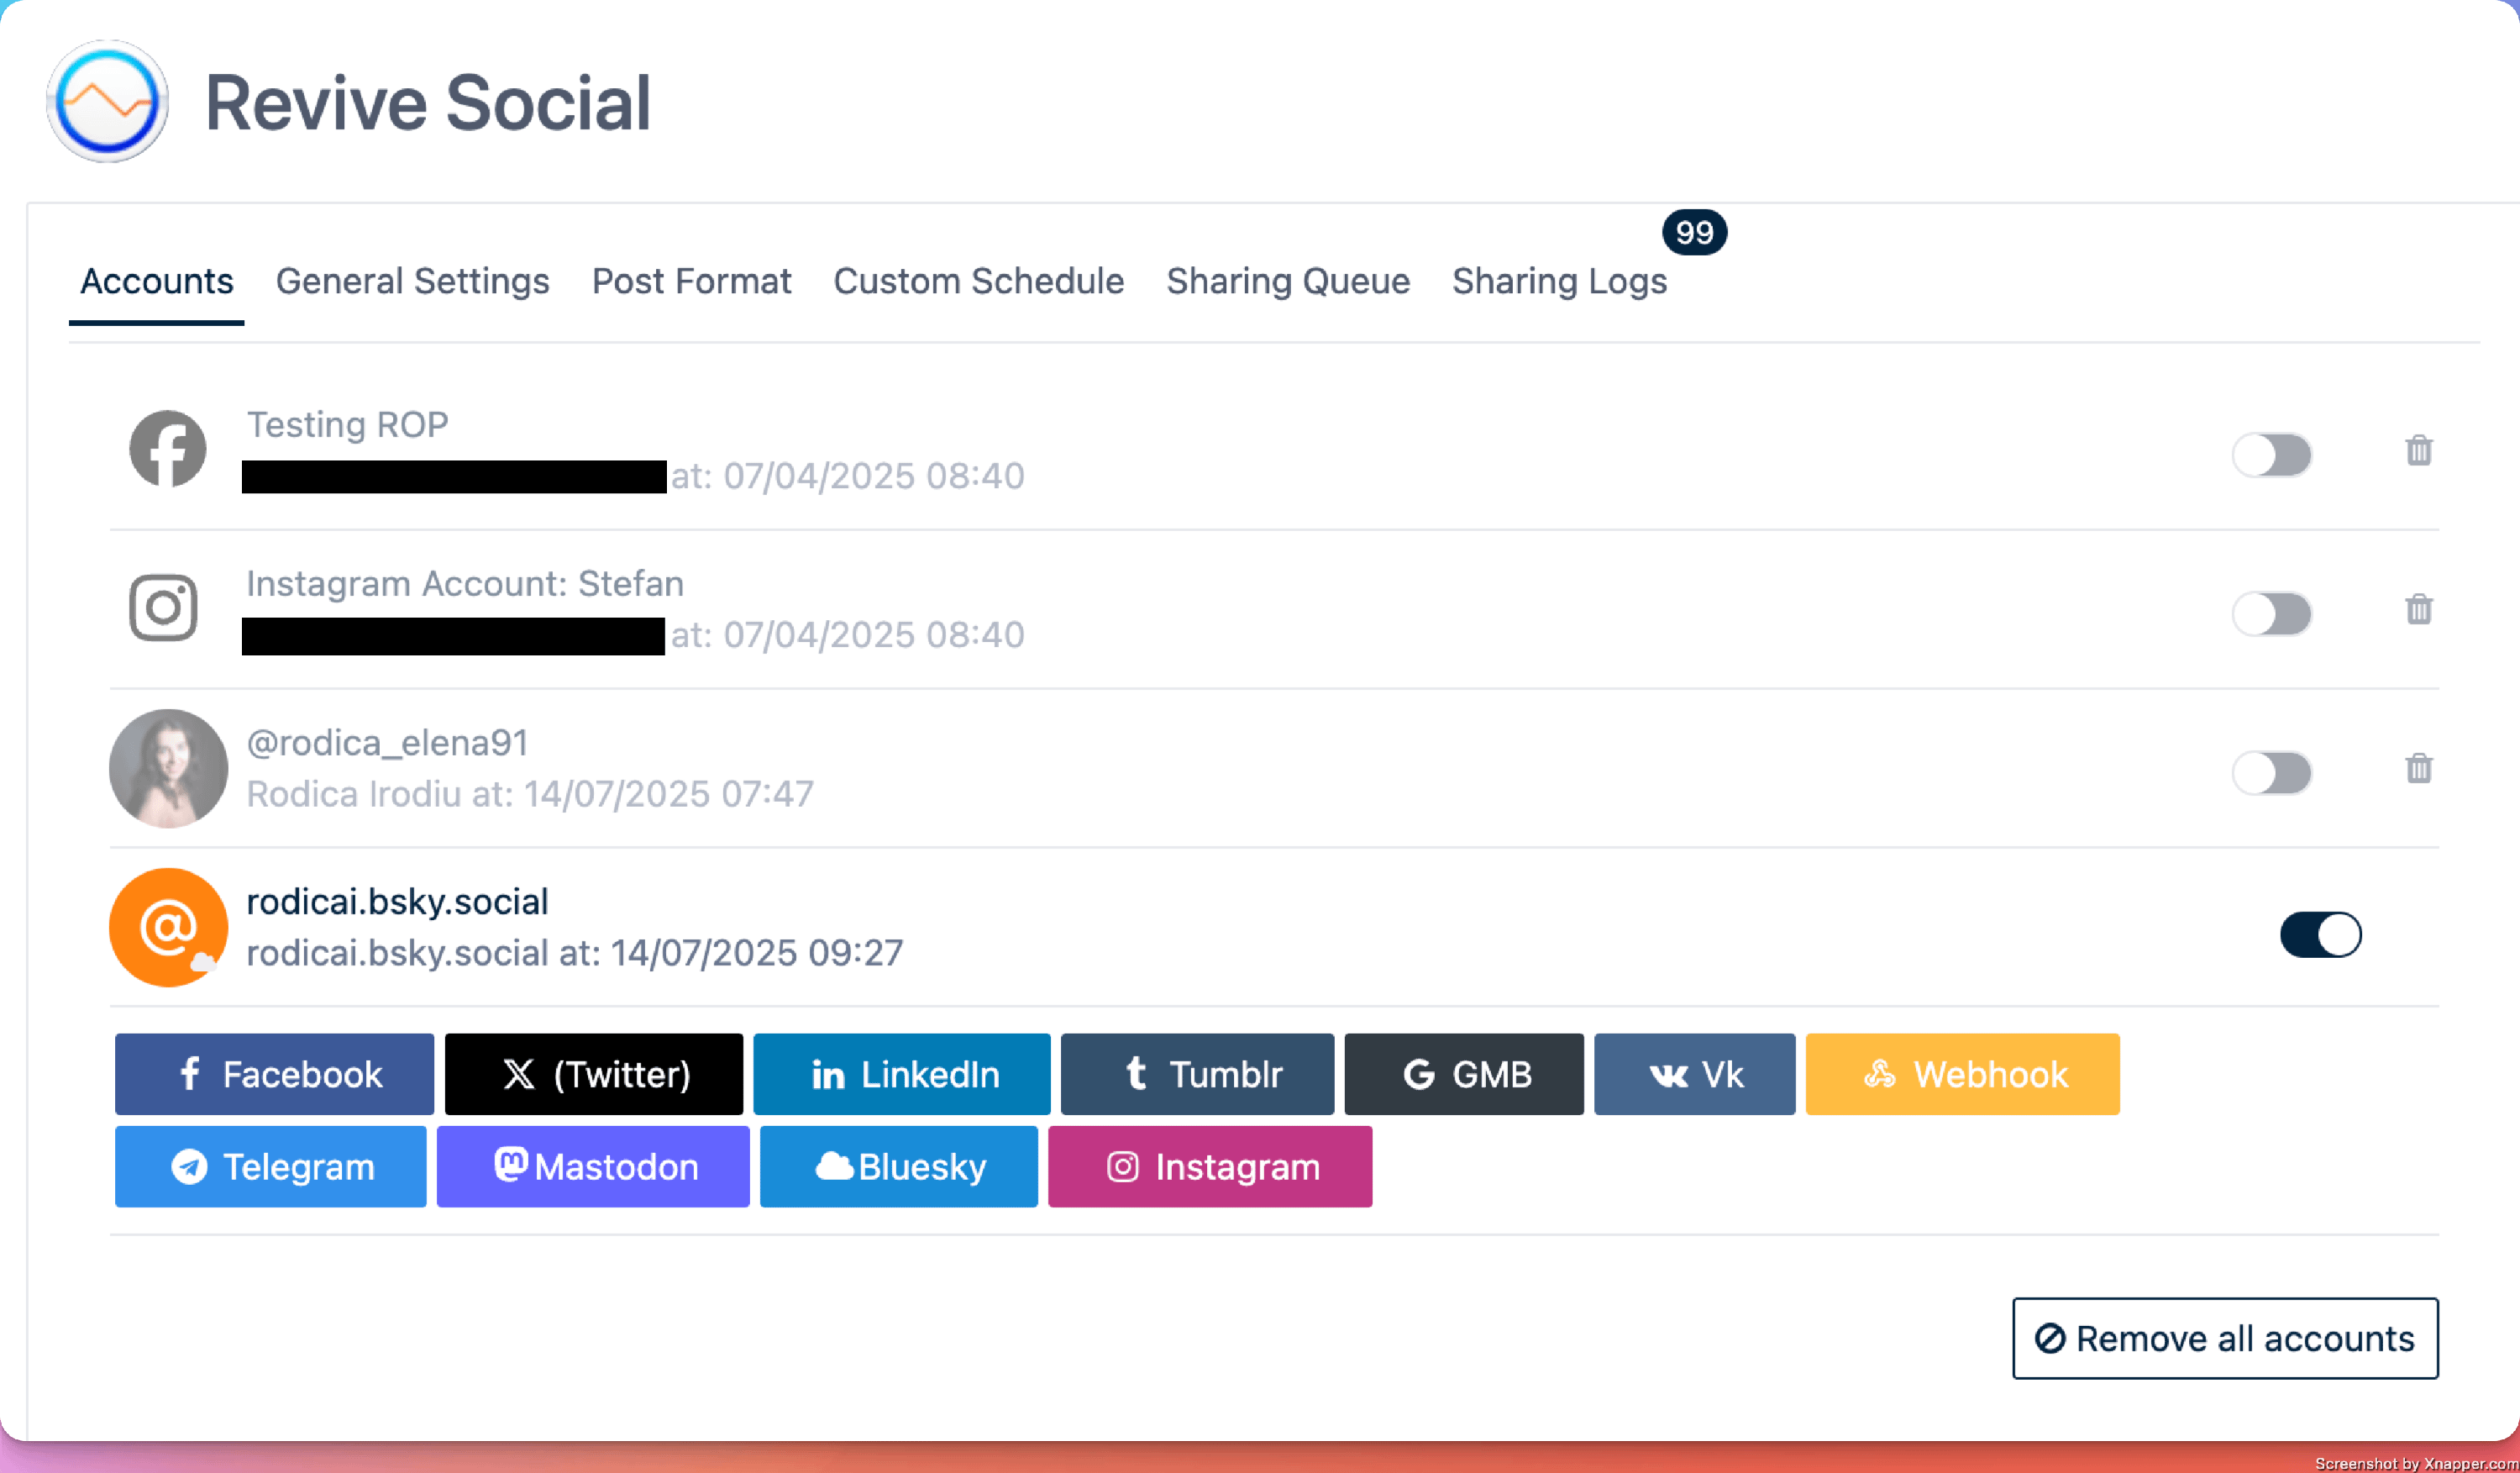
This is the accounts tab; from here, you can attach your social profiles.
The Revive Social plugin allows you to share posts on the most popular social media platforms. However, there are some limitations regarding the number of social media accounts available in the free version, so you can have only one Facebook page and one Twitter account.
📝 Note: The Revive Social plugin does have limits regarding the number of posts shared on Twitter, according to the pricing plan. Learn more about this here.
5. Configuring the General Settings
As their name suggests, all options from the General Settings tab apply across all connected social media accounts.
Here is a breakdown of them:
- Minimum Interval Between Shares
This value is set in hours and represents the time interval between which posts are shared using Revive Social.
For example, set the Minimum Interval Between Shares to 4 hours to avoid spamming.
- Minimum Post Age
This value is set in days, and represents the minimum “age” (the time interval since their publish date) of posts which are shared using Revive Social.
For example, set the Minimum Post Age to 30 days so new posts aren't shared immediately.
Want to be able to customize the Maximum Post Age as well? Check the PRO version to have access to this option and many more.
- Share More Than Once
Toggle for continuous sharing ( If all available posts have been shared to your active accounts, we will automatically restart the sharing ).
This option can be useful for sites with a large number of posts. By the time Revive Social shares all posts, it’s perfectly fine to share the older ones again without your followers wondering why a post is being shared again.
- Taxonomies
In WordPress, taxonomies are Categories and Tags. Custom taxonomies can also be added using custom code or dedicated plugins.
Under this Taxonomies control, you have the option to select specific categories and/or tags.
If the Exclude? option is disabled, Revive Social will share posts just from the selected taxonomies.

If the Exclude? option is enabled, Revive Social will share posts from all other taxonomies, other than the selected ones

- Enable Google Analytics Tracking
Check this option to add UTM campaign tags to your shared URLs, so you can monitor traffic from your Google Analytics dashboard.
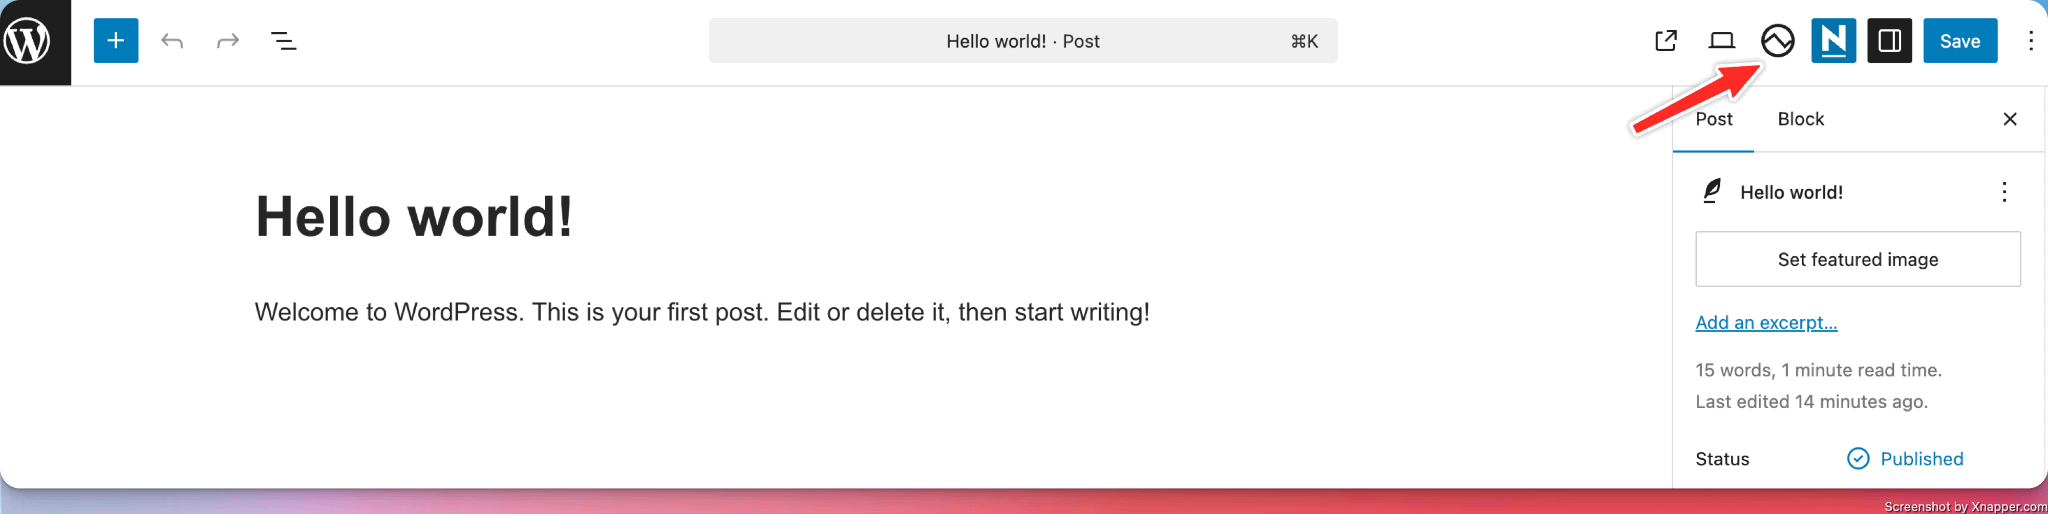
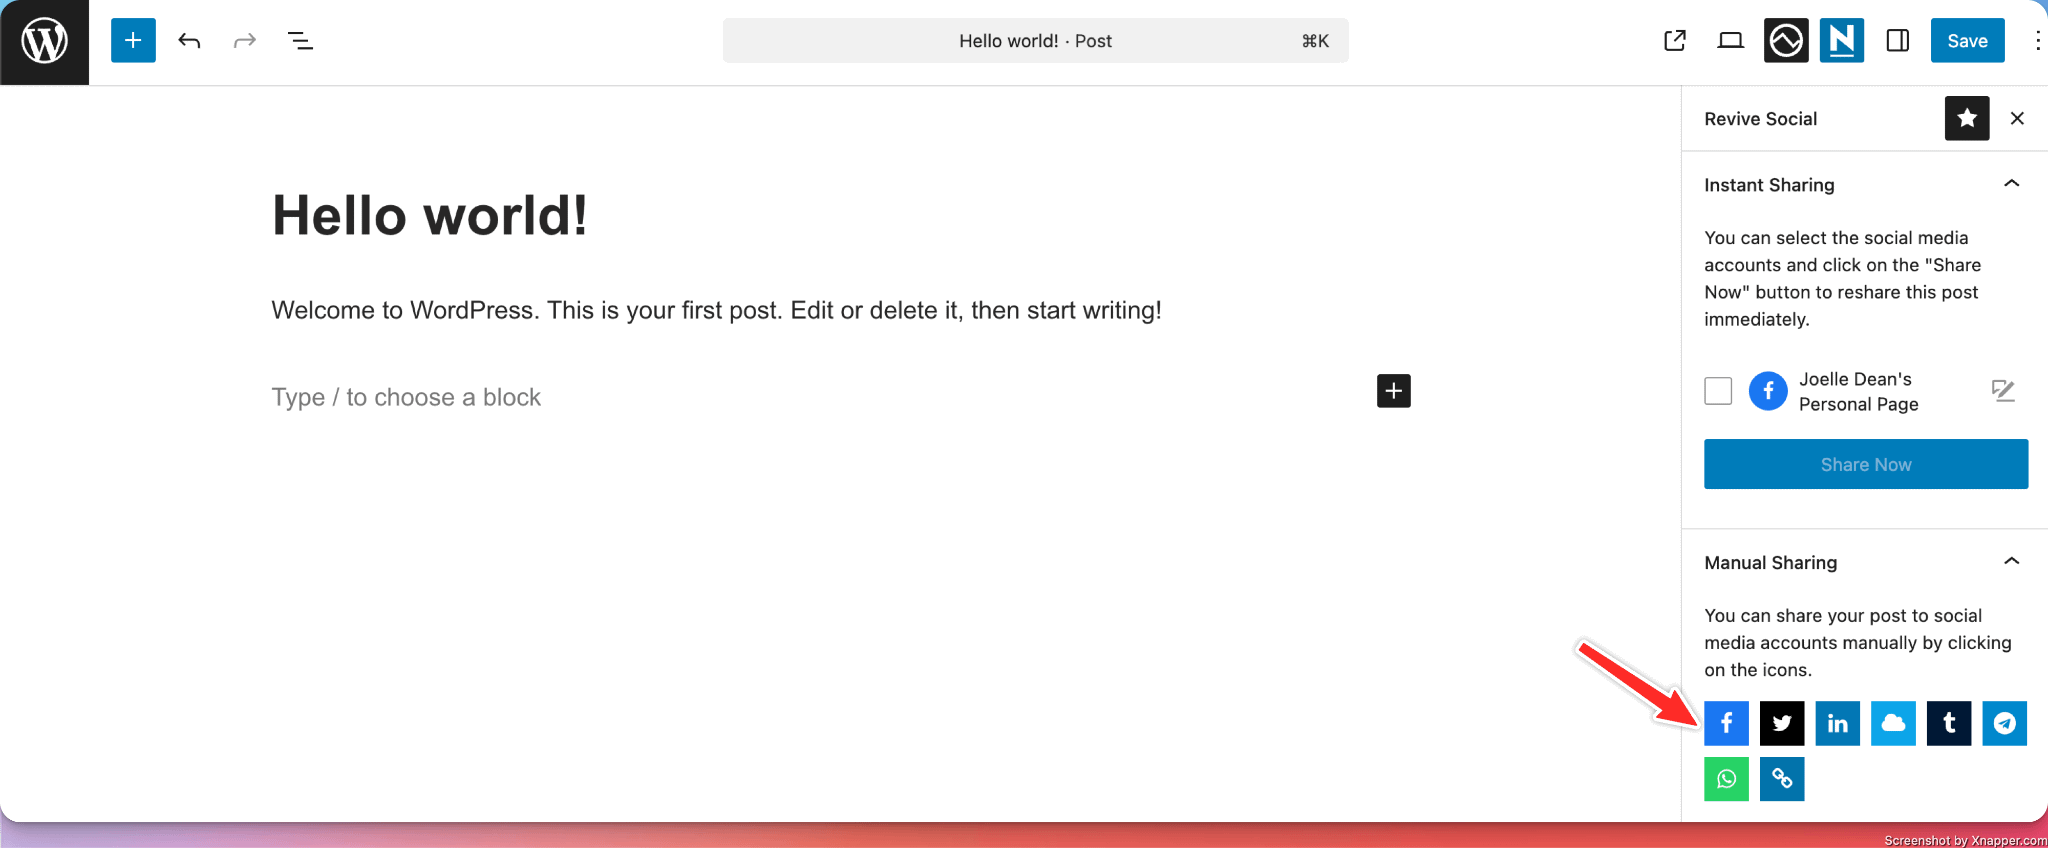
- Enable Instant Sharing Feature (Post on Publish)
When the Enable Instant Sharing Feature (Post on Publish) is enabled, a new Revive Social icon will be available for all posts, at the top of the post editor.
Once clicked on, you will find options for Instant Share and Manual Share.
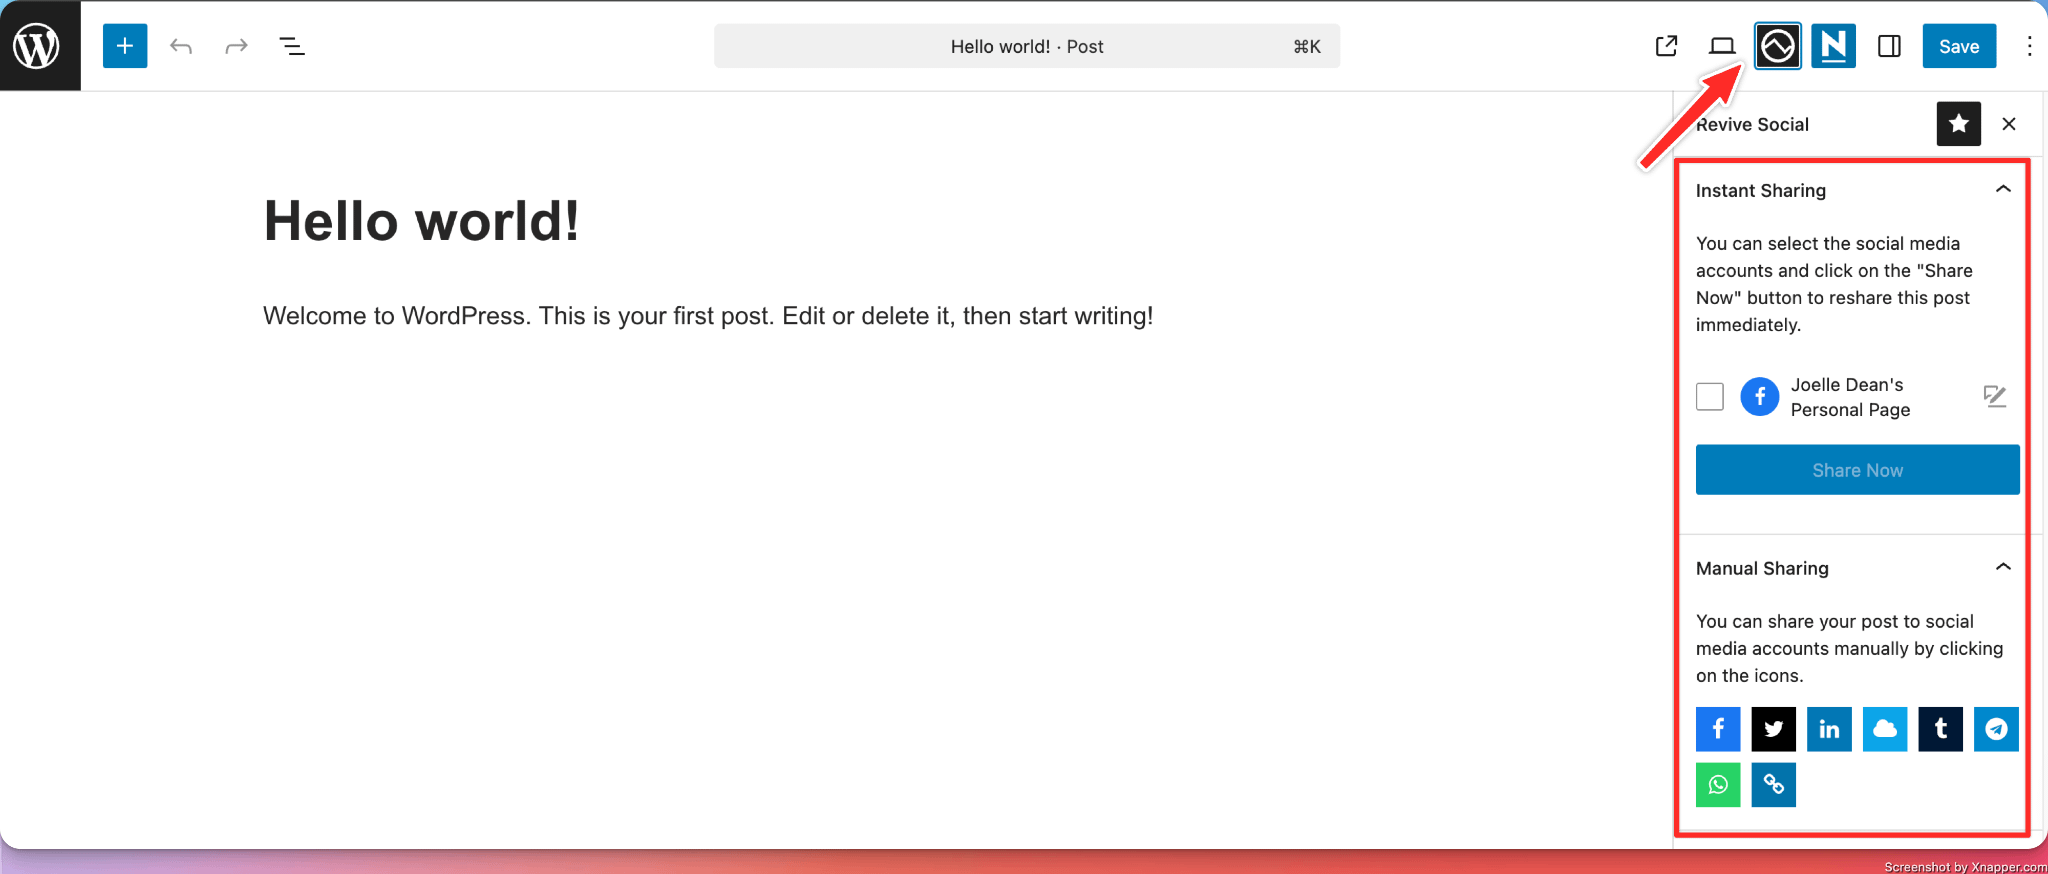
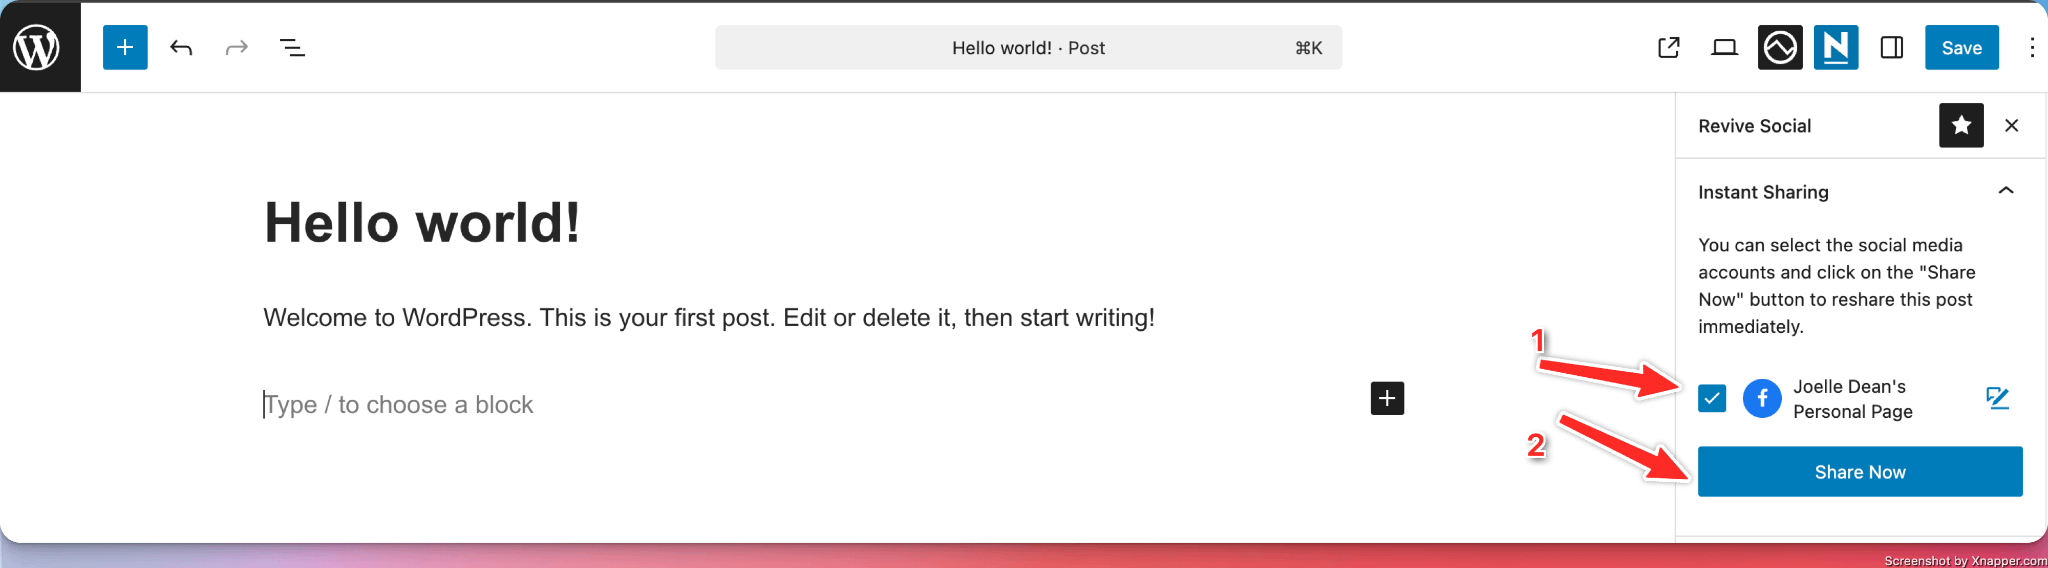
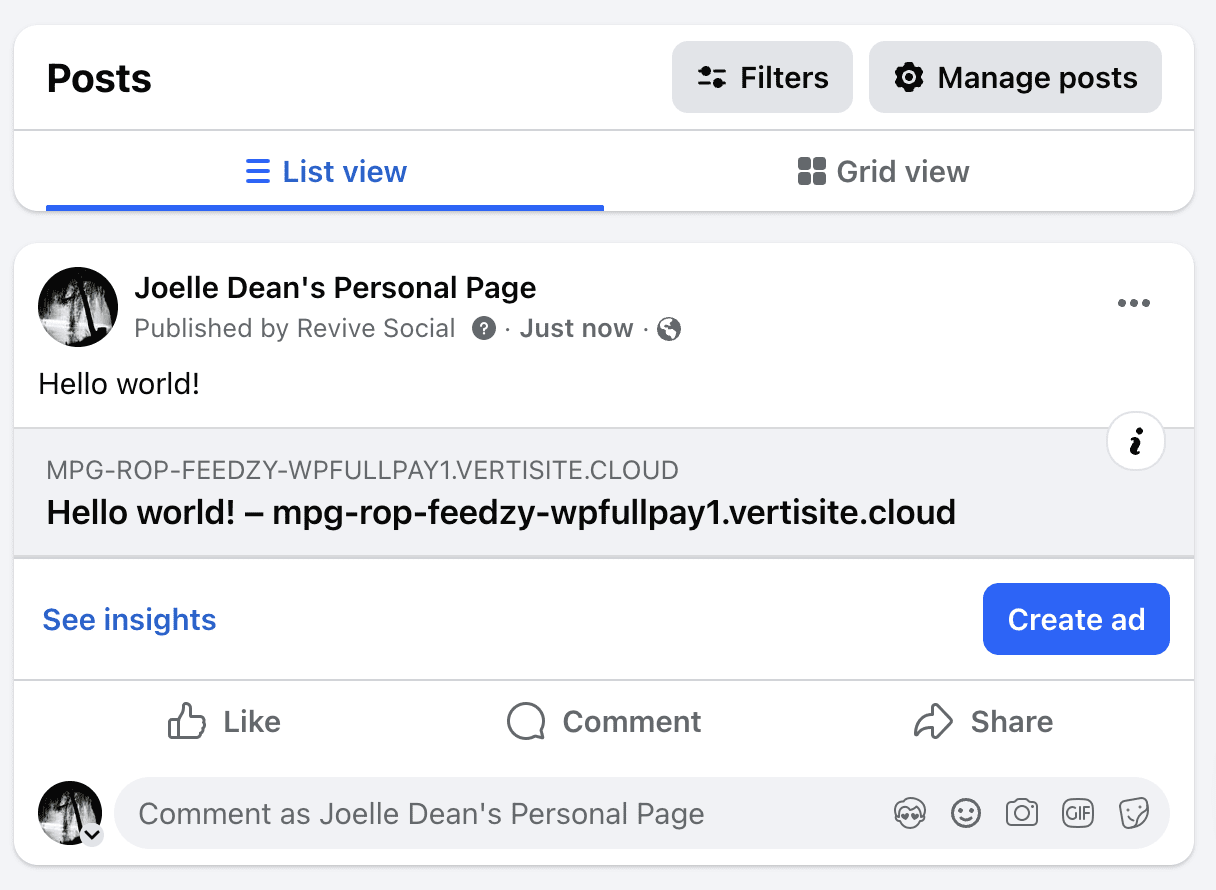
a) Instant Sharing
Select the social network where you want to share the post, and click on the Share Now button.
Want to share a custom message? Custom instant share messages are available in the Pro version of the plugin.
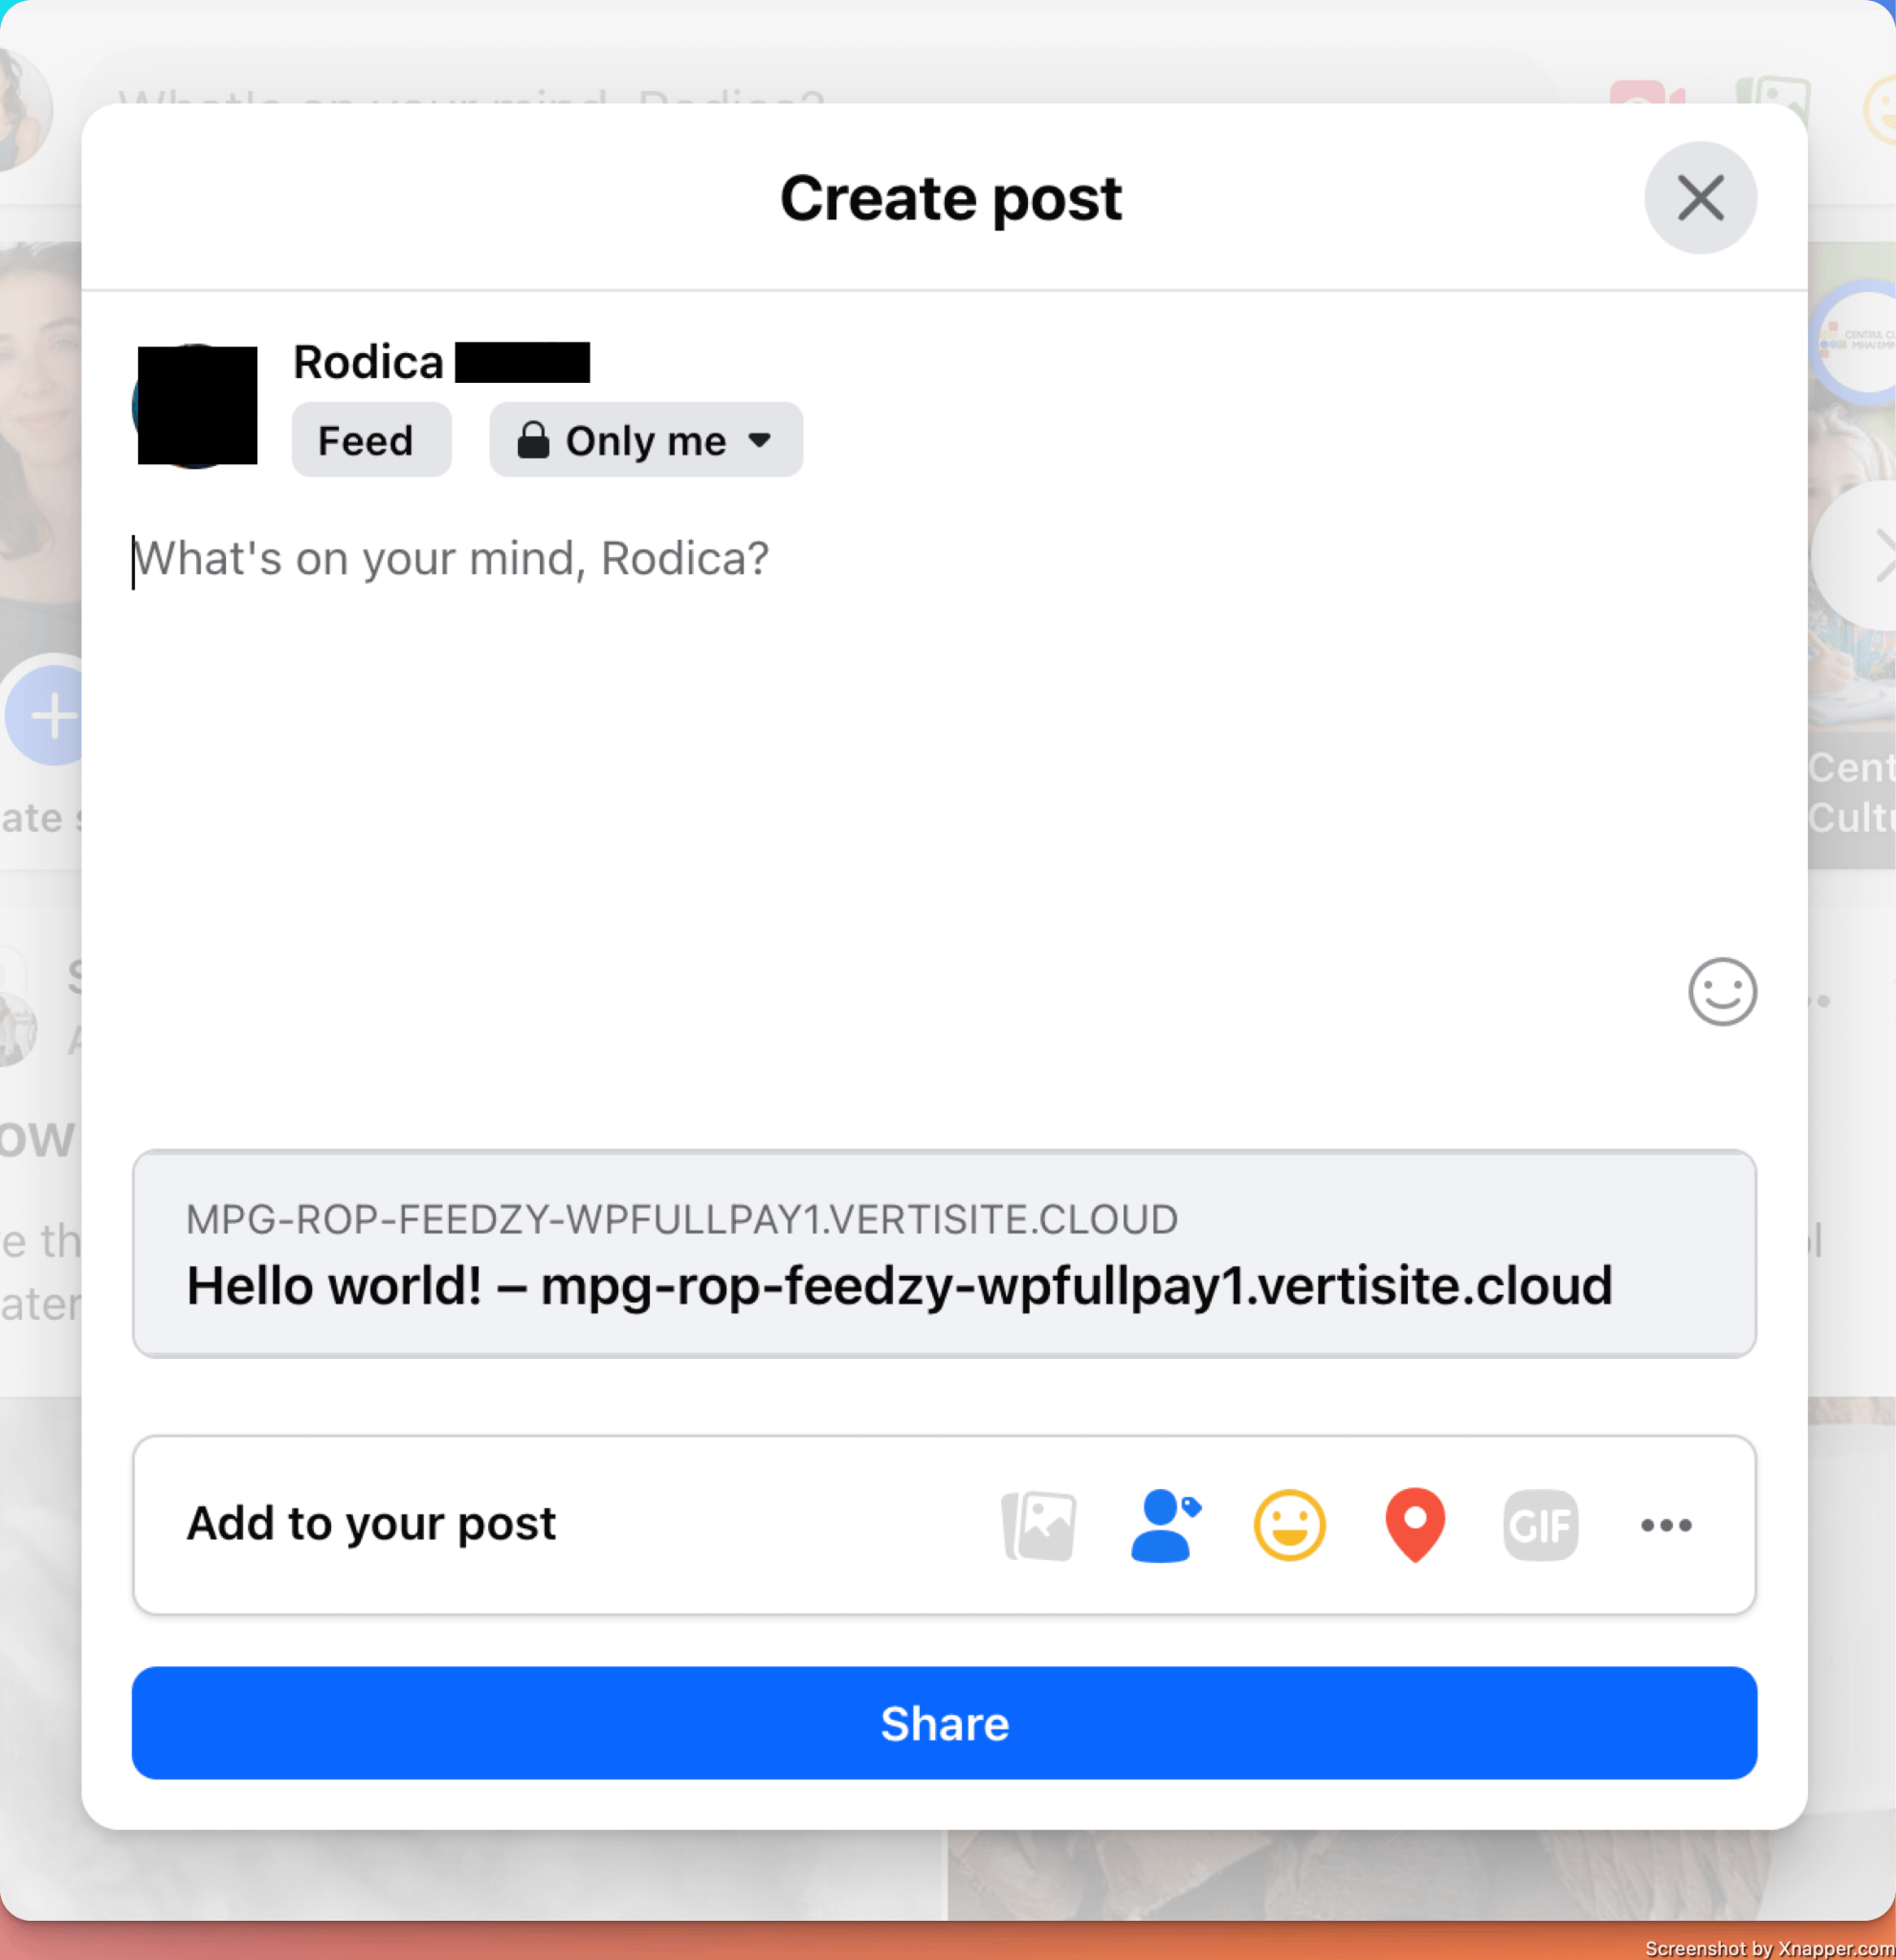
b) Manual Sharing
Just click on one of the icons, and a new page will open where you can manually share the current post.
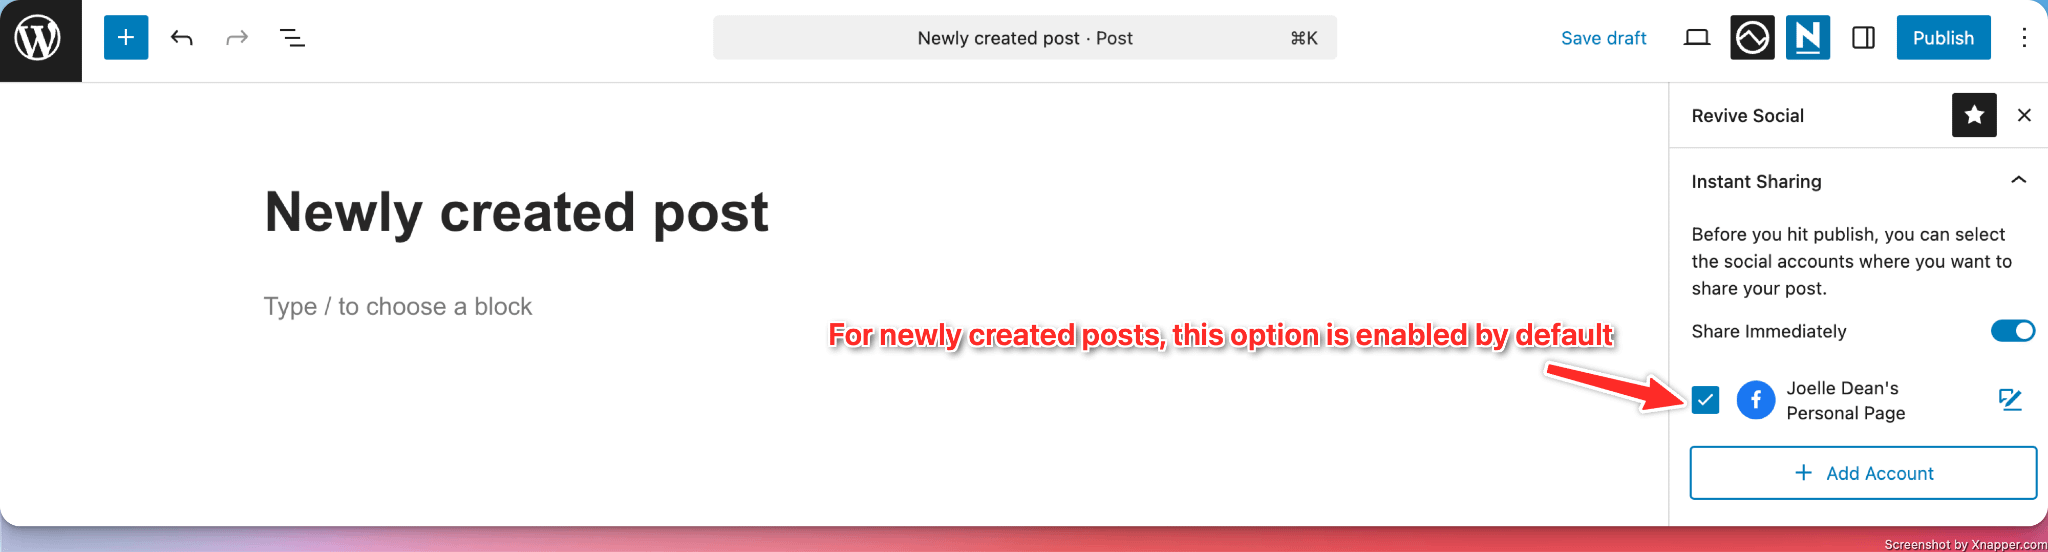
- Enable Instant Sharing By Default
When the Enable Instant Sharing Feature (Post on Publish) option presented before is enabled, a new Enable Instant Sharing By Default option becomes available.
When Enable Instant Sharing By Default is enabled, the social networks are already selected by default, in the Instant Sharing section. But this happens just for newly created posts. For already existing posts, this won’t apply.
- Housekeeping
When this option is enabled, all saved settings will be deleted when the Revive Social plugin is deleted.
- Contributing
If this option is enabled, you agree to send anonymous data to help us understand how you use the Revive Social plugin. More details can be found here.
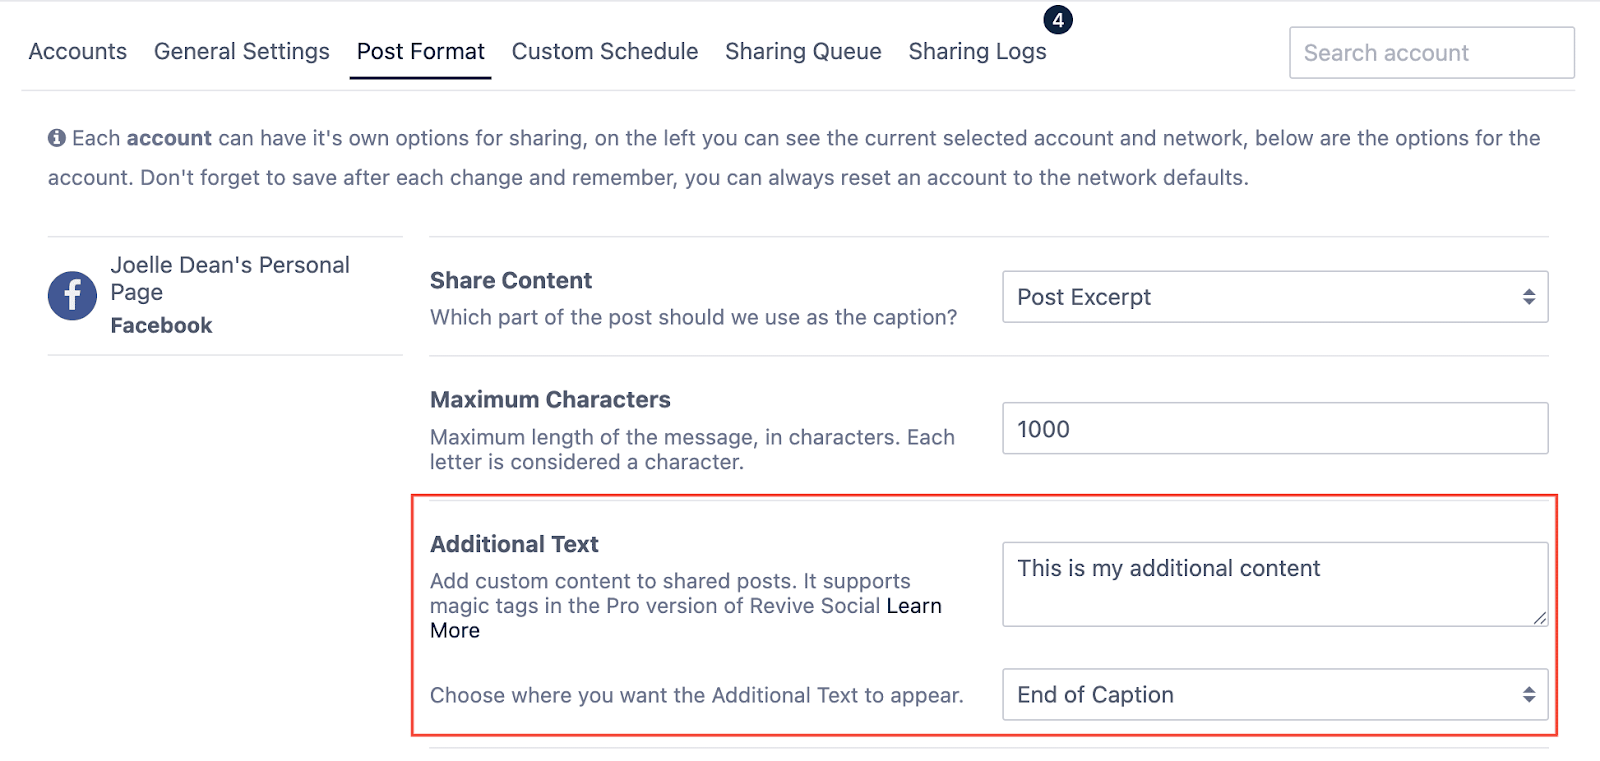
Customizing the Post Format
While the General Settings apply across all connected social media accounts, in the Post Format tab, you can set up specific options for each connected social media account.
- Share Content
Using this option, you can choose which part of the post will be used as the caption once the post is shared.
The options are:
a) Post Title
b) Post Content
c) Post Title & Content
d) Post Excerpt
Check the PRO version to have access to Custom Fields or Custom Content.
- Maximum Characters
Maximum length of the message to be shared, in characters. Each letter is considered a character.
Note: This value can go above 140 for networks that support this, such as Facebook or LinkedIn, but for X(Twitter), the max is 140 characters, including the link.
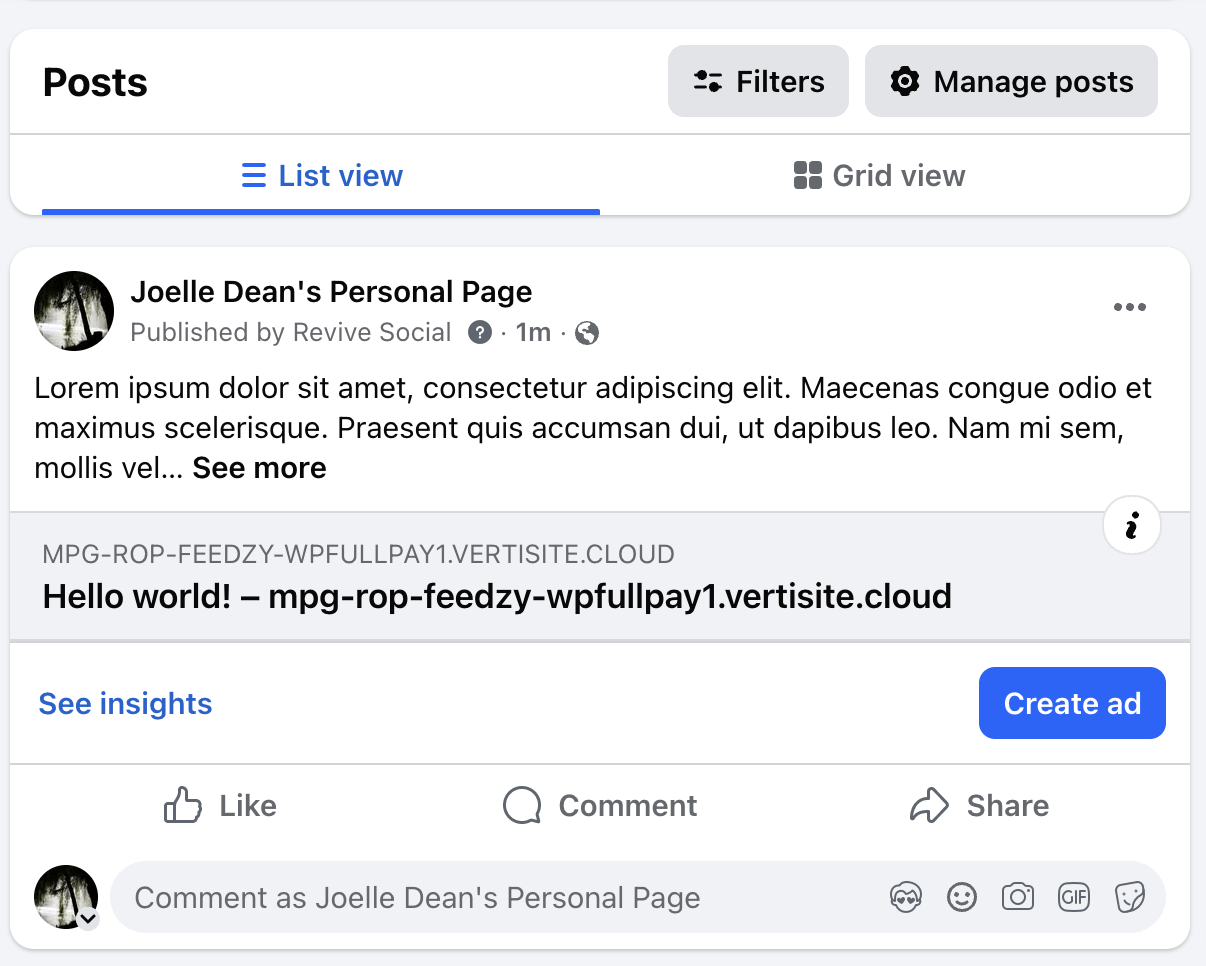
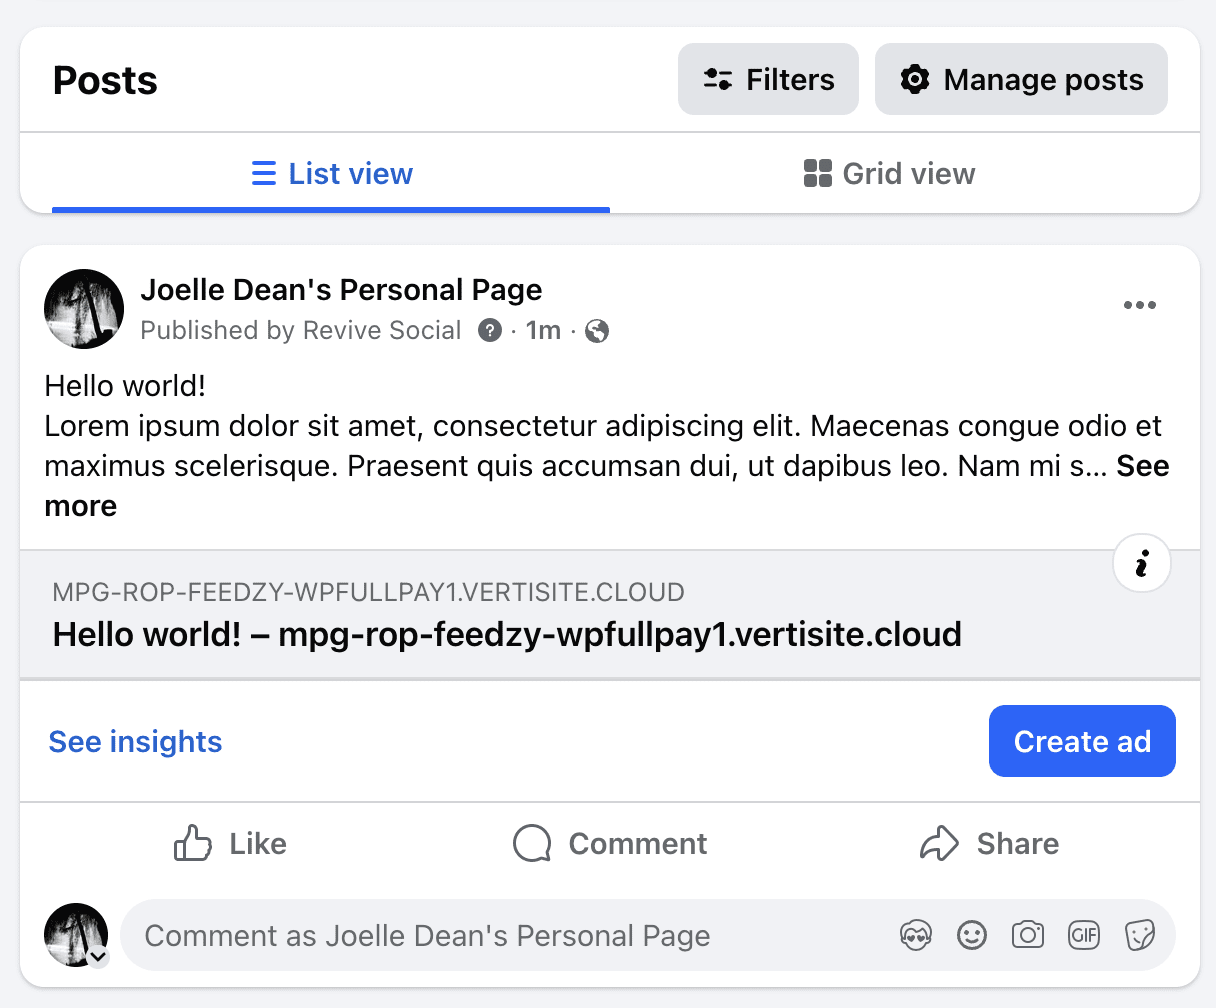
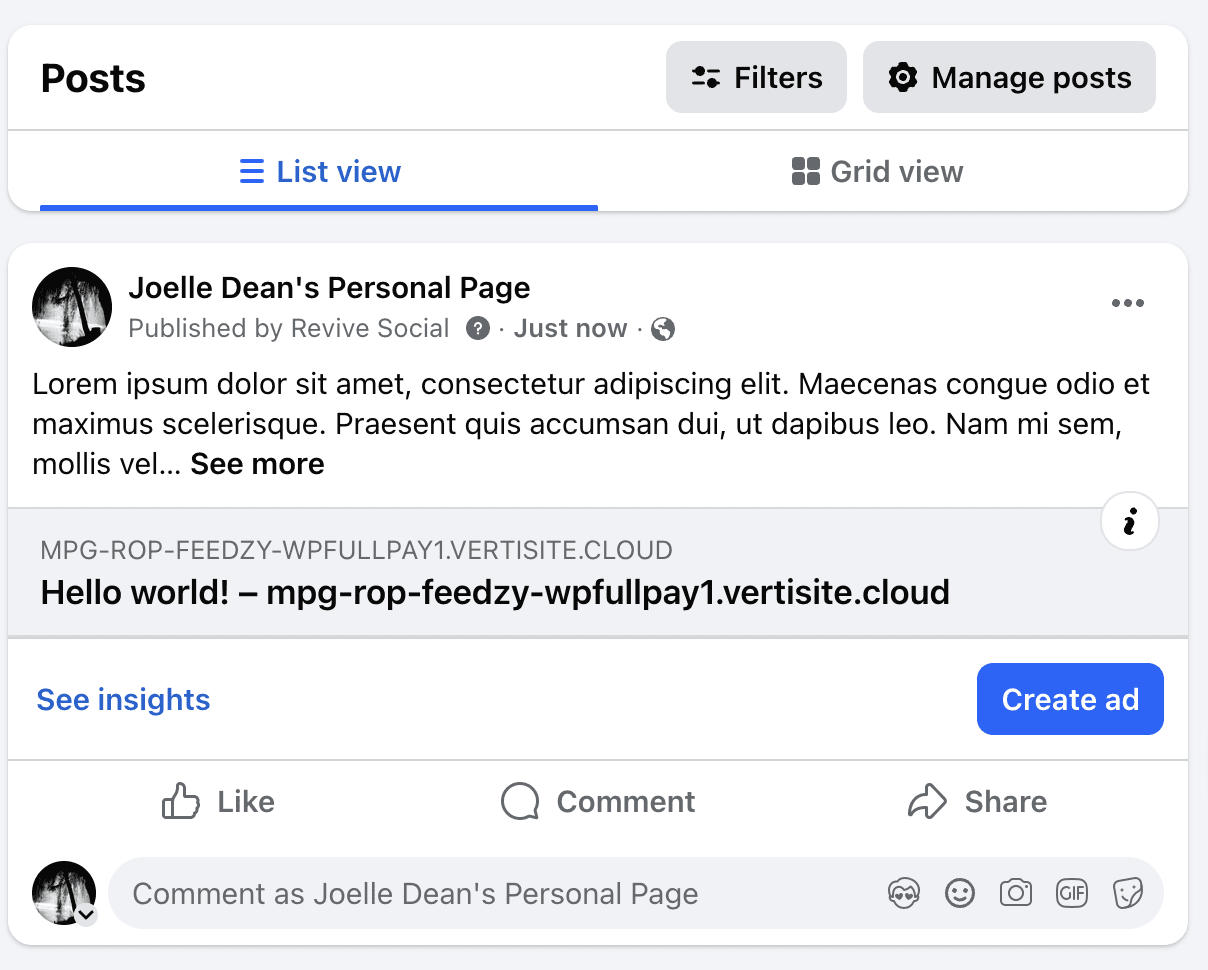
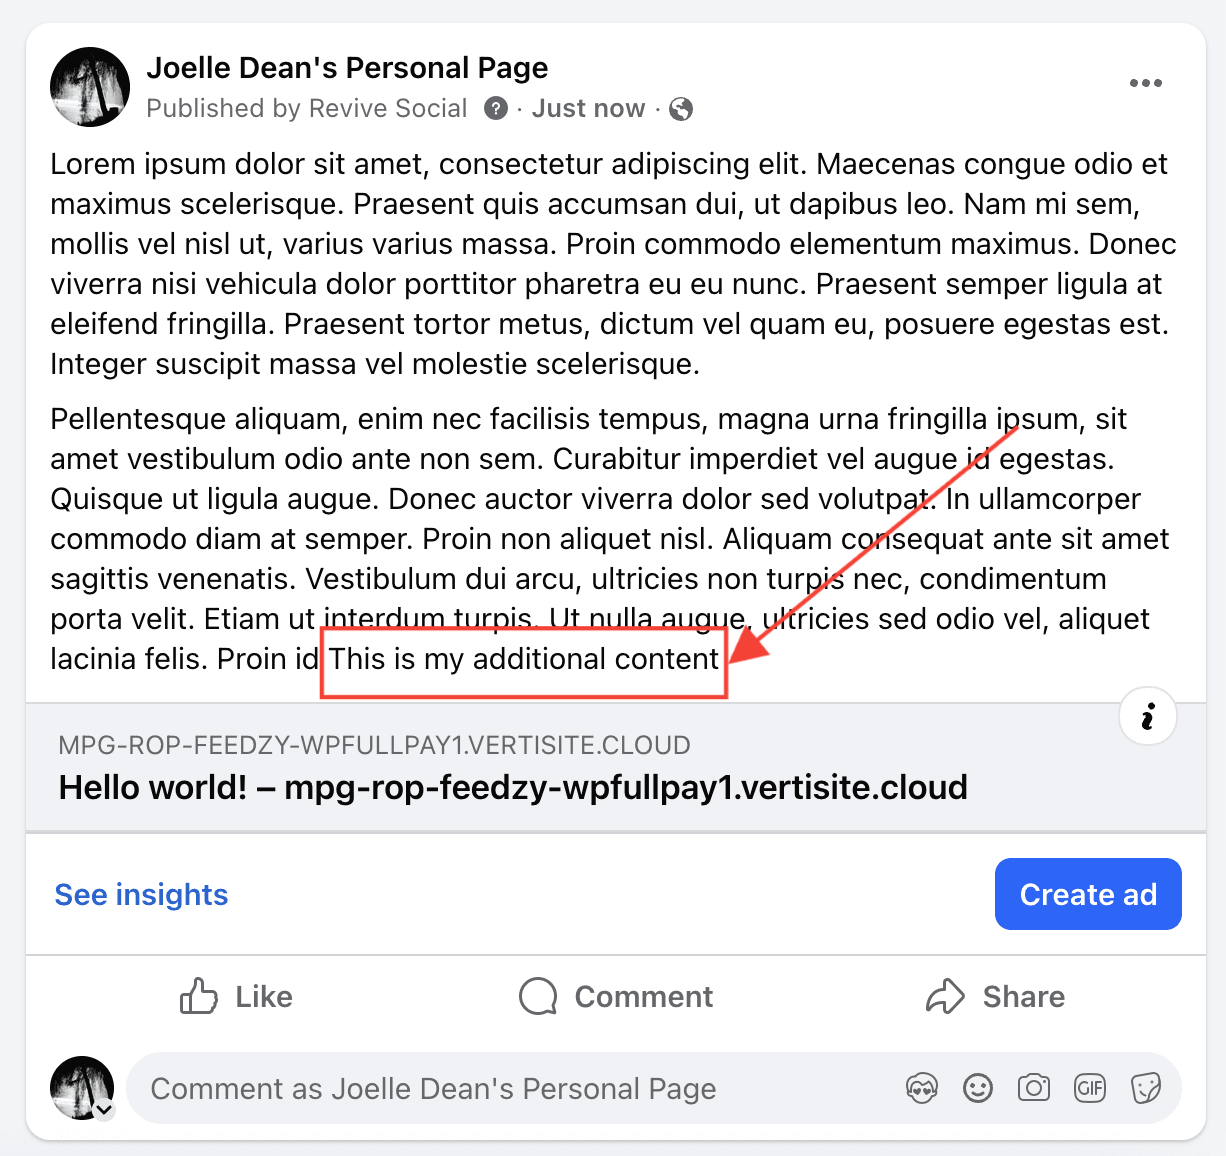
- Additional Text
Use this option to add additional text to the shared content.
Make sure you also select where this additional text should be added:
a) At the beginning of the caption
b) At the end of the caption
Note: When used, this Additional Text option takes priority over the default shared content. This means that, for example, if you have a maximum length of 140, and your post title is taking all of those characters already, Revive Social will still try to display the Additional Text by making the post title shorter.
- Use URL Shortener - Revive Social could automatically shorten your URLs on the fly while sharing. Use this option if you have a long domain name and long post names and are sharing to networks such as Twitter.
Custom Schedule
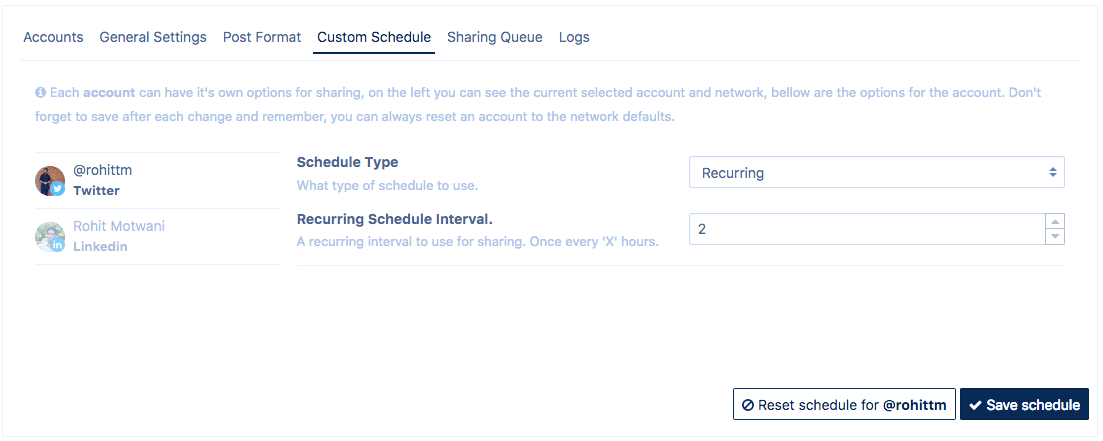
There are two types of scheduling available:
- Recurring
Just like before you could set these settings per social profile, so you could have Twitter sharing every 2 hours and LinkedIn every 8 hours.
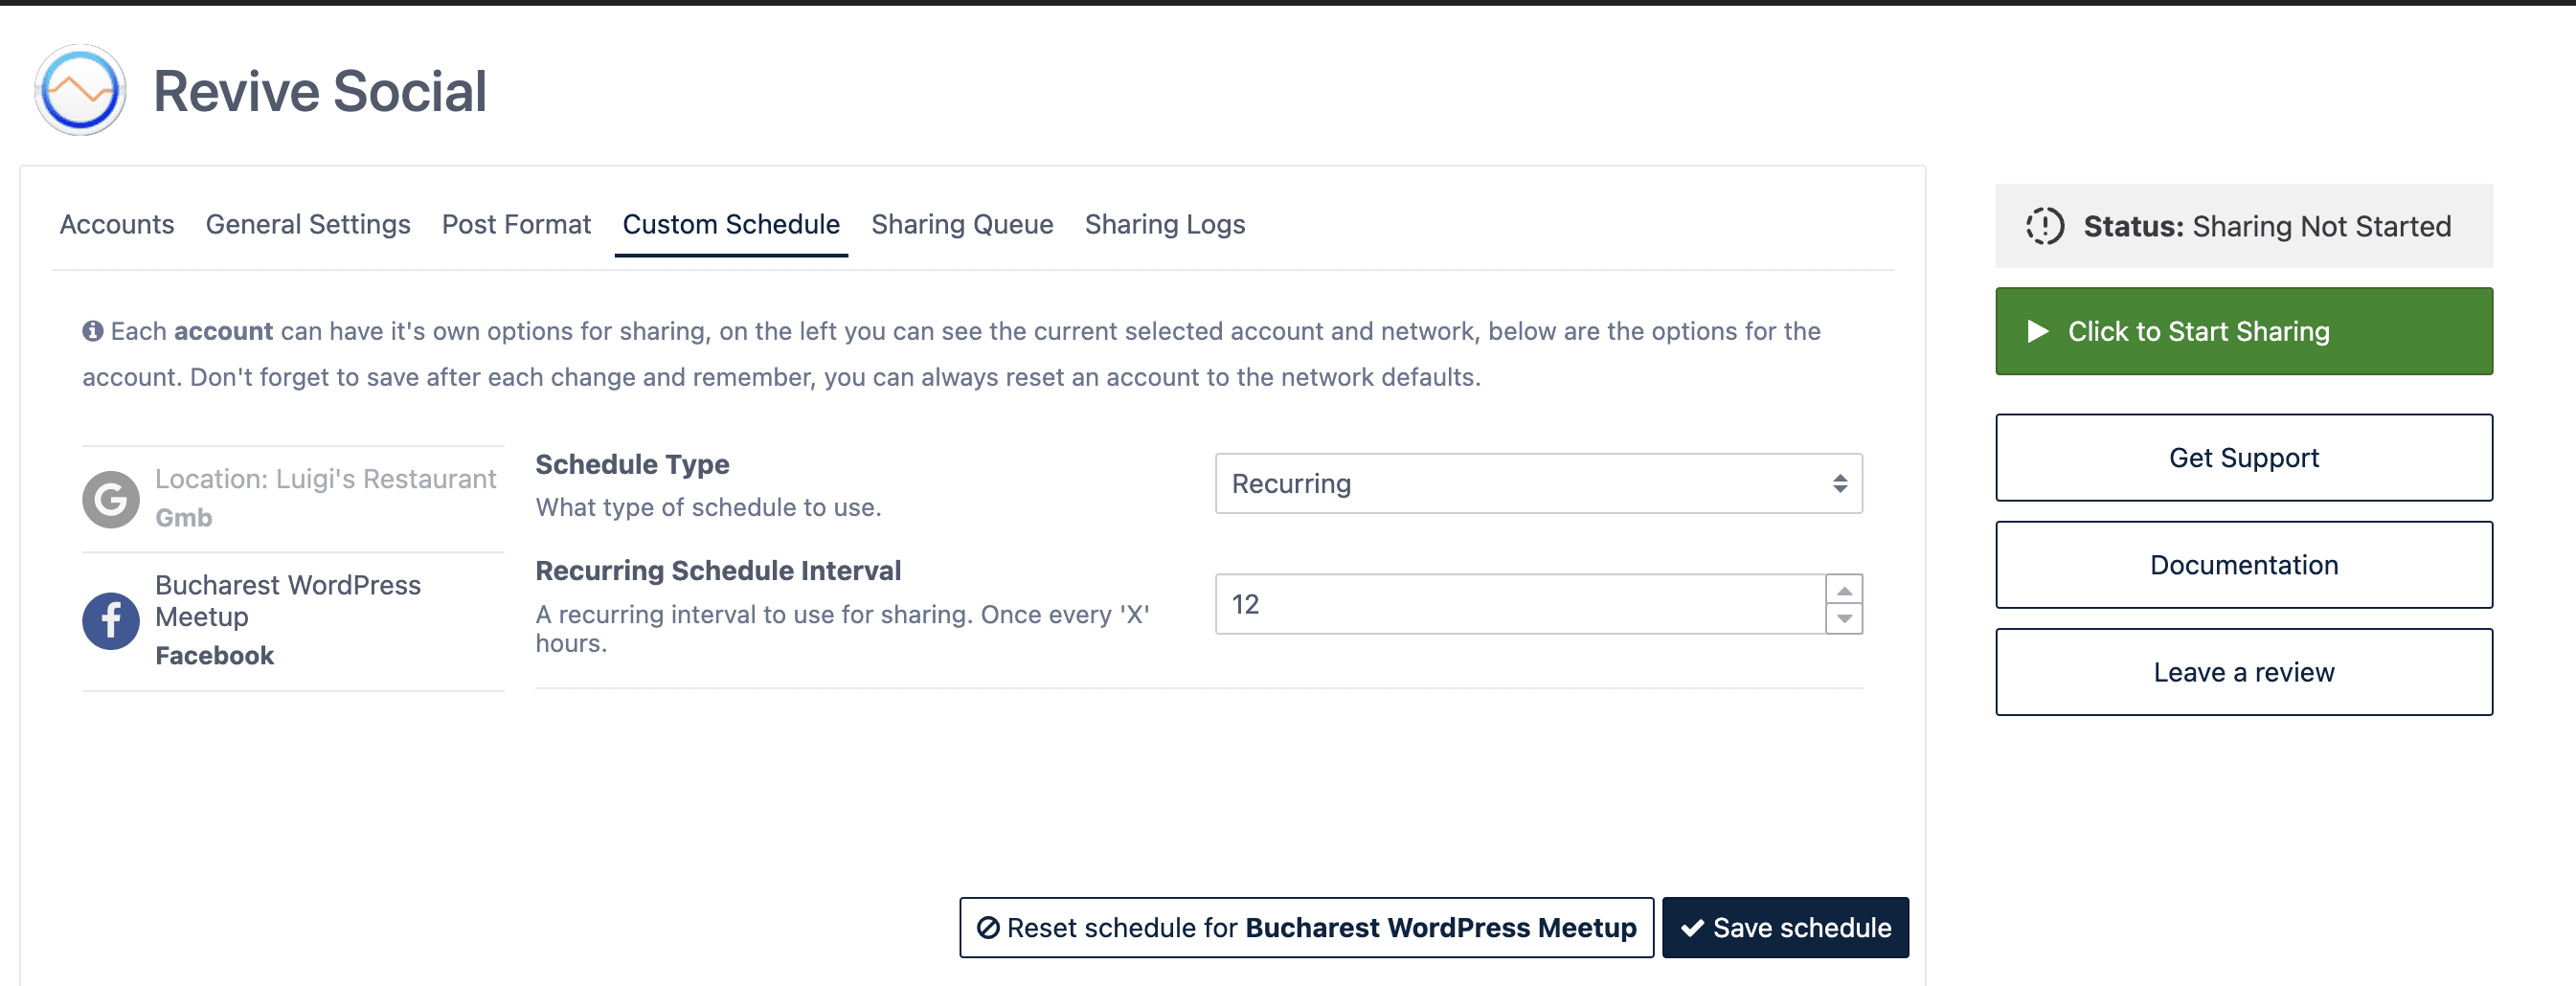
- Fixed
You could choose to share every certain number of hours (every 2 hours, every 2 1/2 hours (2.5) etc.) or you could create a custom schedule.
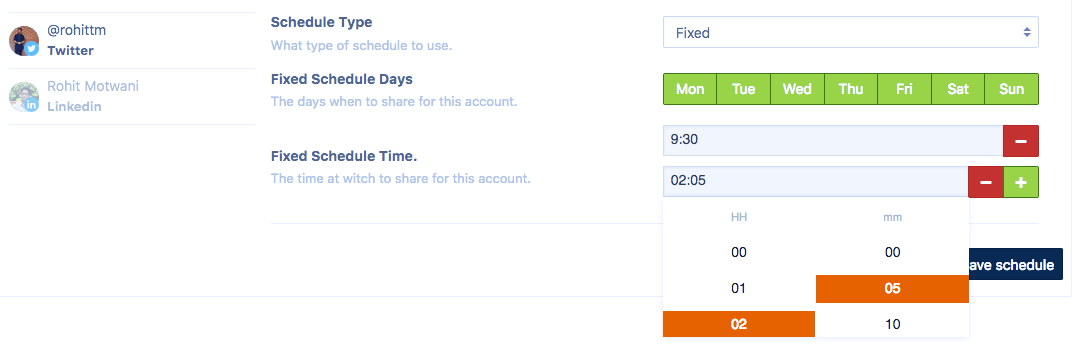
In the above image, we have chosen to post from this profile (the one selected on the left) every day of the week at 09:30 AM and at 02:05 AM. You could add as many post times as you wish; please keep in mind that these posts may not always fire at the exact time you set but will be accurate by a few minutes more or less.
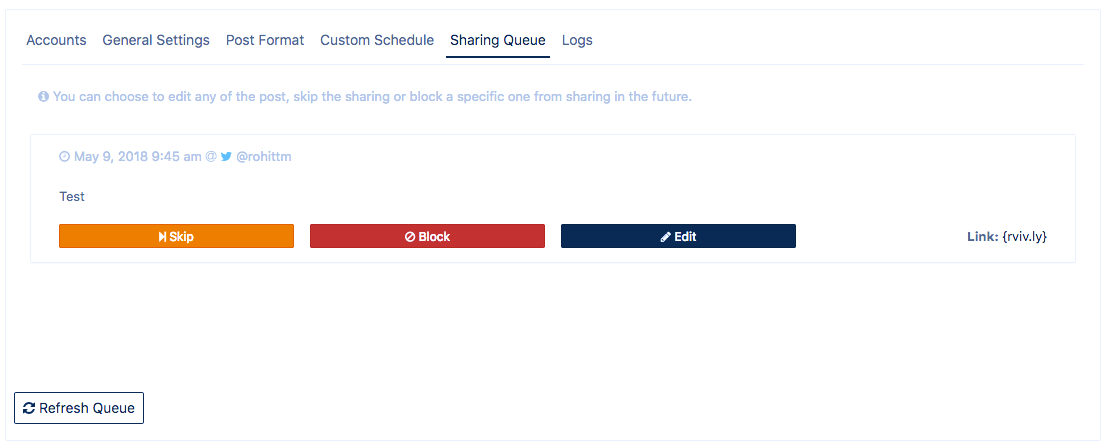
Sharing Queue
The post queue lets you see the upcoming posts to be shared and their content and images; if you select to share them with featured images, click the pencil icon to edit the post or the trash icon to remove it from the queue.
Logs
The log shows the status of previously shared posts. Use it to monitor whether your posts are being posted or not.

🛠 Basic Troubleshooting
Some basic troubleshooting steps for Revive Social are as follows:
1. Try disabling all plugins on your website then check if the issue you are experiencing still occurs. If it doesn't then start enabling each plugin again one by one to filter out the one which causes the problem.
2. If posts are not being posted to certain profiles then try creating a new profile and then connect it to Revive Social and try sharing it. Also, try sharing a sample post to see if that post goes through.
3. Disconnect the social profile and reconnect it, in the case of Facebook, LinkedIn, etc. Try creating a new Application and setting it up again as before.
🎥 Video - Connecting Social Accounts to Revive Social
If your problem still exists, submit a support ticket at: https://revive.social/support/. Be sure to let us know if you've tried all these steps while submitting your ticket to help us deduce possible issues quickly.