
Appearance
How to auto share from WordPress to Discord
Learn how to automatically share WordPress posts to a Discord channel using Revive Social's webhook integration with Zapier.
This is a Premium Feature! Get immediate access to it with any Pro subscription of Revive Social here
In this article
Introduction
Integrating your WordPress plugin with Zapier enables seamless automation of sharing your posts on various social media platforms. This guide will walk you through setting up a webhook and using Zapier to automate the process, ensuring your content reaches a wider audience effortlessly.
📝 Note: More details about the connection between Revive Social and Zapier can be found here.
Integrating with Zapier
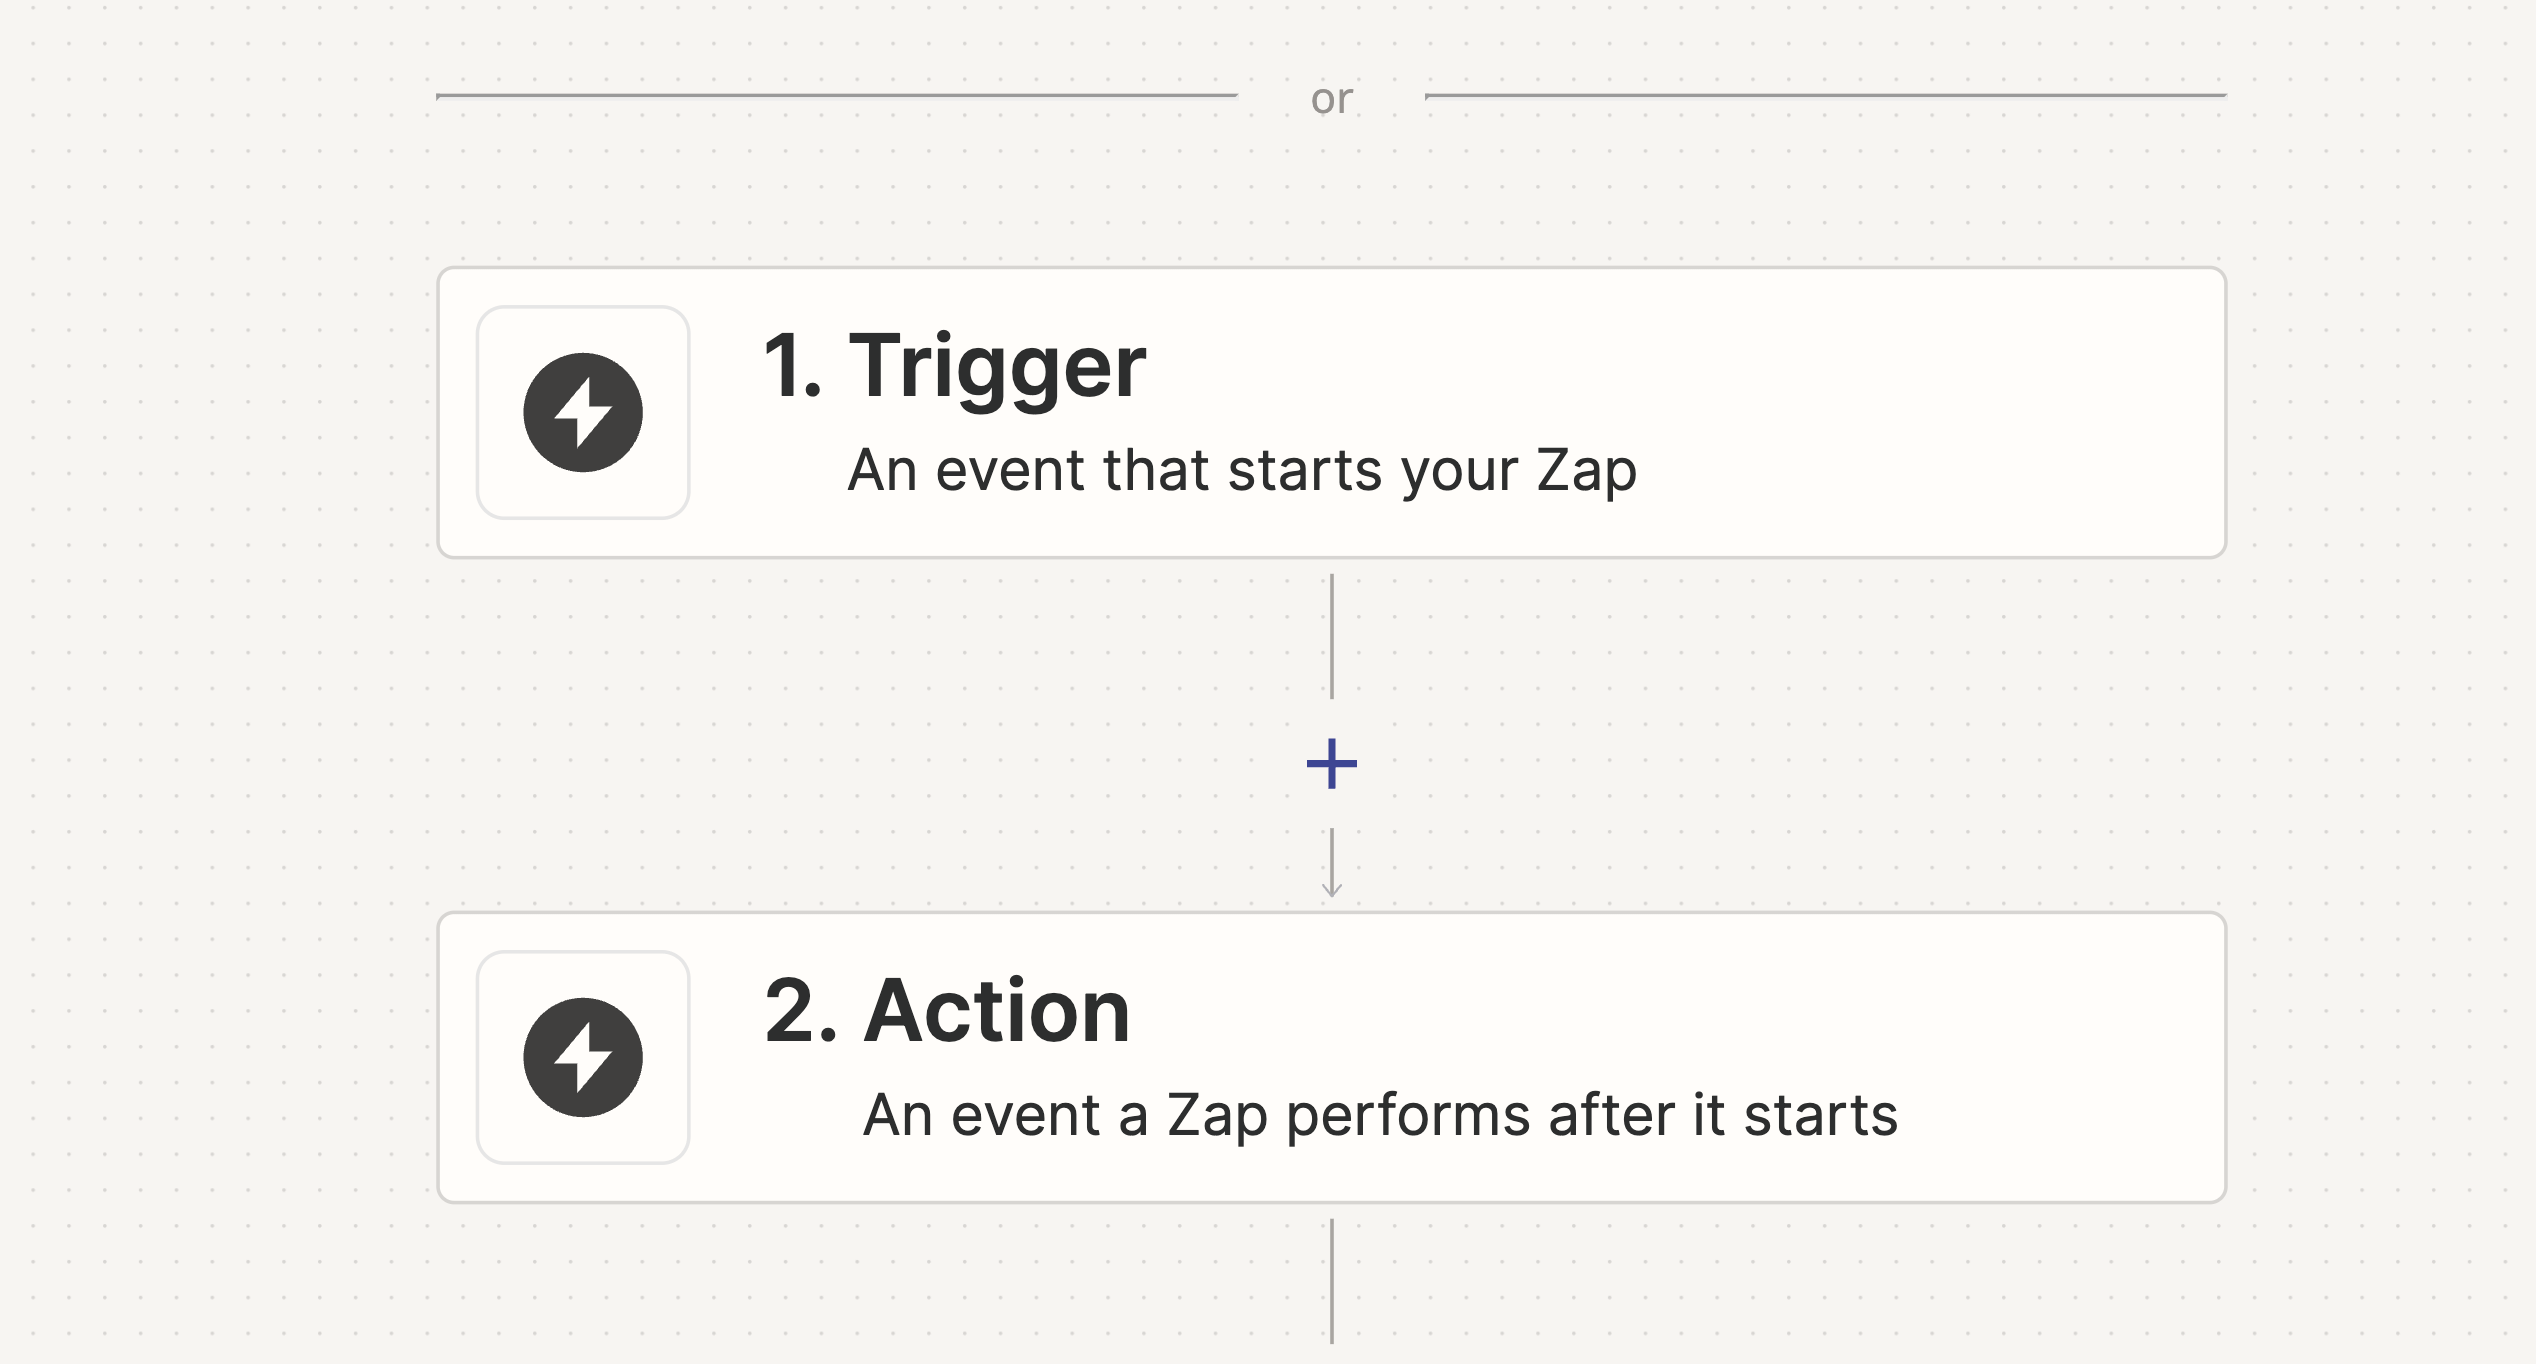
Follow these steps to create a Zap in Zapier that will automatically share your WordPress posts on social media platforms:
Step 1: Choose a Trigger
- Log in to your Zapier account.
- Click on "Create Zap".
- Select "Webhook by Zapier" as the trigger app.

Step 2: Set Up the Webhook Trigger
- Choose "Catch Hook" as the trigger event, then click "Continue".
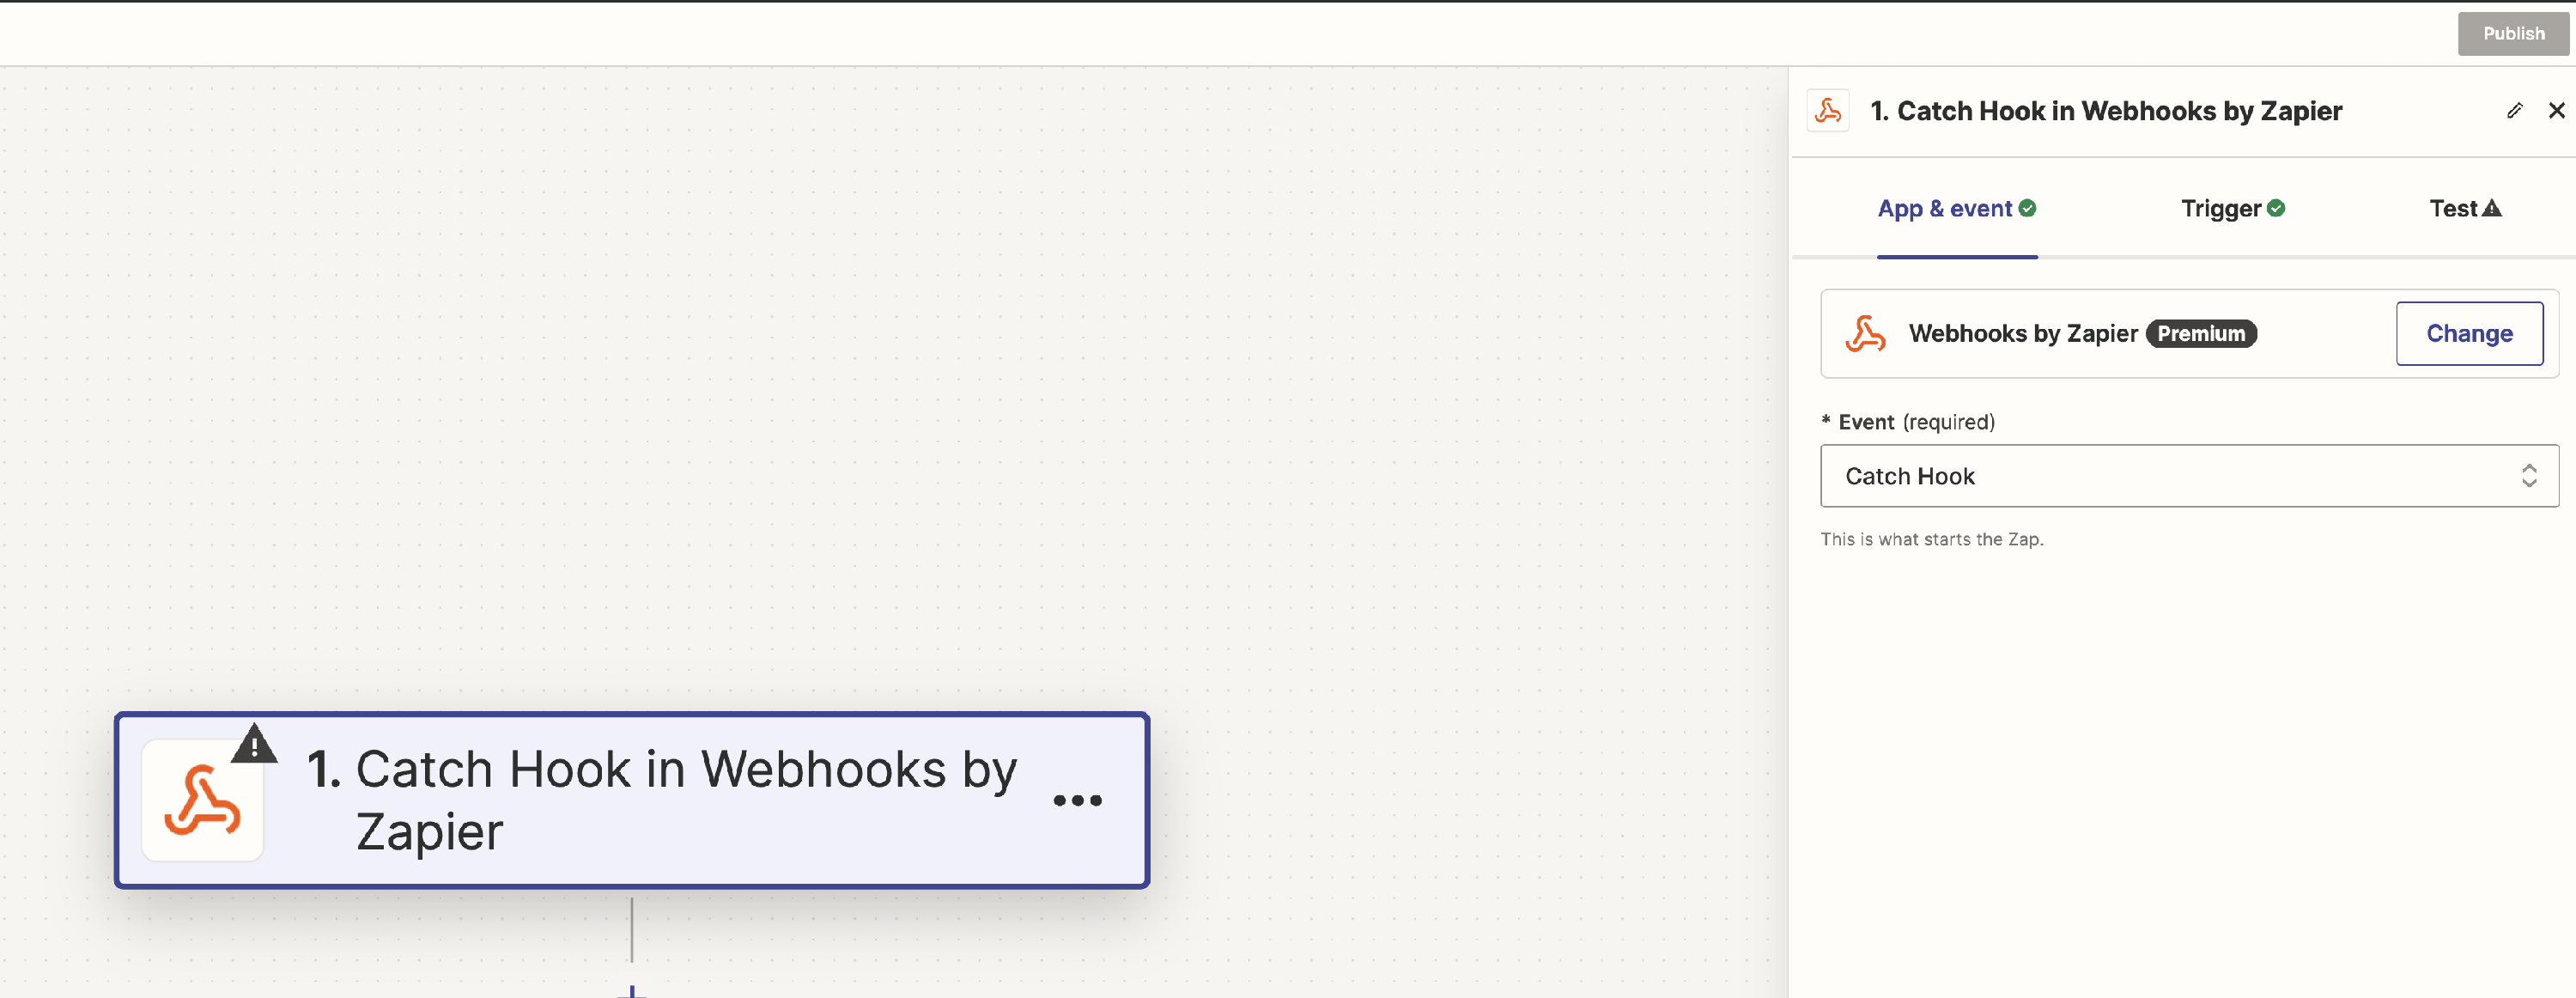 3. Leave empty the Pick off a Child Key field, and click "Continue".
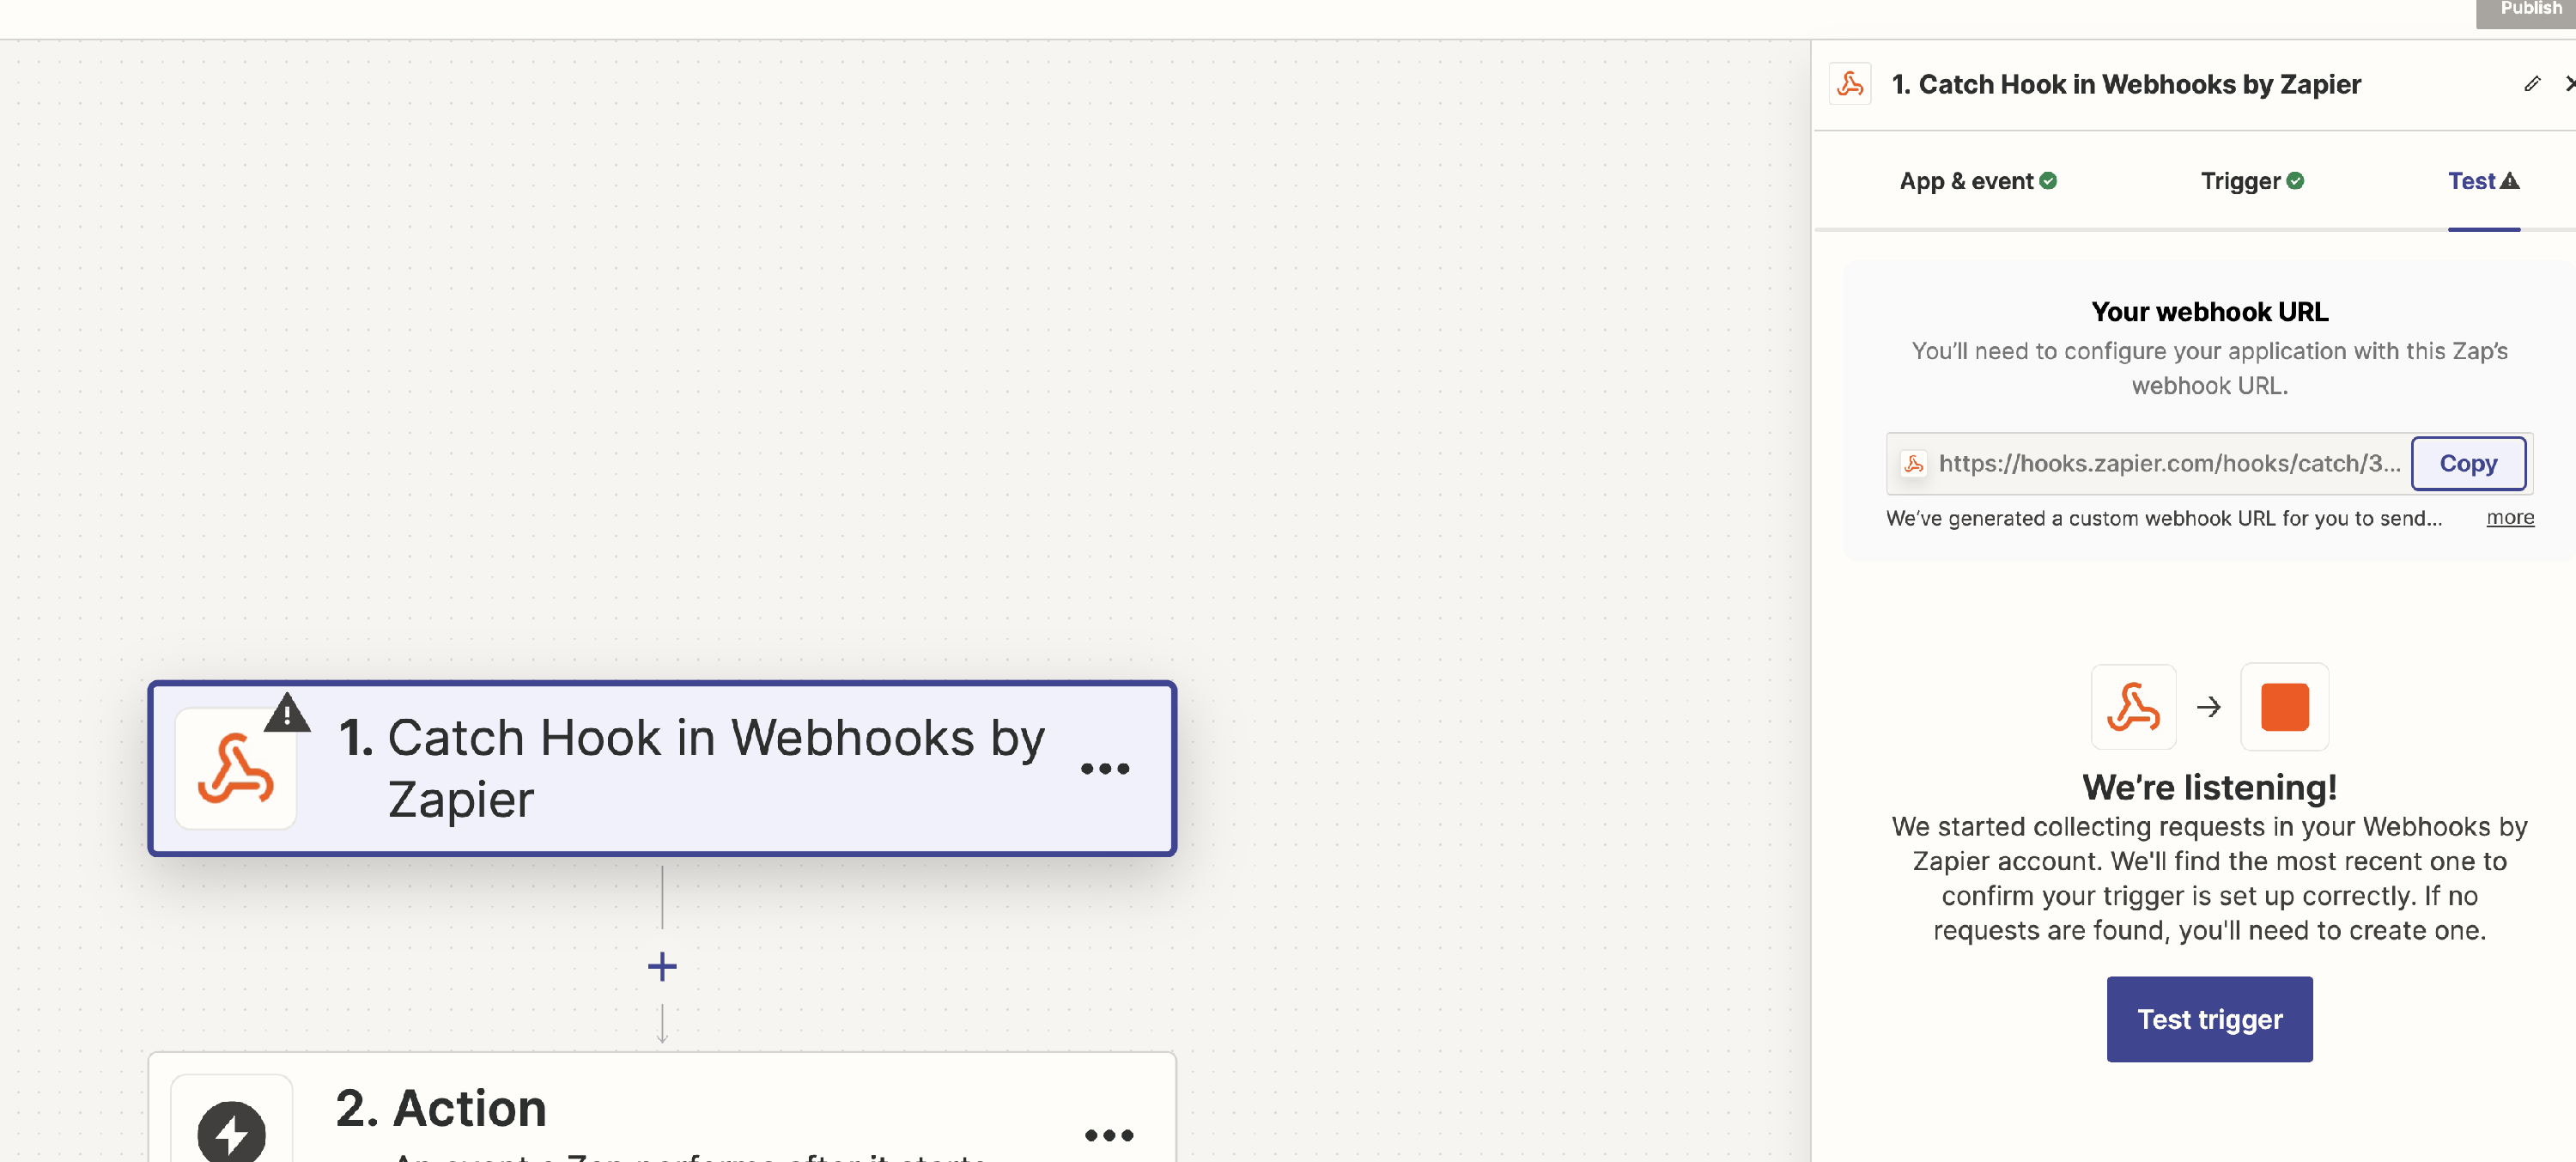
 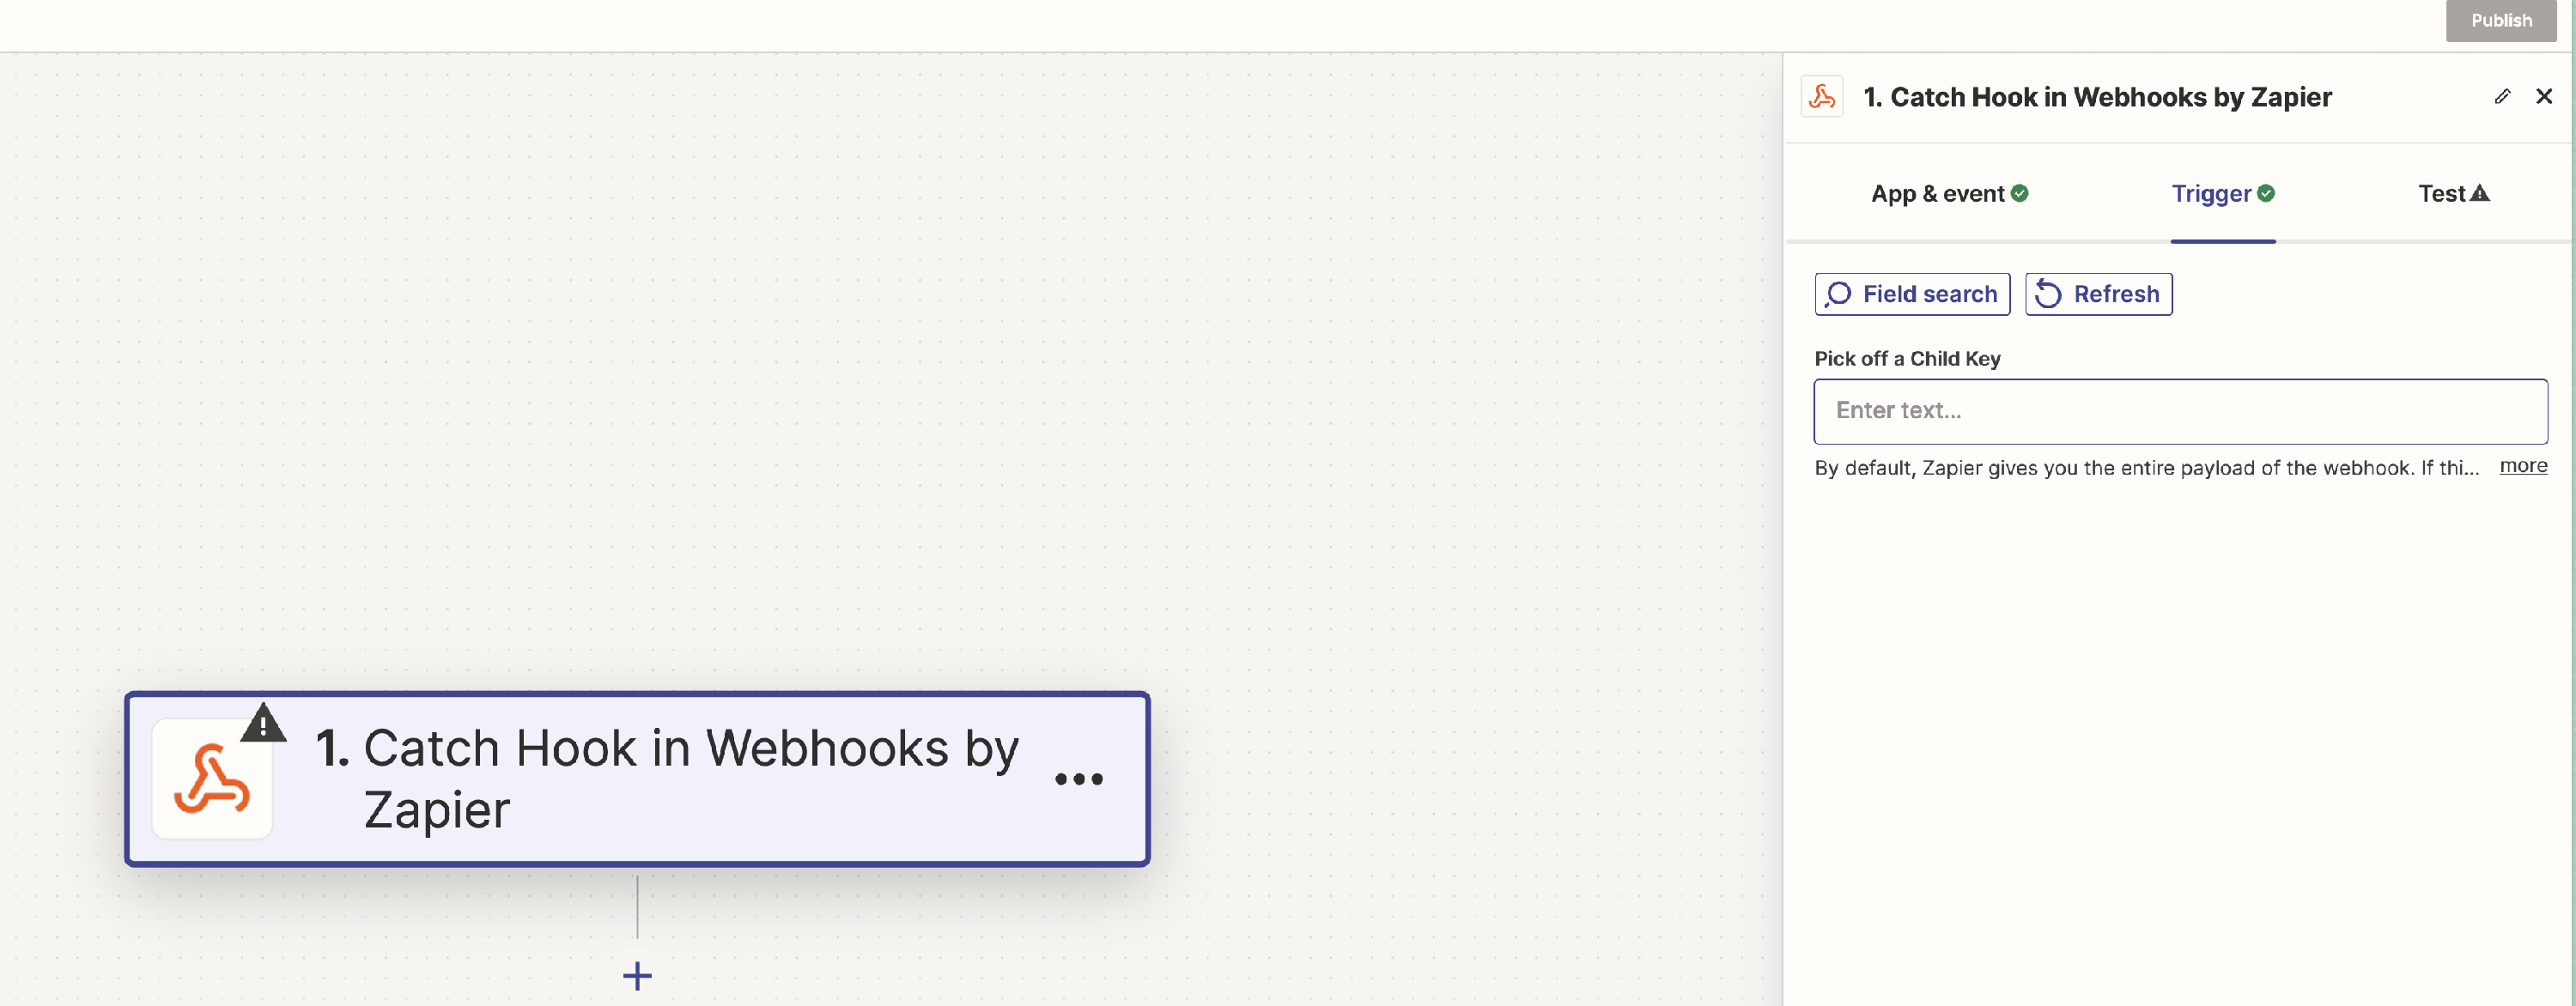 5. Copy the custom webhook URL provided by Zapier, which we will use later when we set in the plugin (e.g.:
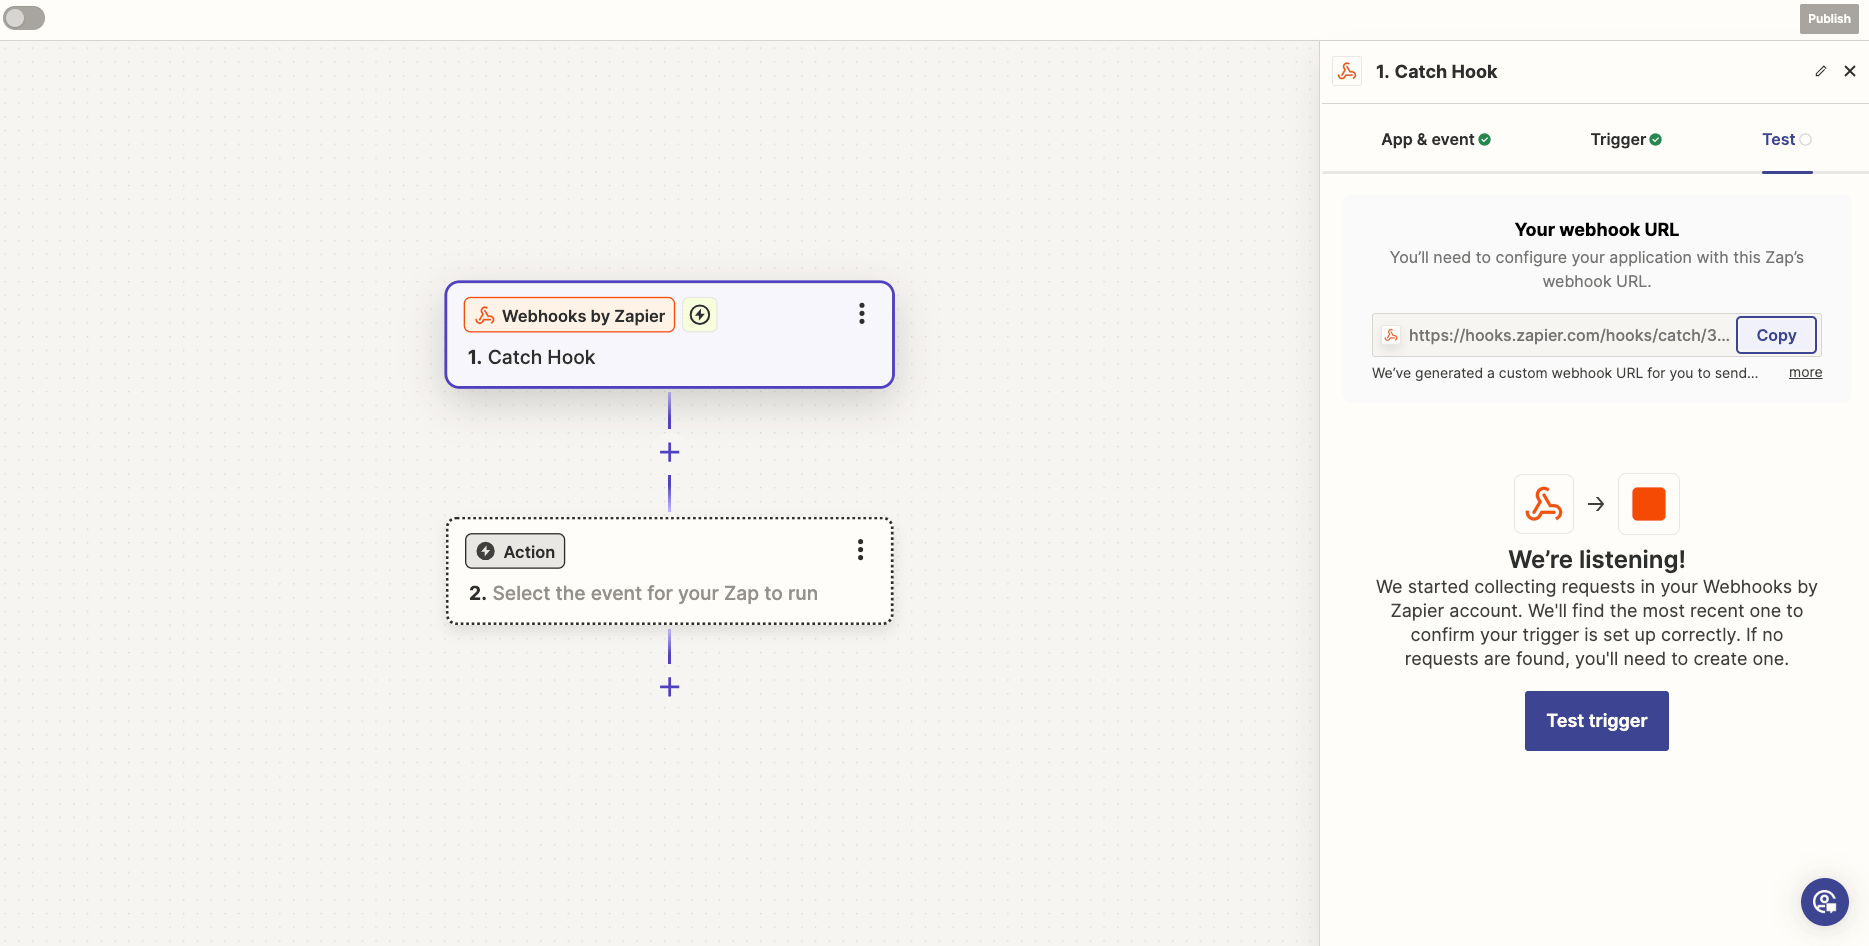
 https://hooks.zapier.com/hooks/...).
Before adding other Actions, we need to make Zapier aware of our payload structure so that we can select them as data input.
To achieve this, we need to send a test payload to Zapier. Thus, we will set up a Webhook account in our plugin and send a sample post to it.
Step 3: Setting Up the Webhook in WordPress with Revive Social
- Go back to your website.
- Go to the Revive Social dashboard.
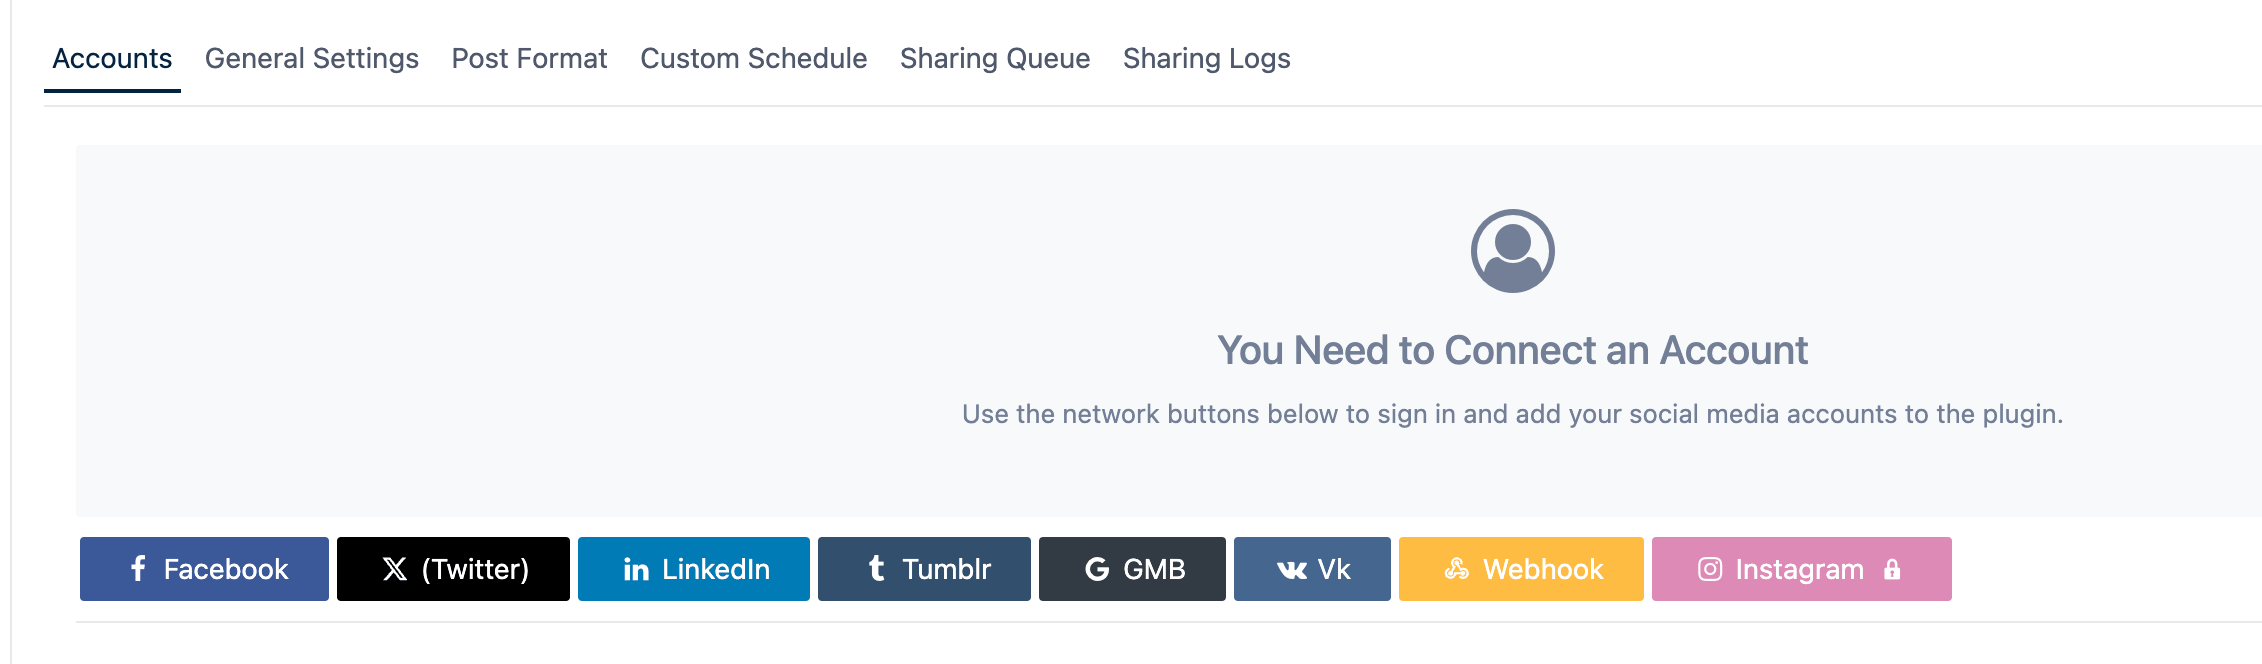 4. Add a new account via the Webhook button.
 - Write a name for this account to help identify it.
- Paste the URL from Zapier in the Webhook URL field.
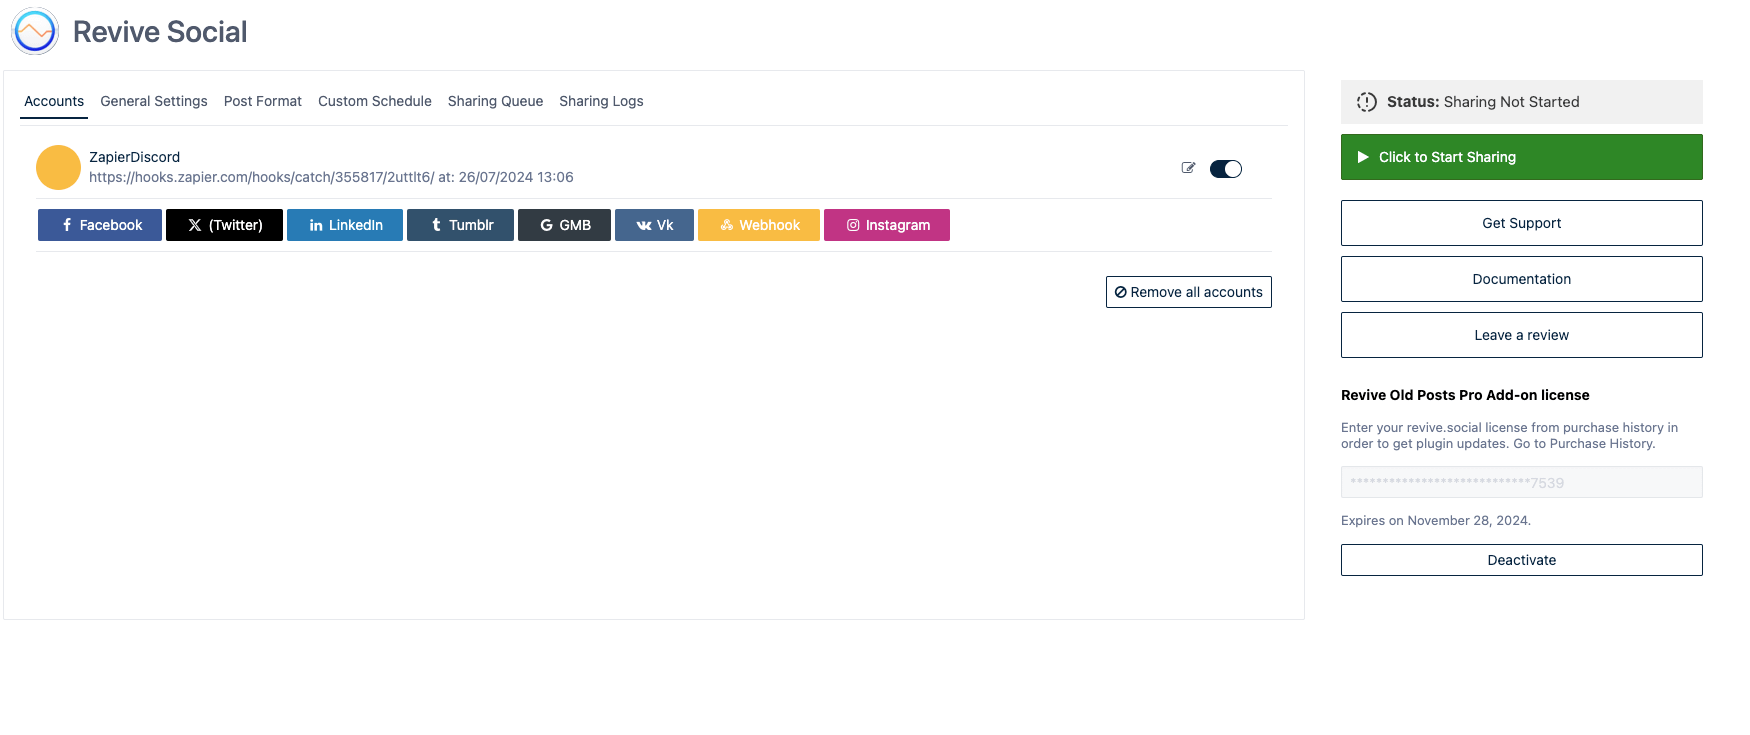
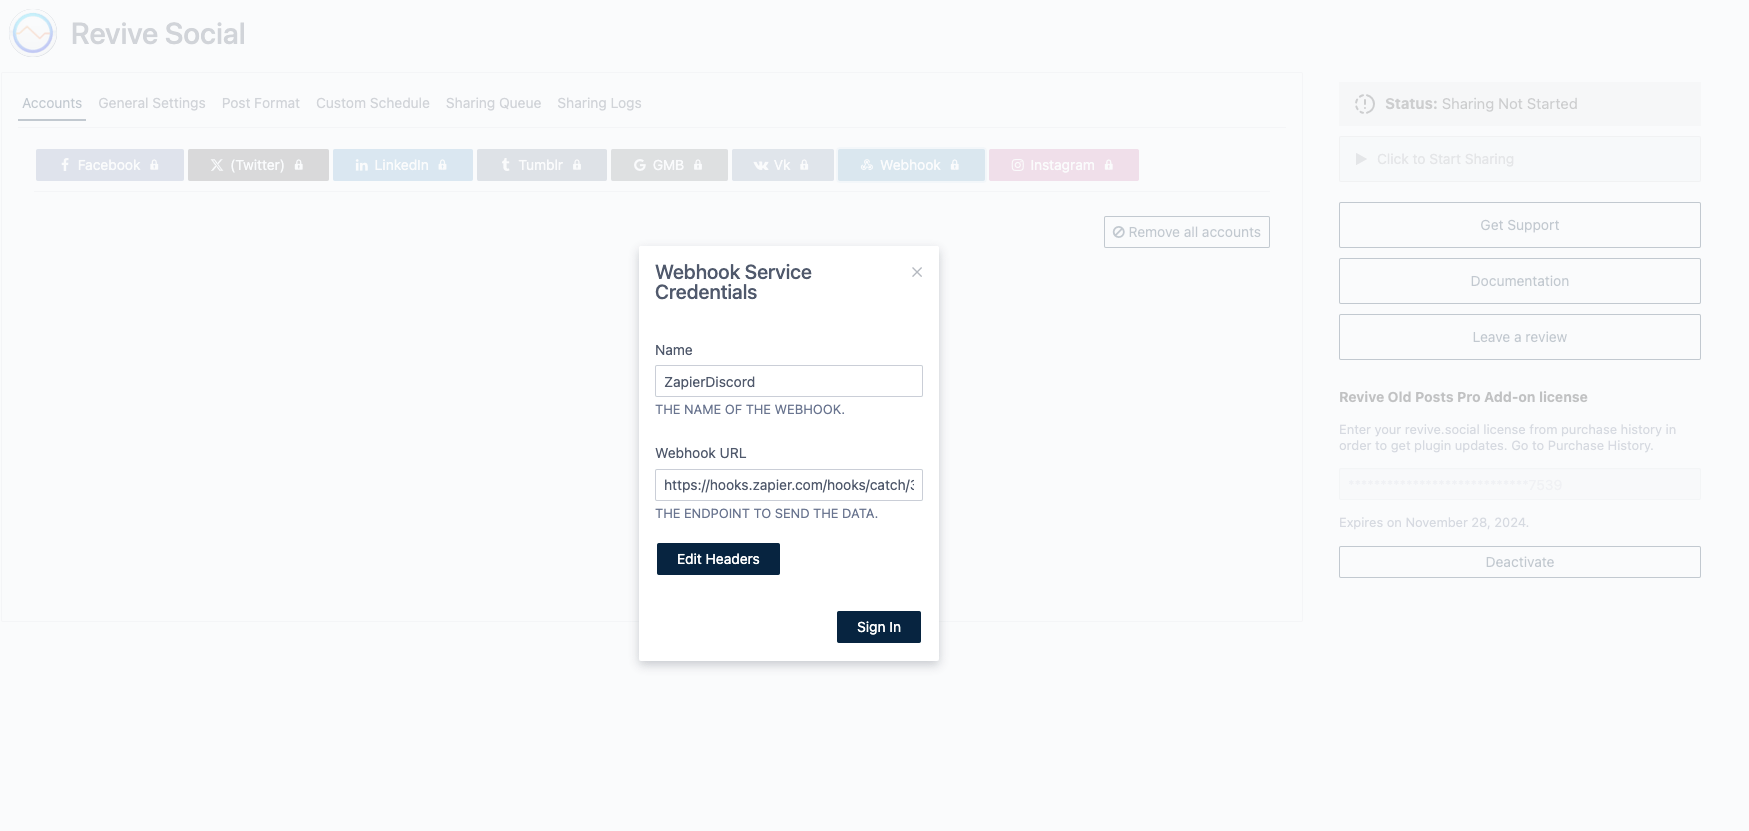 8. Save your settings by clicking on the Sign in button.
 - After the page is reloaded, you will see your account added.
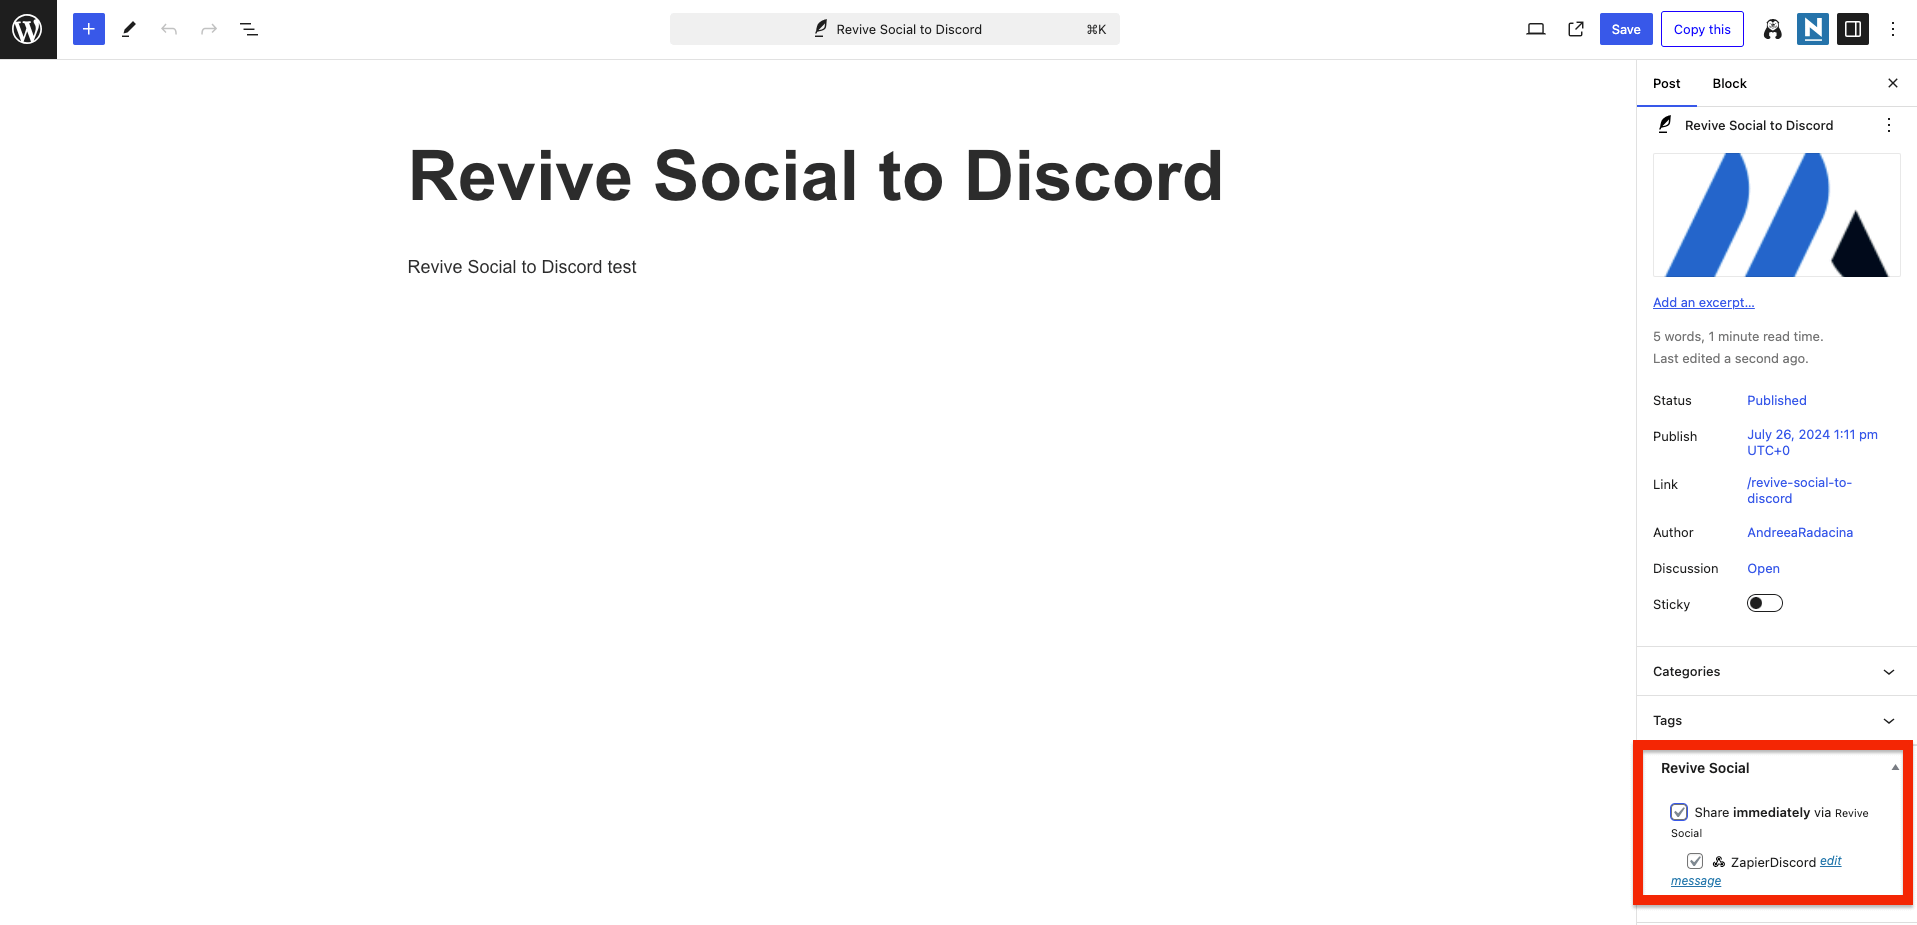
Step 4: Creating a test post
- Create a new sample Post on your website and give it a suggestive title.
- By using the Instant Share feature, select your newly added Webhook account.
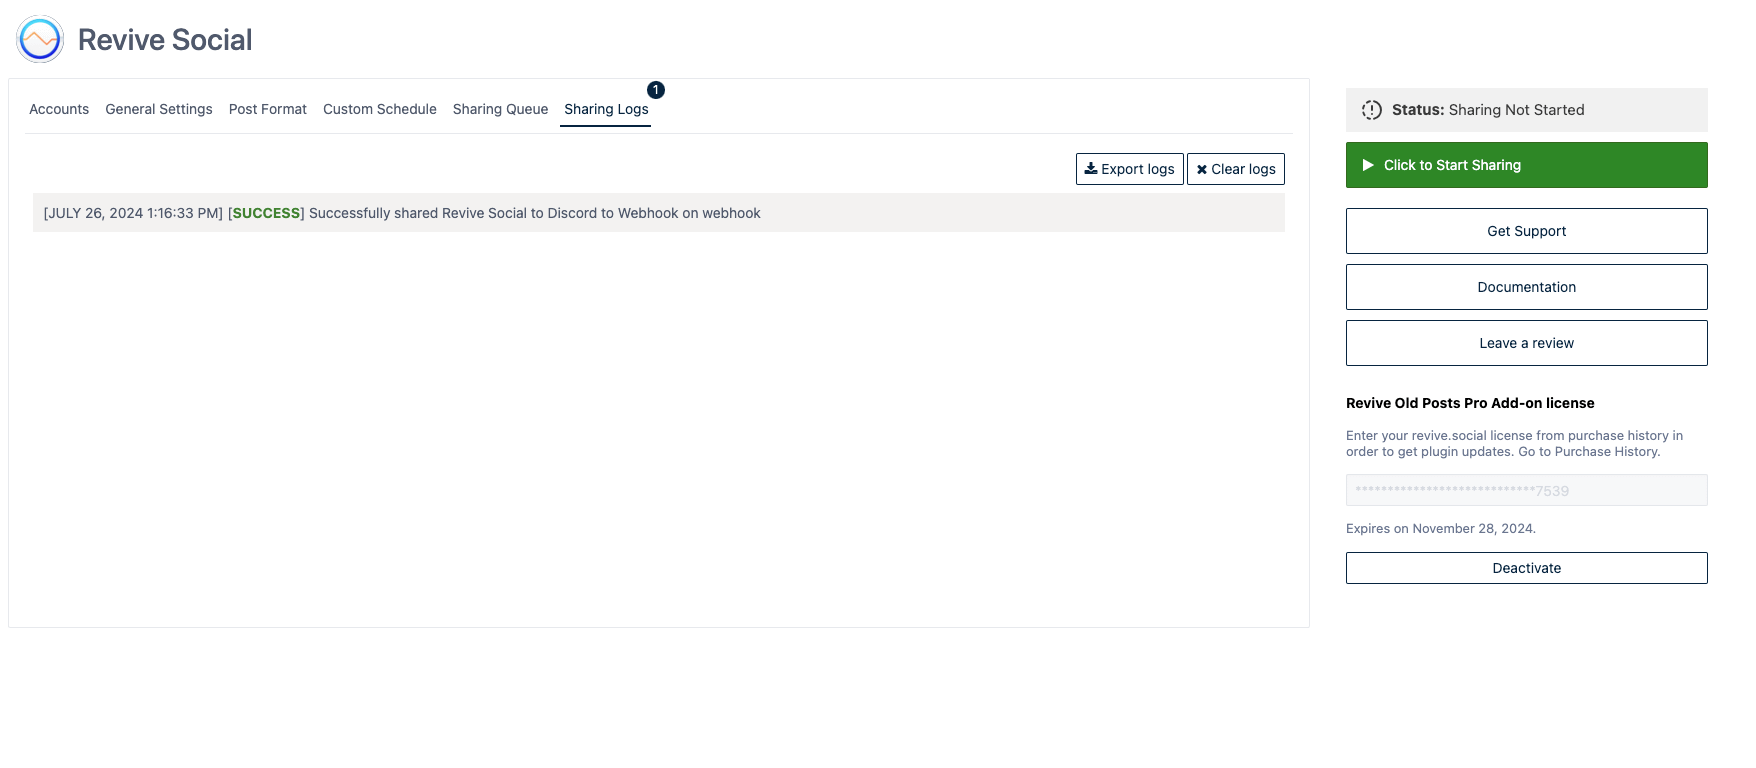
Step 5: Checking the sharing
- Go to the plugin Dashboard.
- Select the Sharing Logs tab.
- Check for the successful message sharing of the post.
Step 6: Making Zappier aware of the payload structure
- Go back to your previously created Zap in Zapier.
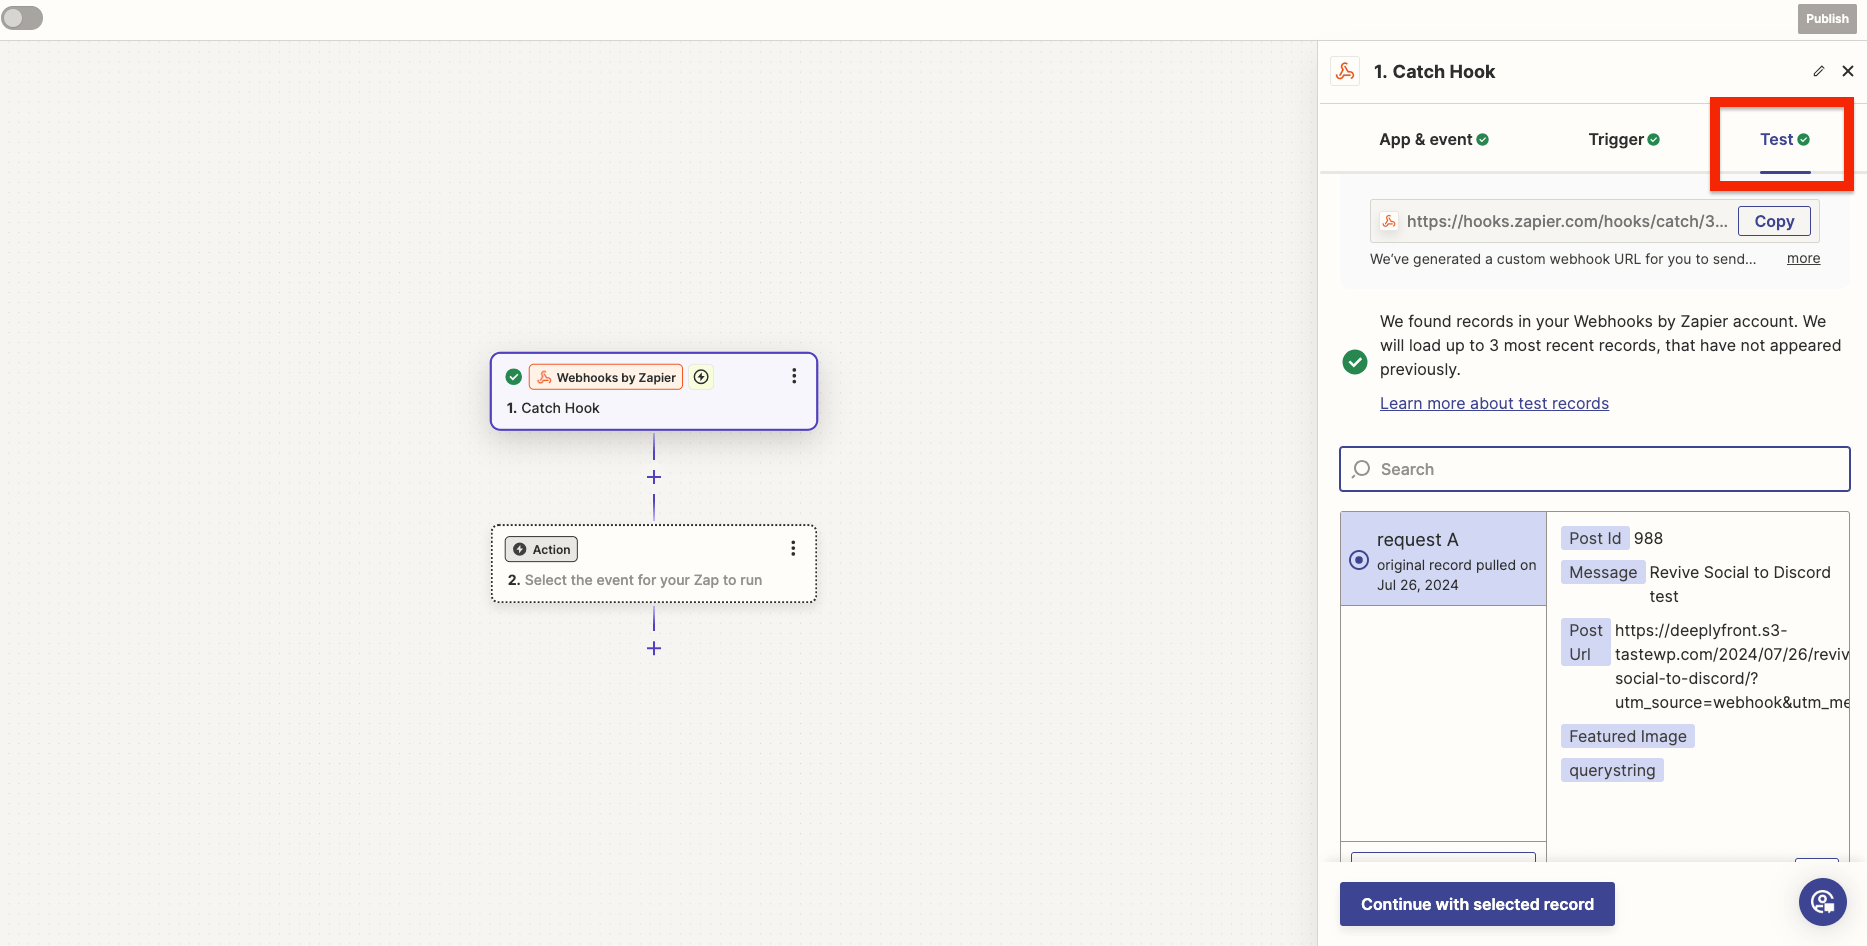
- Click on Webhook action and select the Test tab.
- Click on Test Trigger or Find new records.
- Check the payload structure displayed and click on Continue with the selected record.
Step 7: Set Up a Discord action
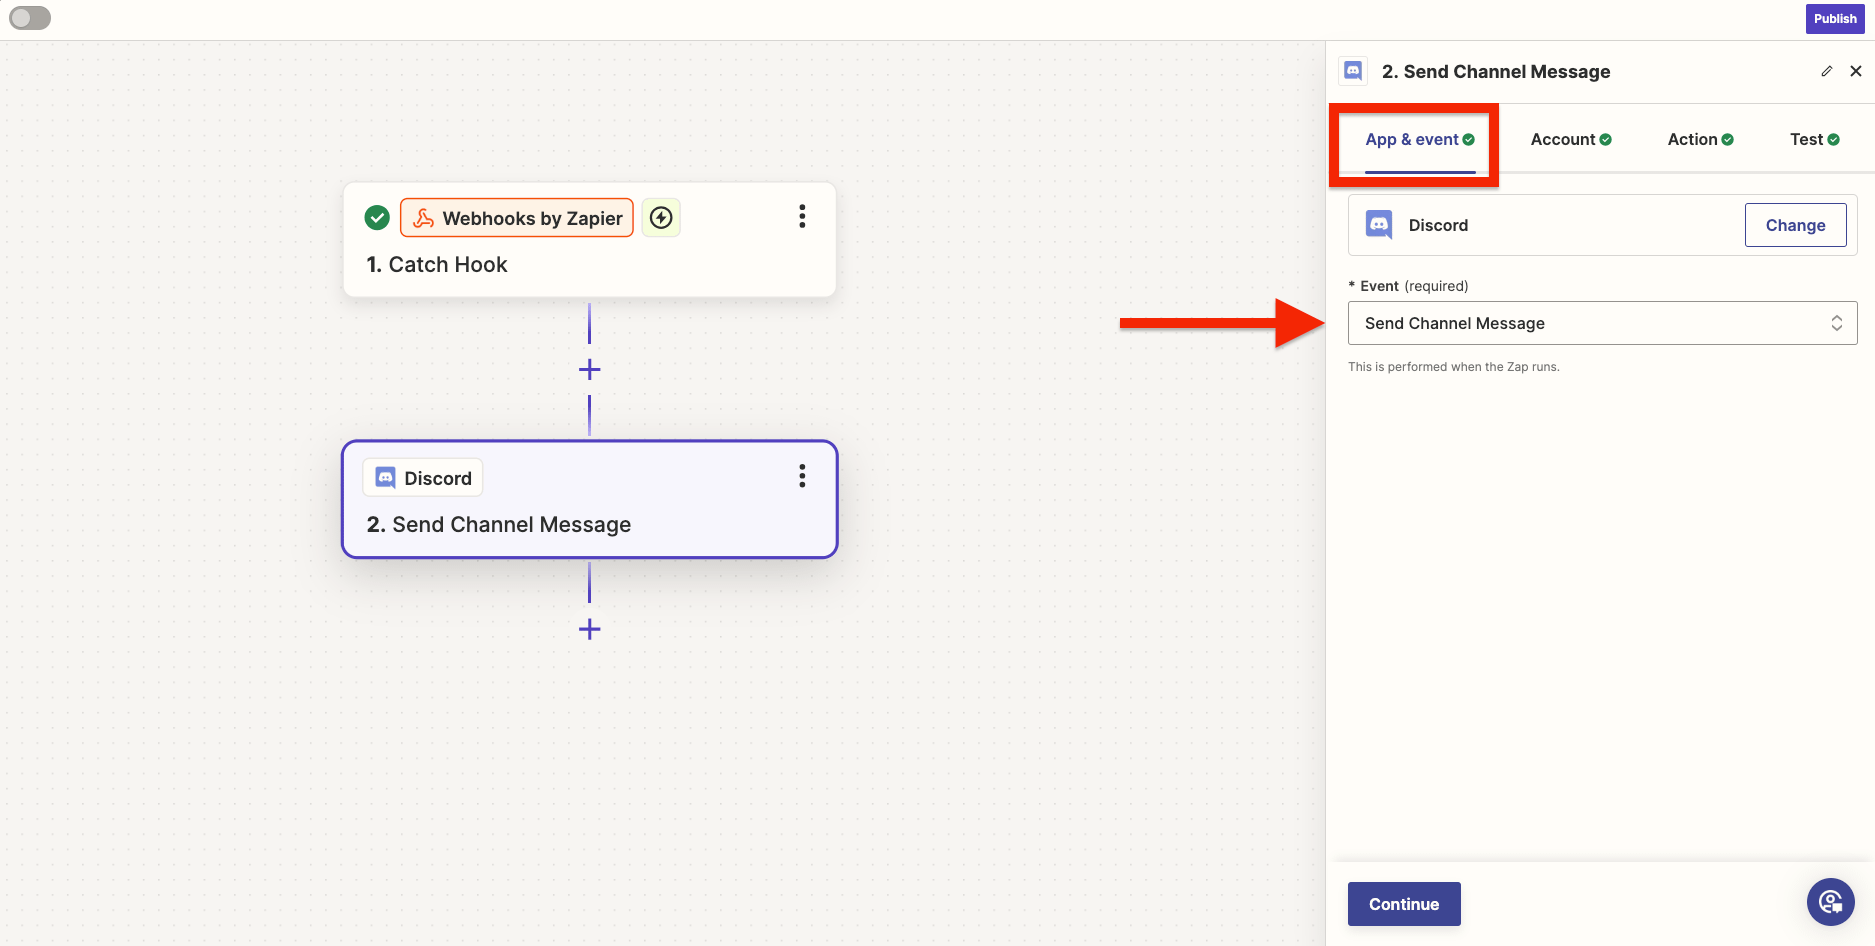
- Click on the "+" button to add a new action.
- Select Discord from the list.
- Choose the action you want to perform (e.g. Send Channel Message) and click "Continue".
 5. Connect your Discord account and click "Continue".
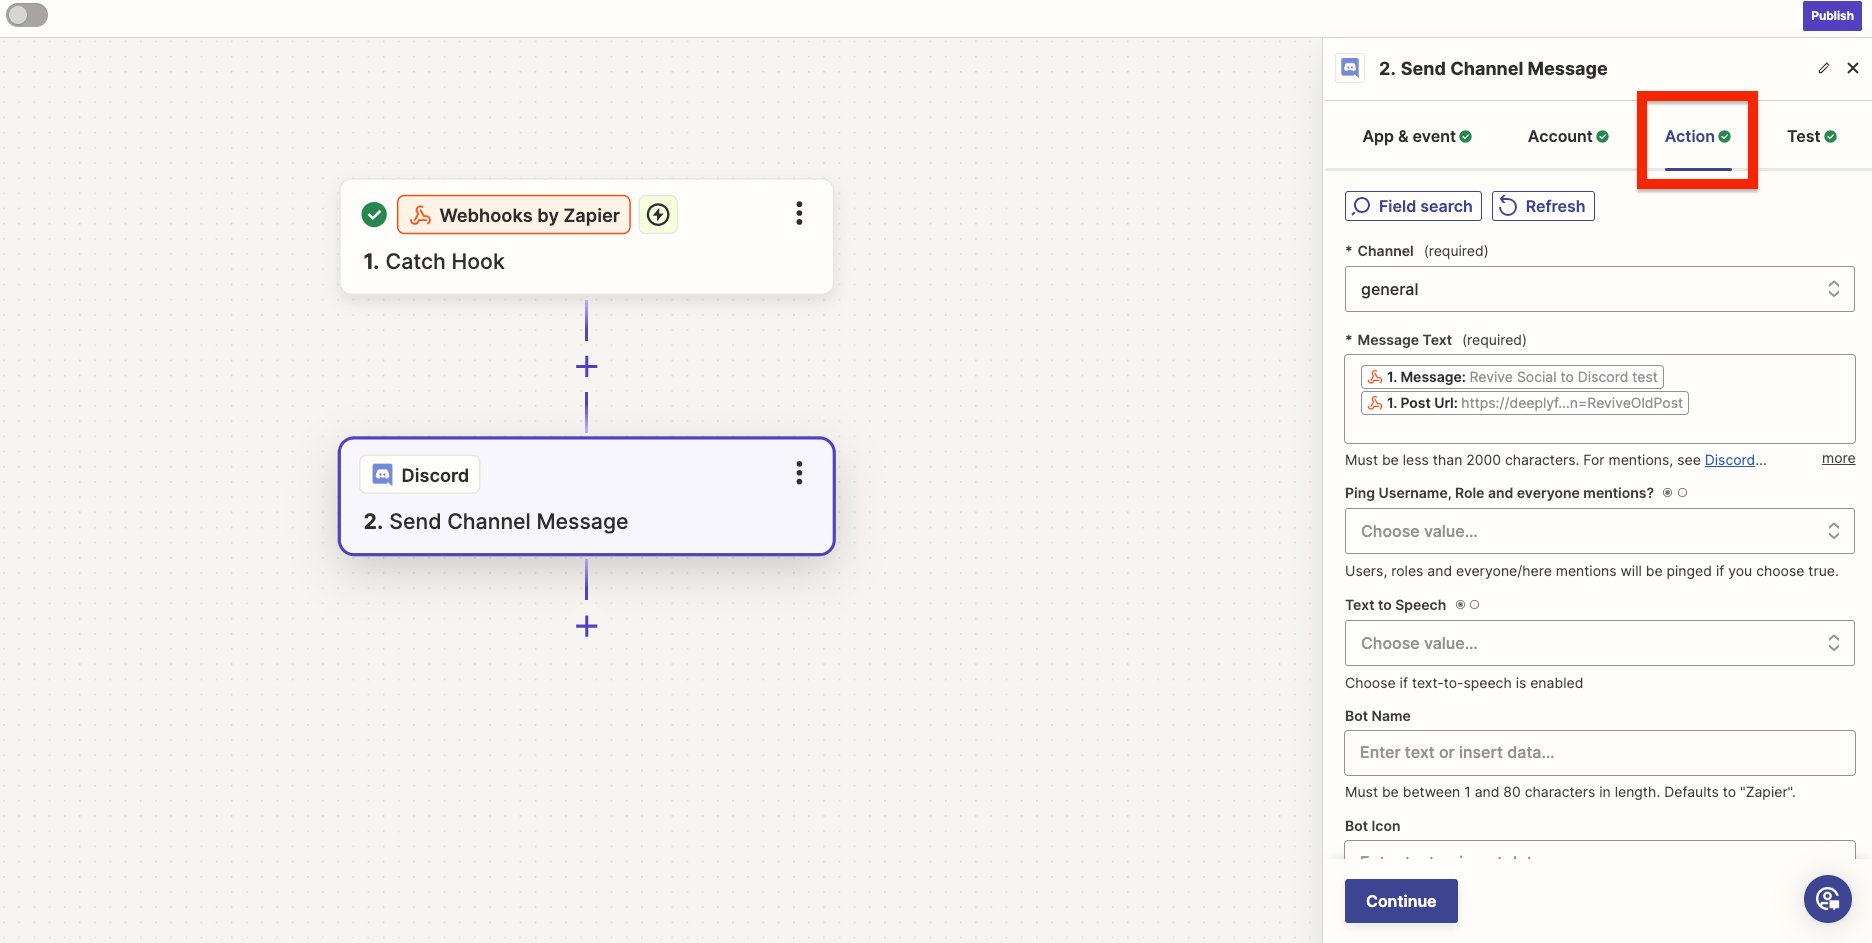
 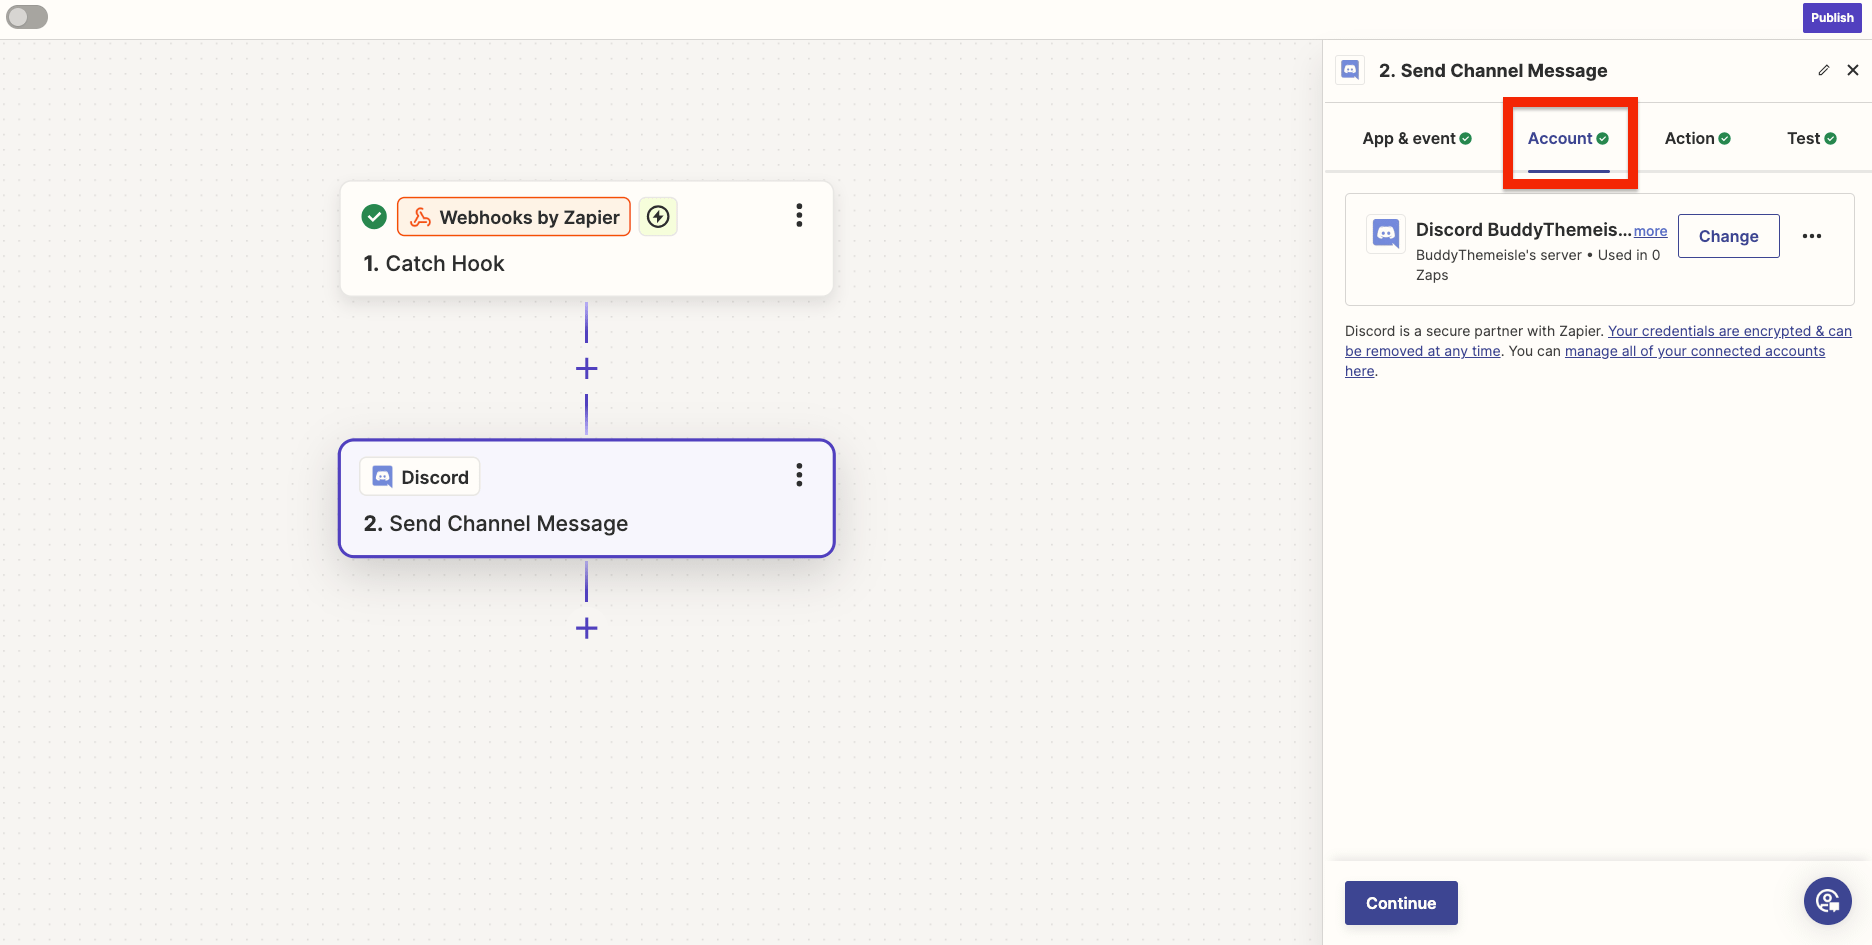 7. In the Channel field, add the channel where you want to send the post.
 - Fill the other fields with the data from the webhook. You should see a nice dropdown with the data from the post. When it's done, click "Continue".
- Test your integration by clicking on Test Step.
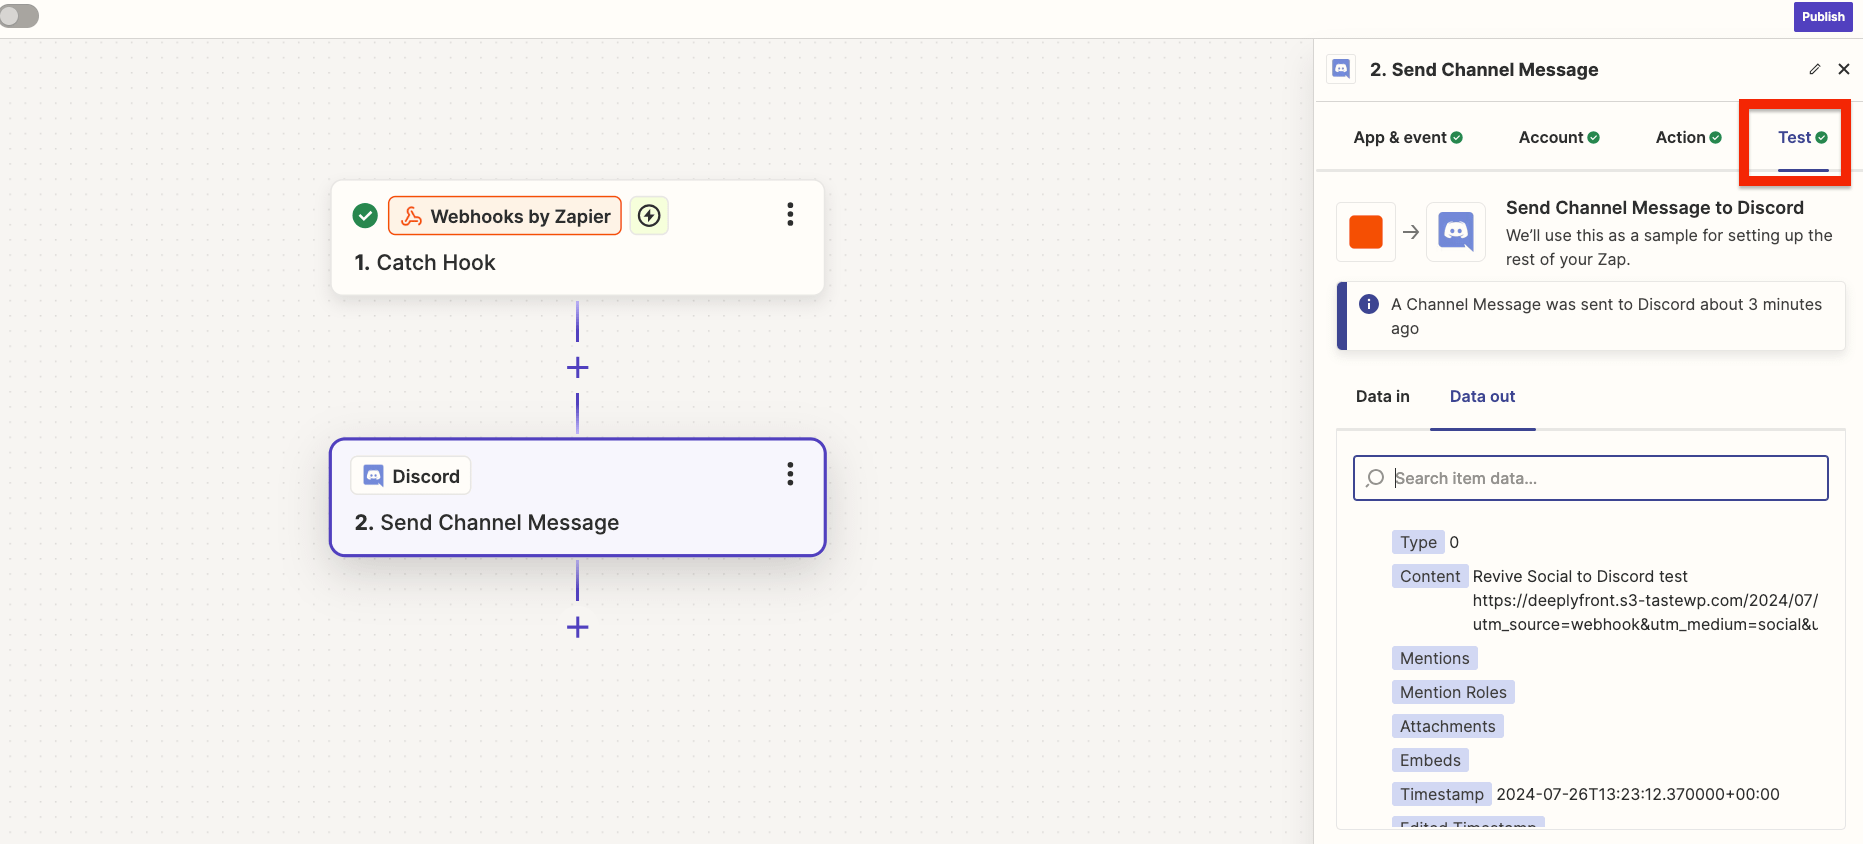
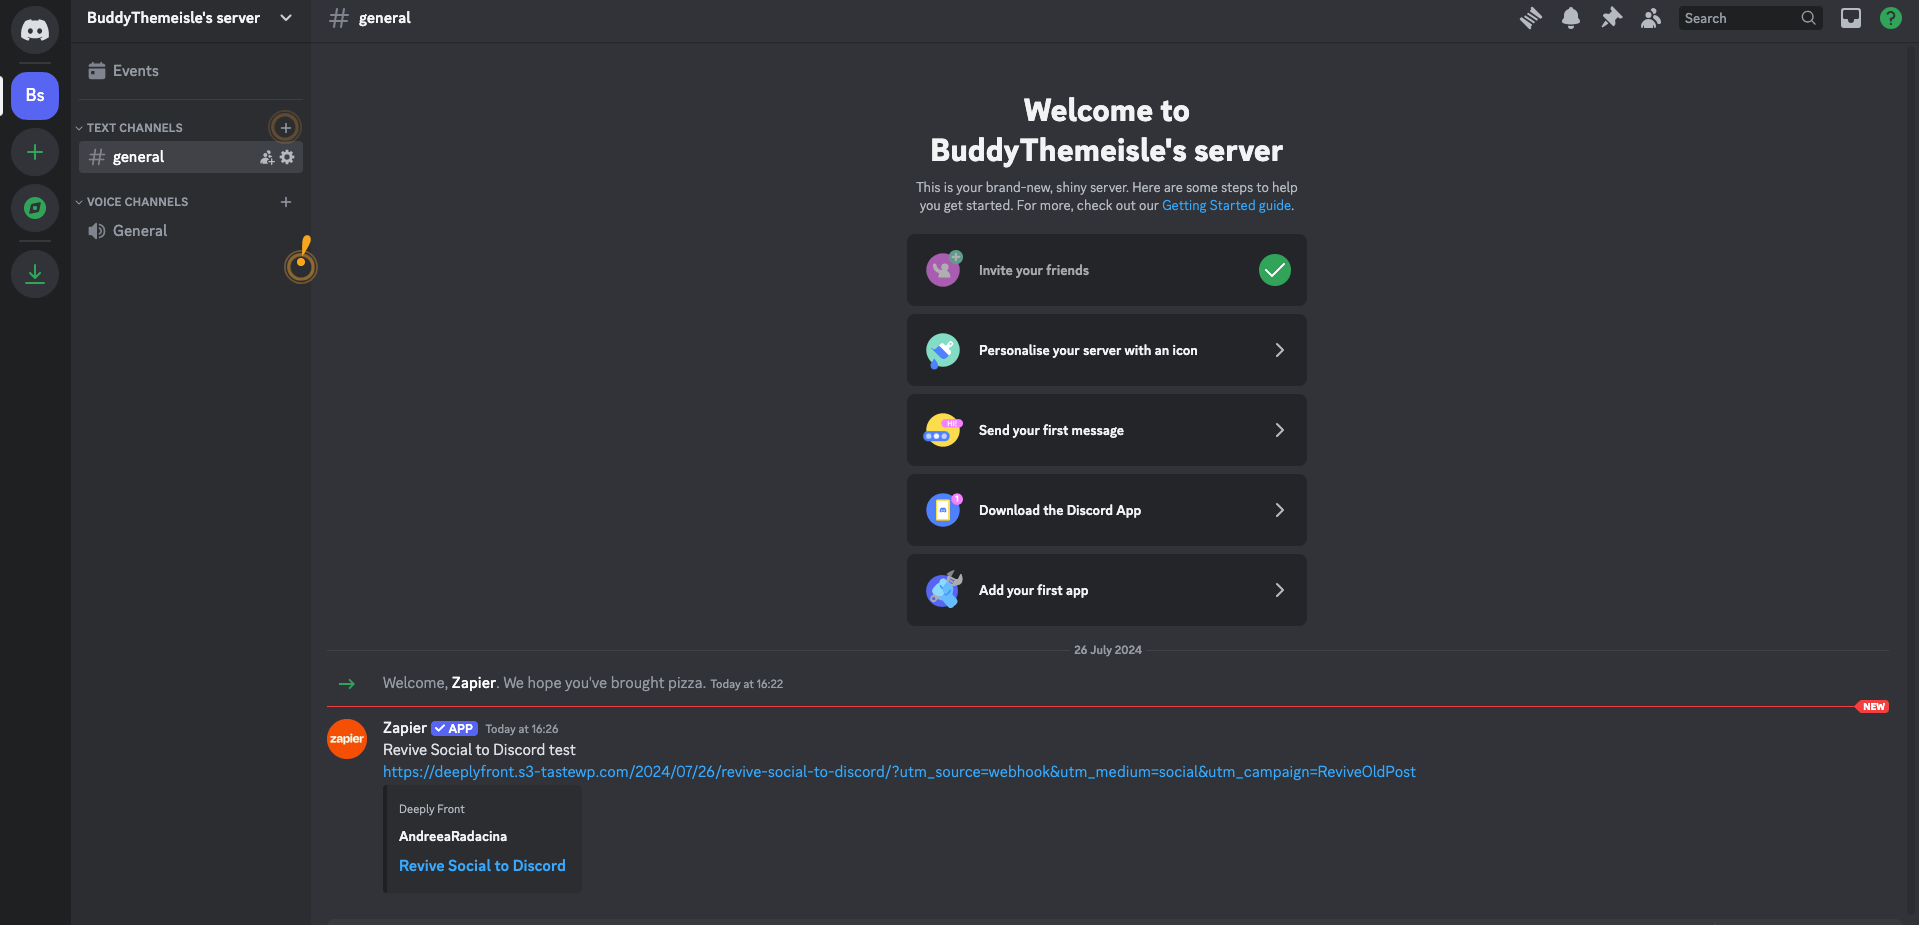
You should see a post containing your data on the Discord channel.
📝 Note: Please note that sending an email is just an example. You can also create forum posts, send direct messages, and send messages in a forum post.
Happy automating!