Appearance
How to share posts to X (Twitter) using Revive Social?
This article explains how to fix X (Twitter) authentication errors and connect your account to Revive Social using your own X Developer app keys.
In this article
Fix error code 32: Could not authenticate you
If your shares fail and your Sharing Logs show messages like Could not authenticate you, error code 32, Twitter/X authentication error, or connection failed, your current X authorization is usually no longer accepted.
This commonly happens after X account verification changes, X API access changes, or when an older/legacy X connection is still saved in Revive Social.
This does not usually mean Revive Social is broken. In most cases, you need to reconnect X with current credentials from your own X Developer app.
📝 Info: Revive Social does not provide X API keys. You must create or update your own app in the X Developer Console and use your app's keys when reconnecting.
Reconnect Revive Social to X after authentication fails
Before following the full setup below, use this recovery checklist:
- Remove the broken X (Twitter) account from the Revive Social dashboard.
- Confirm your X account verification and API access are complete in X Developer Console.
- Create a new X app or open your existing app and update its authentication settings.
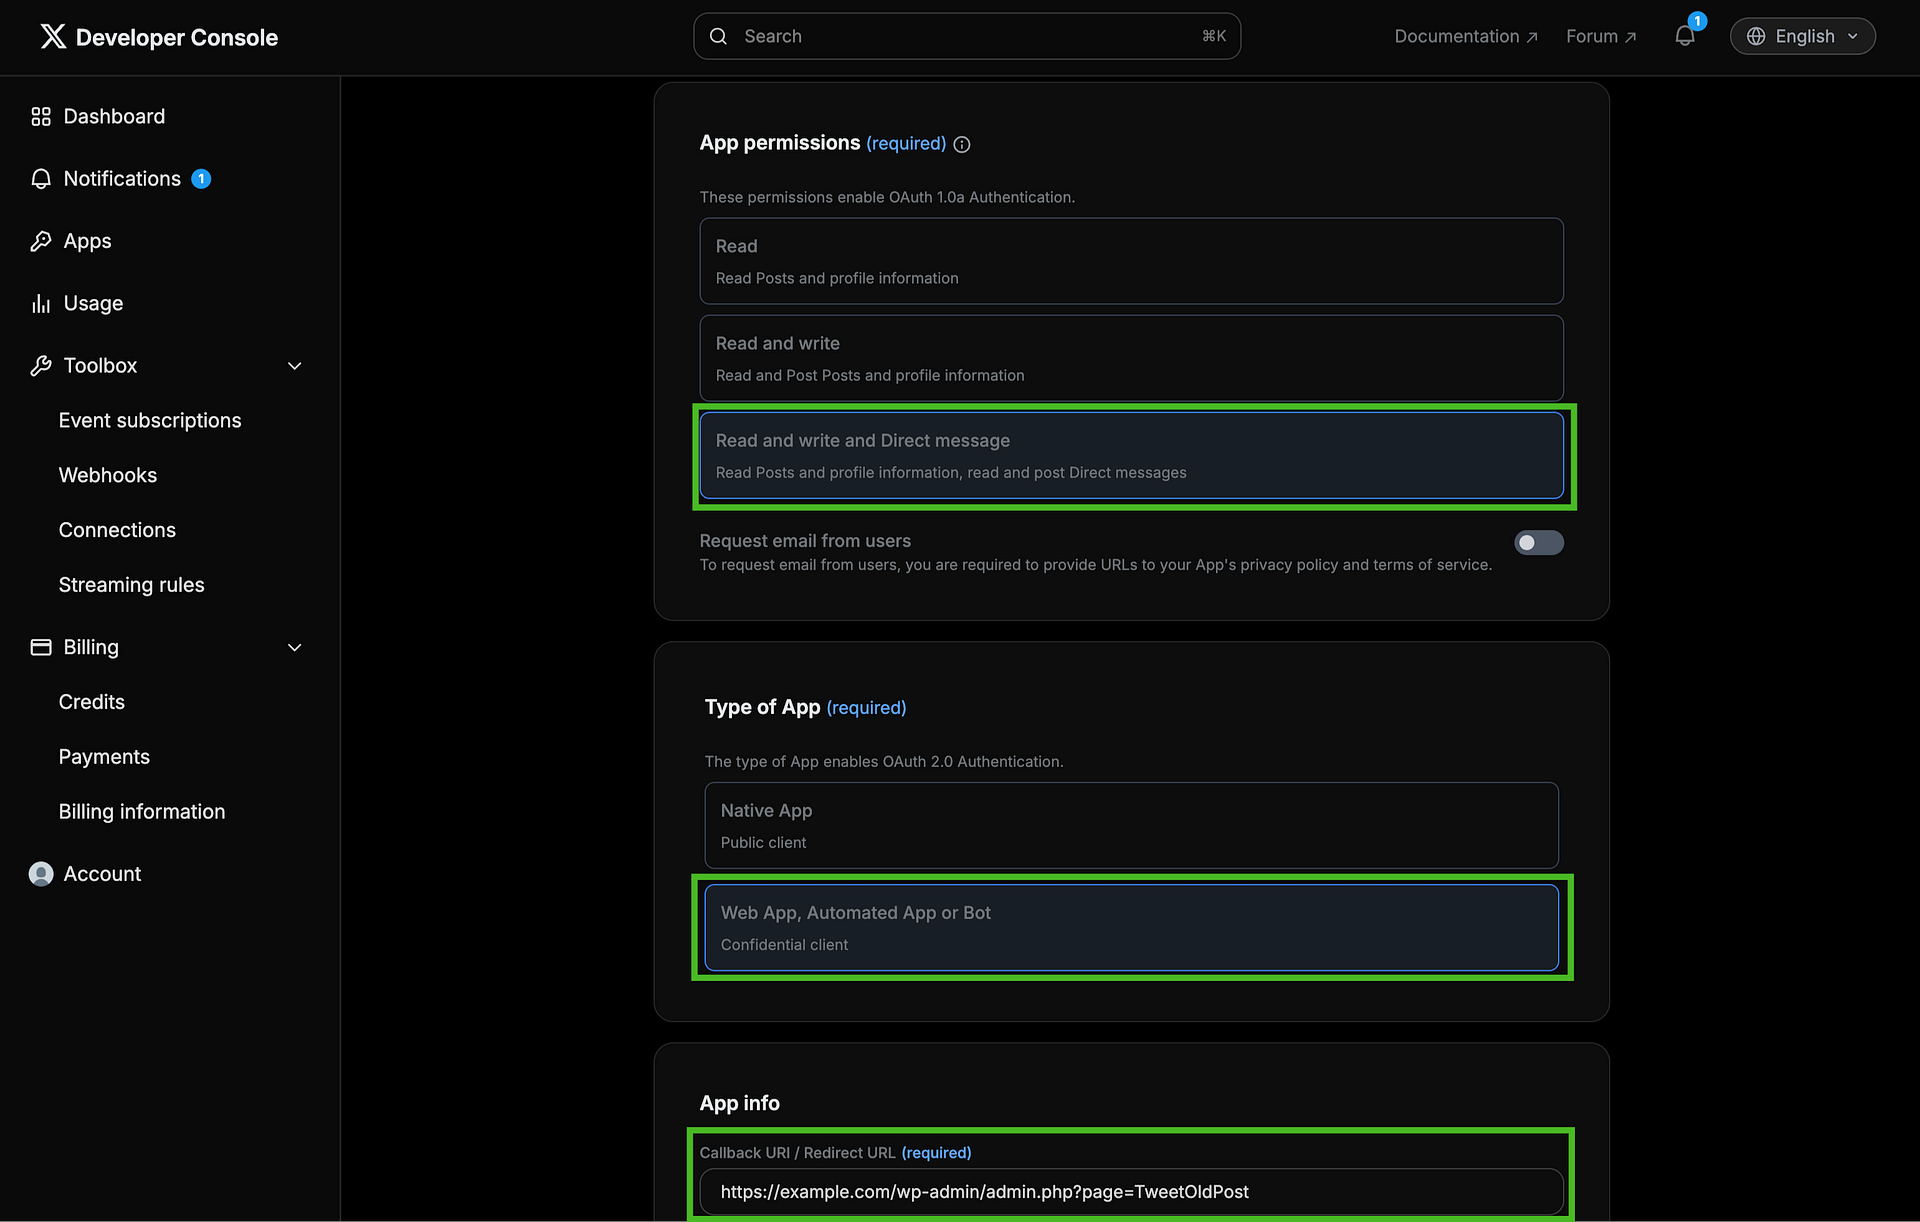
- Set App permissions to Read and write and make sure the callback URL is
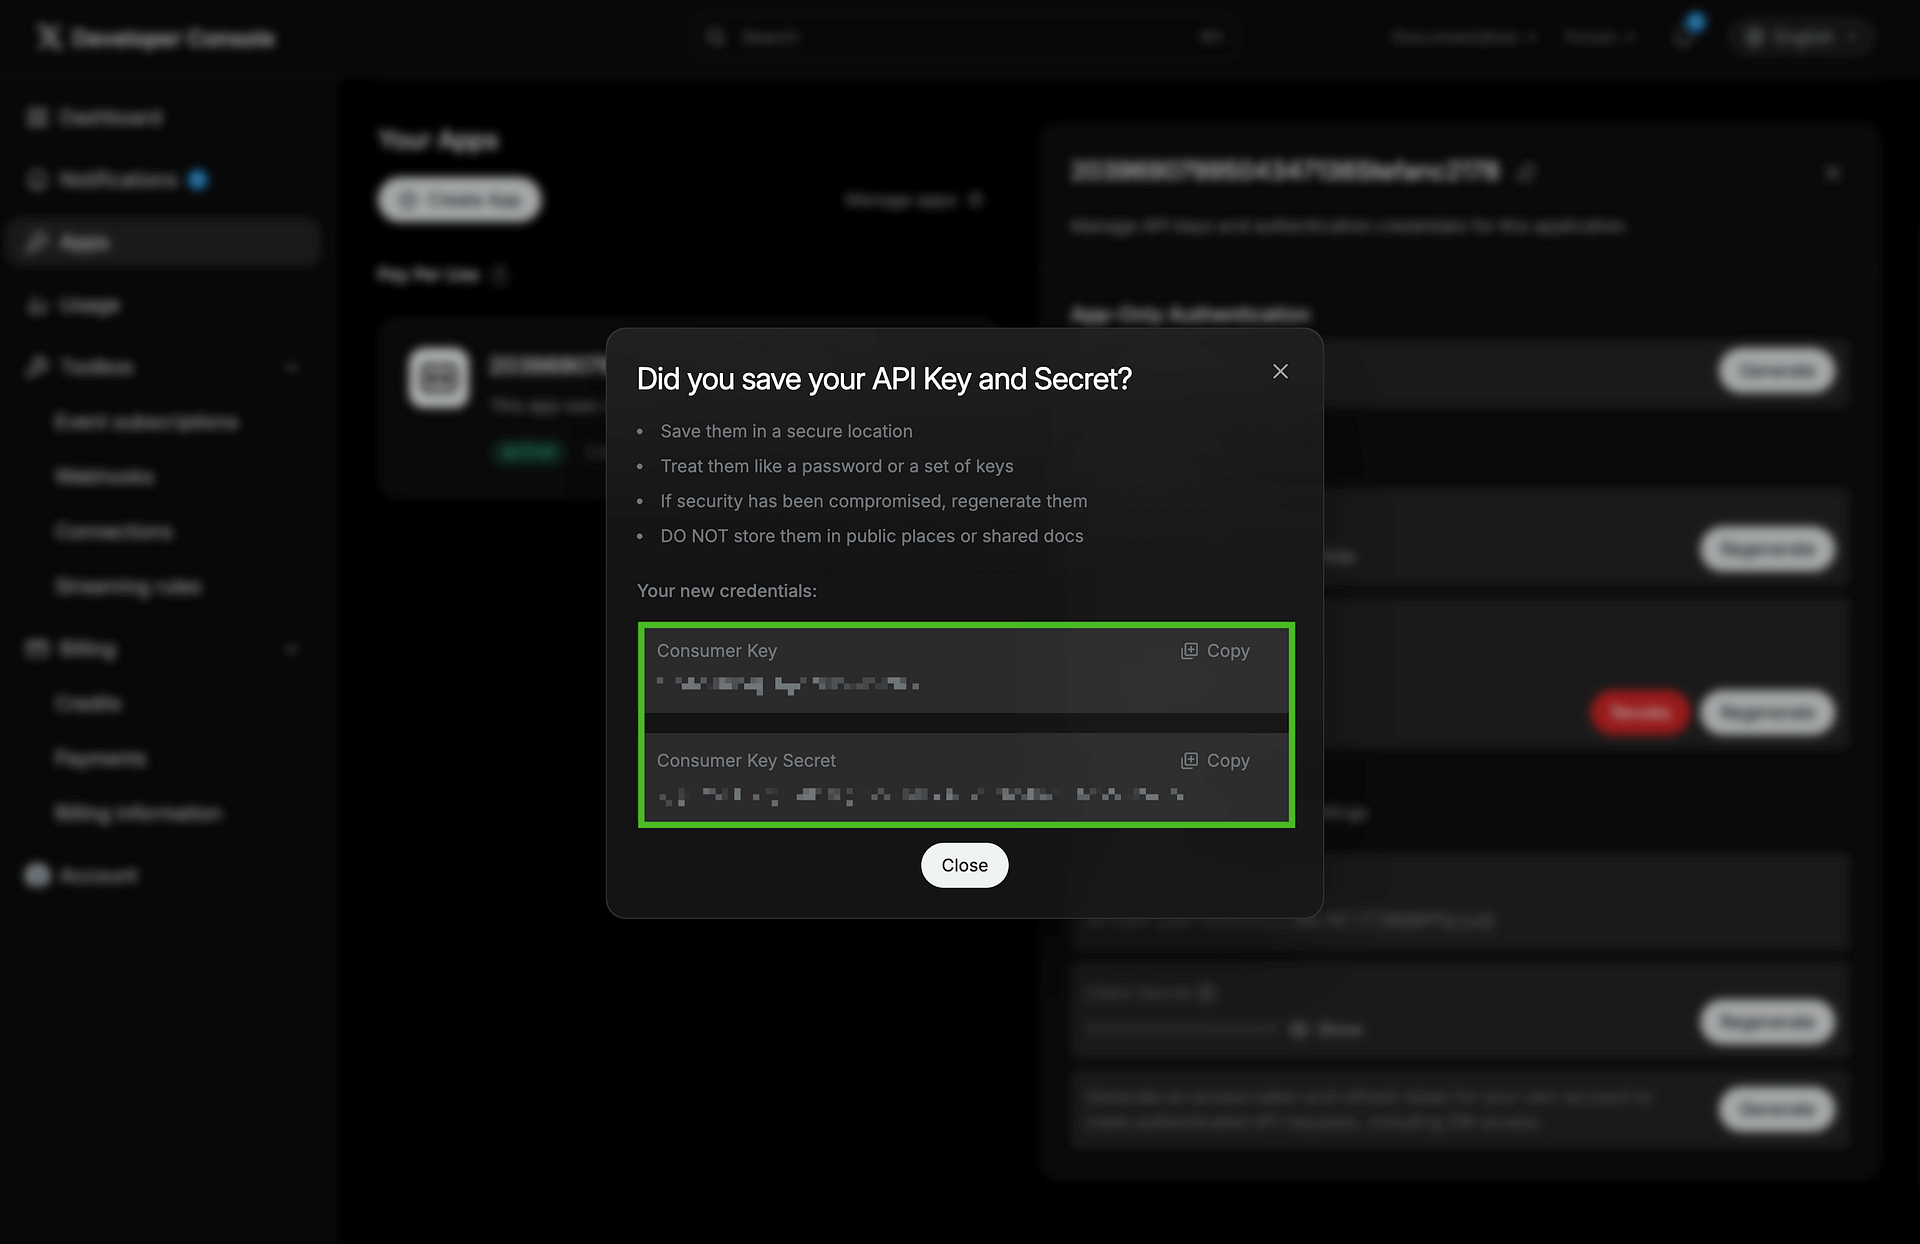
https://example.com/wp-admin/admin.php?page=TweetOldPost(replaceexample.comwith your site URL). - Regenerate and copy the OAuth 1.0 Consumer Key and Consumer Secret.
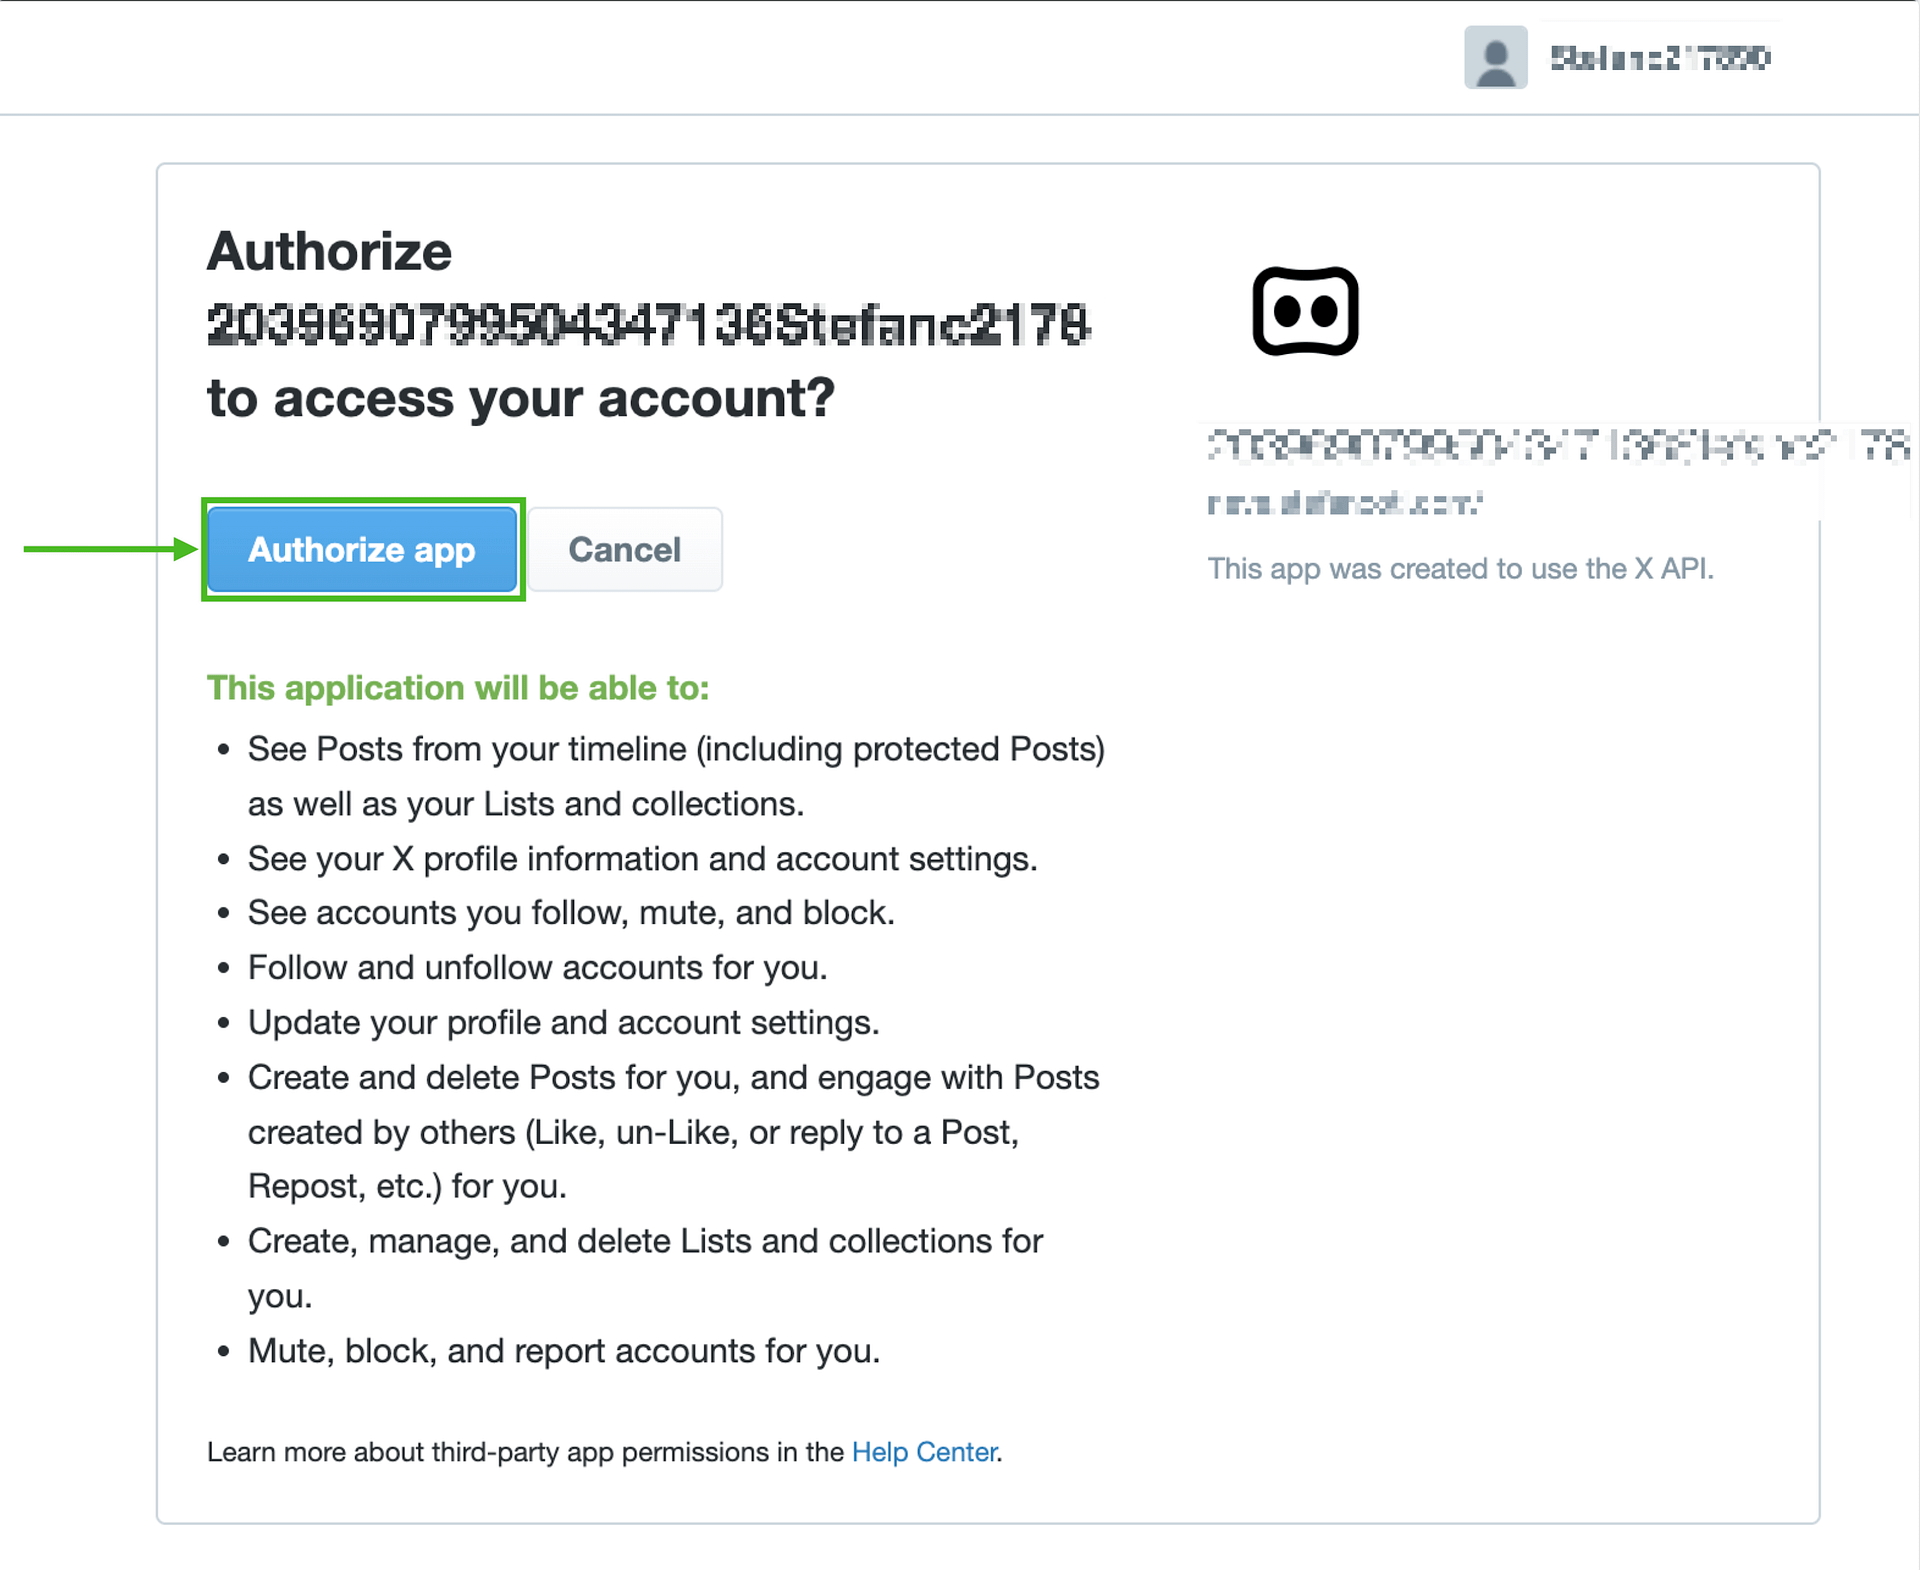
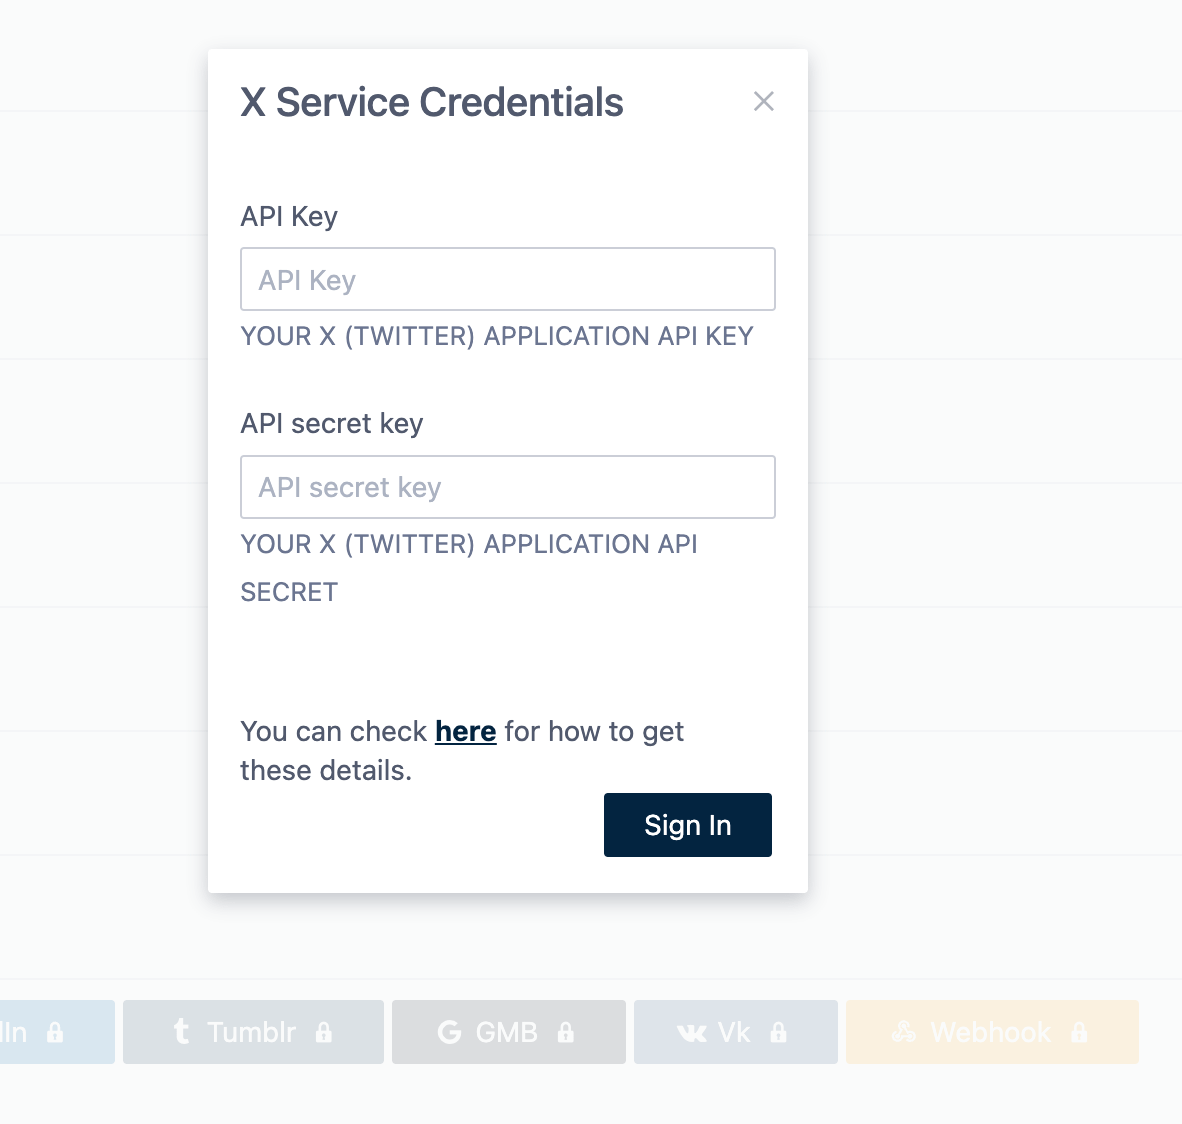
- Return to Revive Social, click Use your own keys, paste your keys, and click Authorize app again.
Set up your own keys
1. If you have added your X (Twitter) account to the Revive Social Dashboard, please remove it first.
2. Then, click to Add X (ex Twitter) account again and select to use your own keys:
📝 Note: Make sure you're using the latest version of the plugin if you're not seeing this option.
Required X app settings for Revive Social
Use these settings in your X Developer app:
- App permissions: Read and write
- Type of App: Web app, Automated App or Bot
- Callback/Redirect URL:
https://example.com/wp-admin/admin.php?page=TweetOldPost - Website URL:
https://example.com/ - Keys used in Revive Social: OAuth 1.0 Consumer Key and Consumer Secret
If your X account recently required verification and posting stopped after that, regenerate your OAuth 1.0 keys and reconnect the account in Revive Social.
Logging in to X Developer account
📝 Note: If this is not the first time you use this page, please skip to the next section to create the project.
1. Log in to X Developer Console. It should have the same credentials as the X (Twitter) account you want to use.
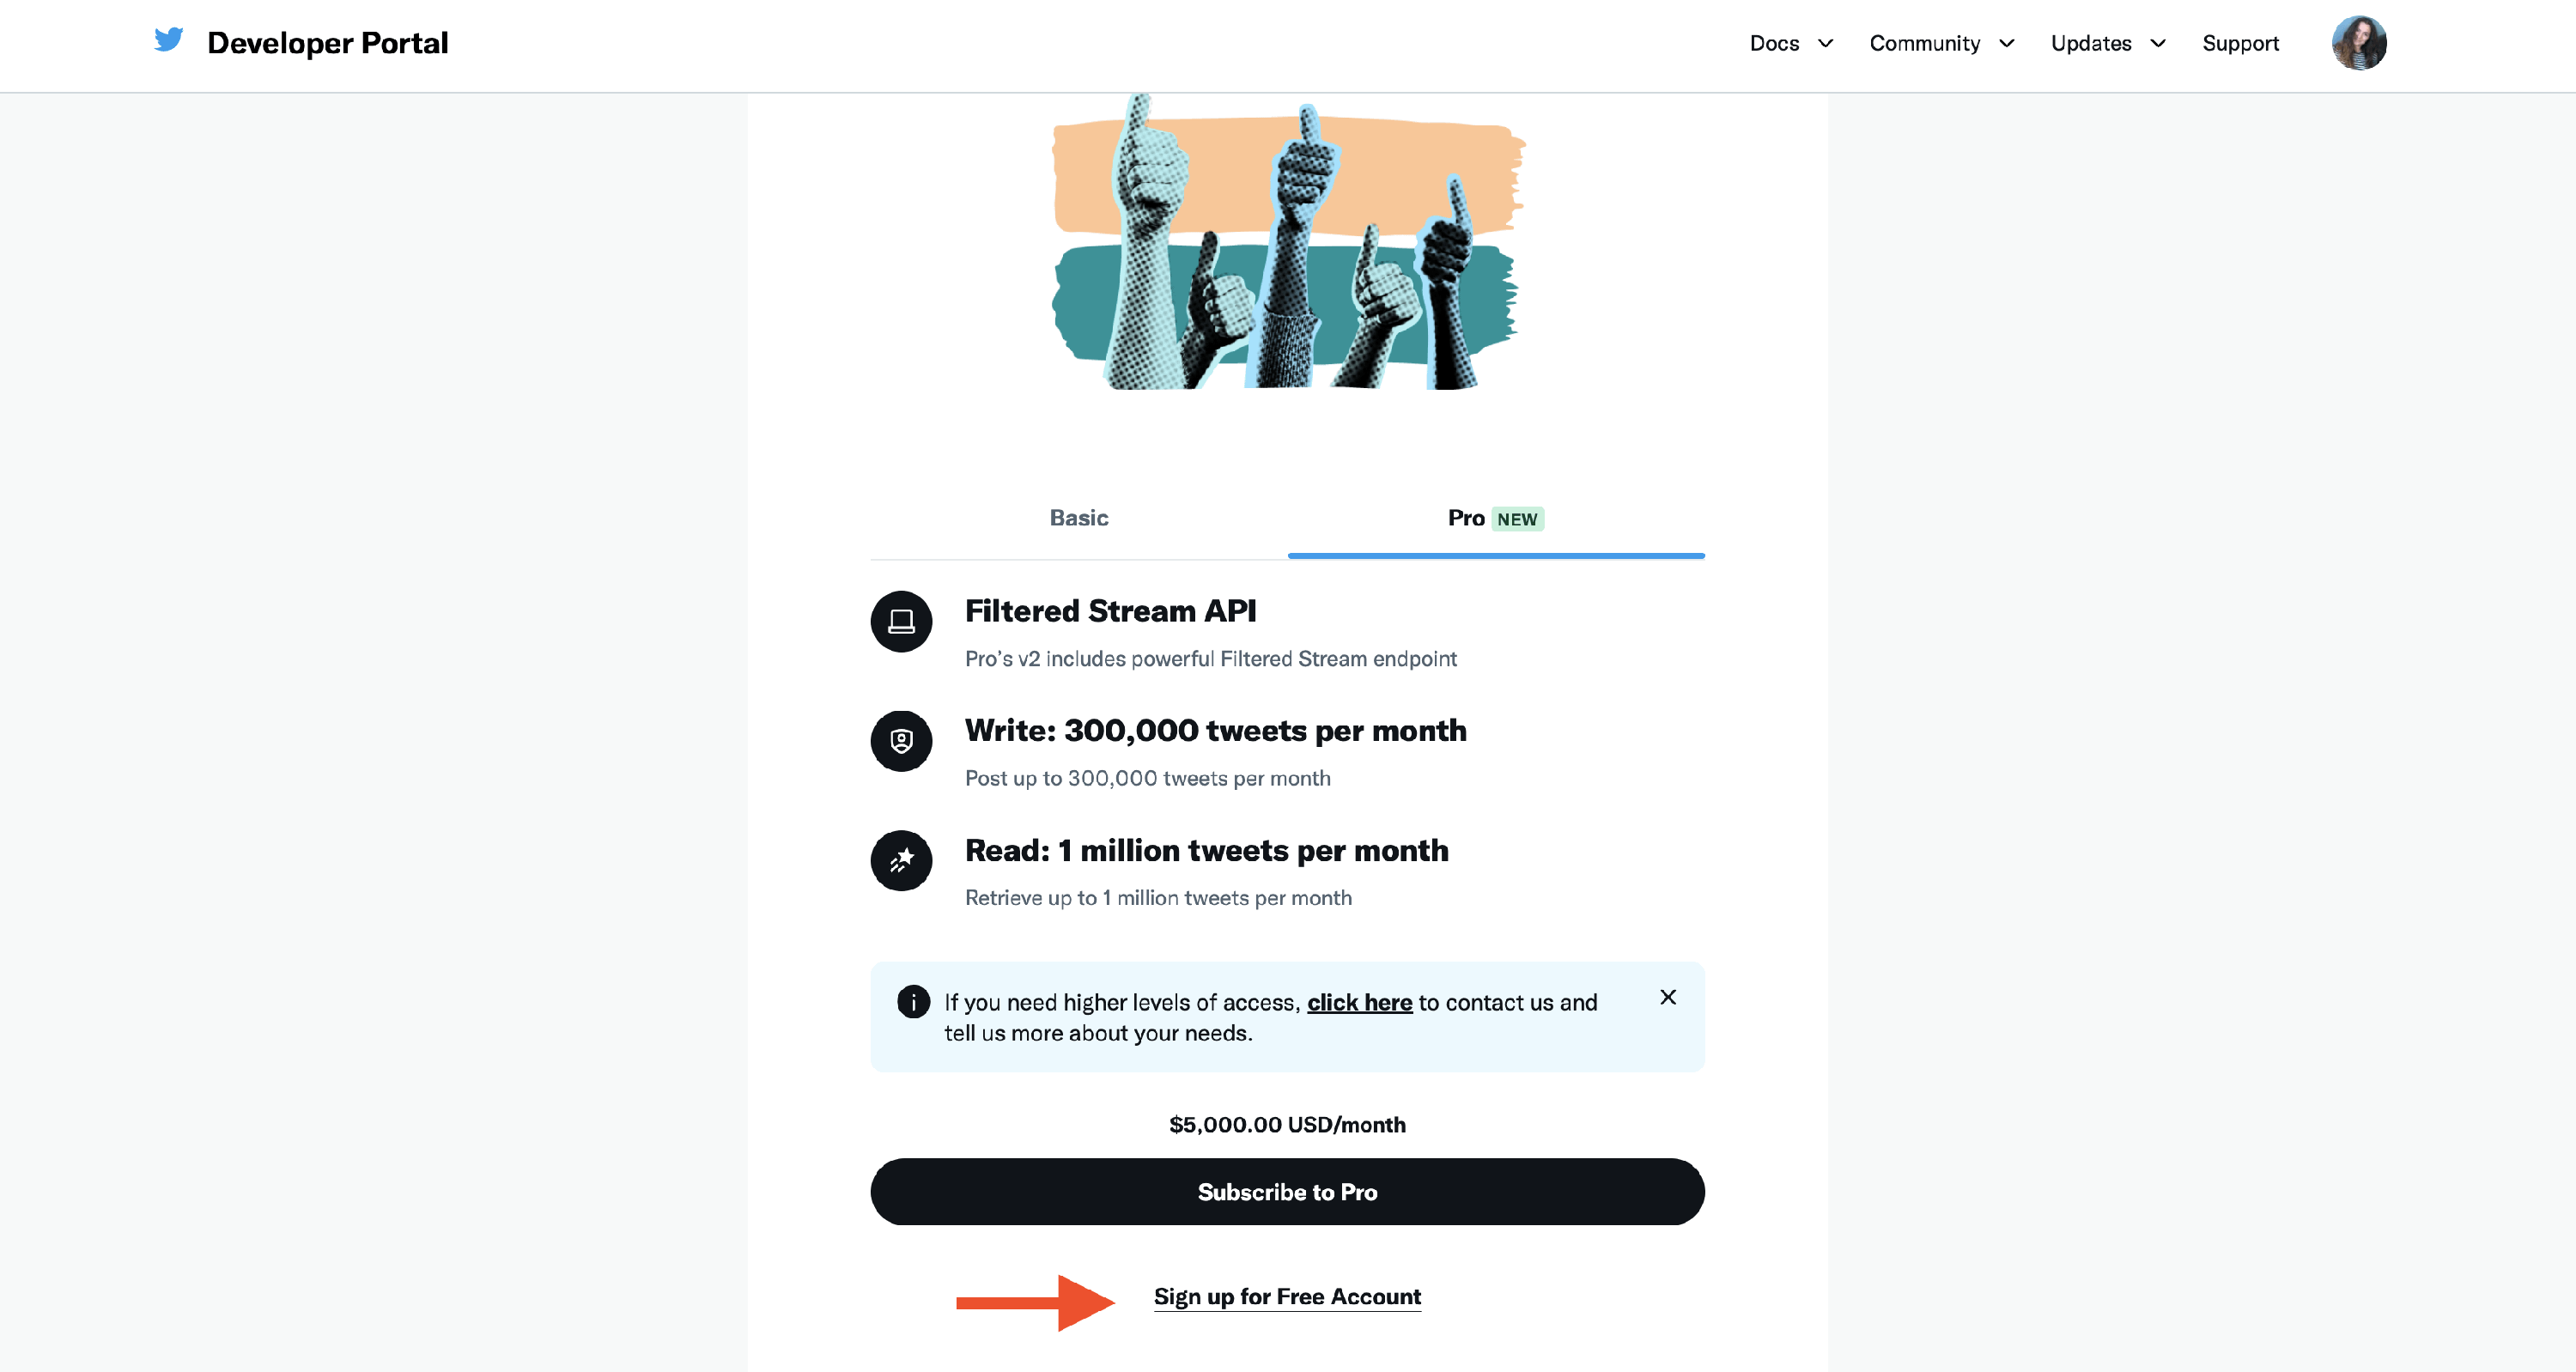
2. You will be presented with X (Twitter) plans, but you have the option to sign up for a free account at the bottom.
3. Enter your use cases in using X (Twitter), there is no right or wrong answer here. It must be at least 250 characters long.
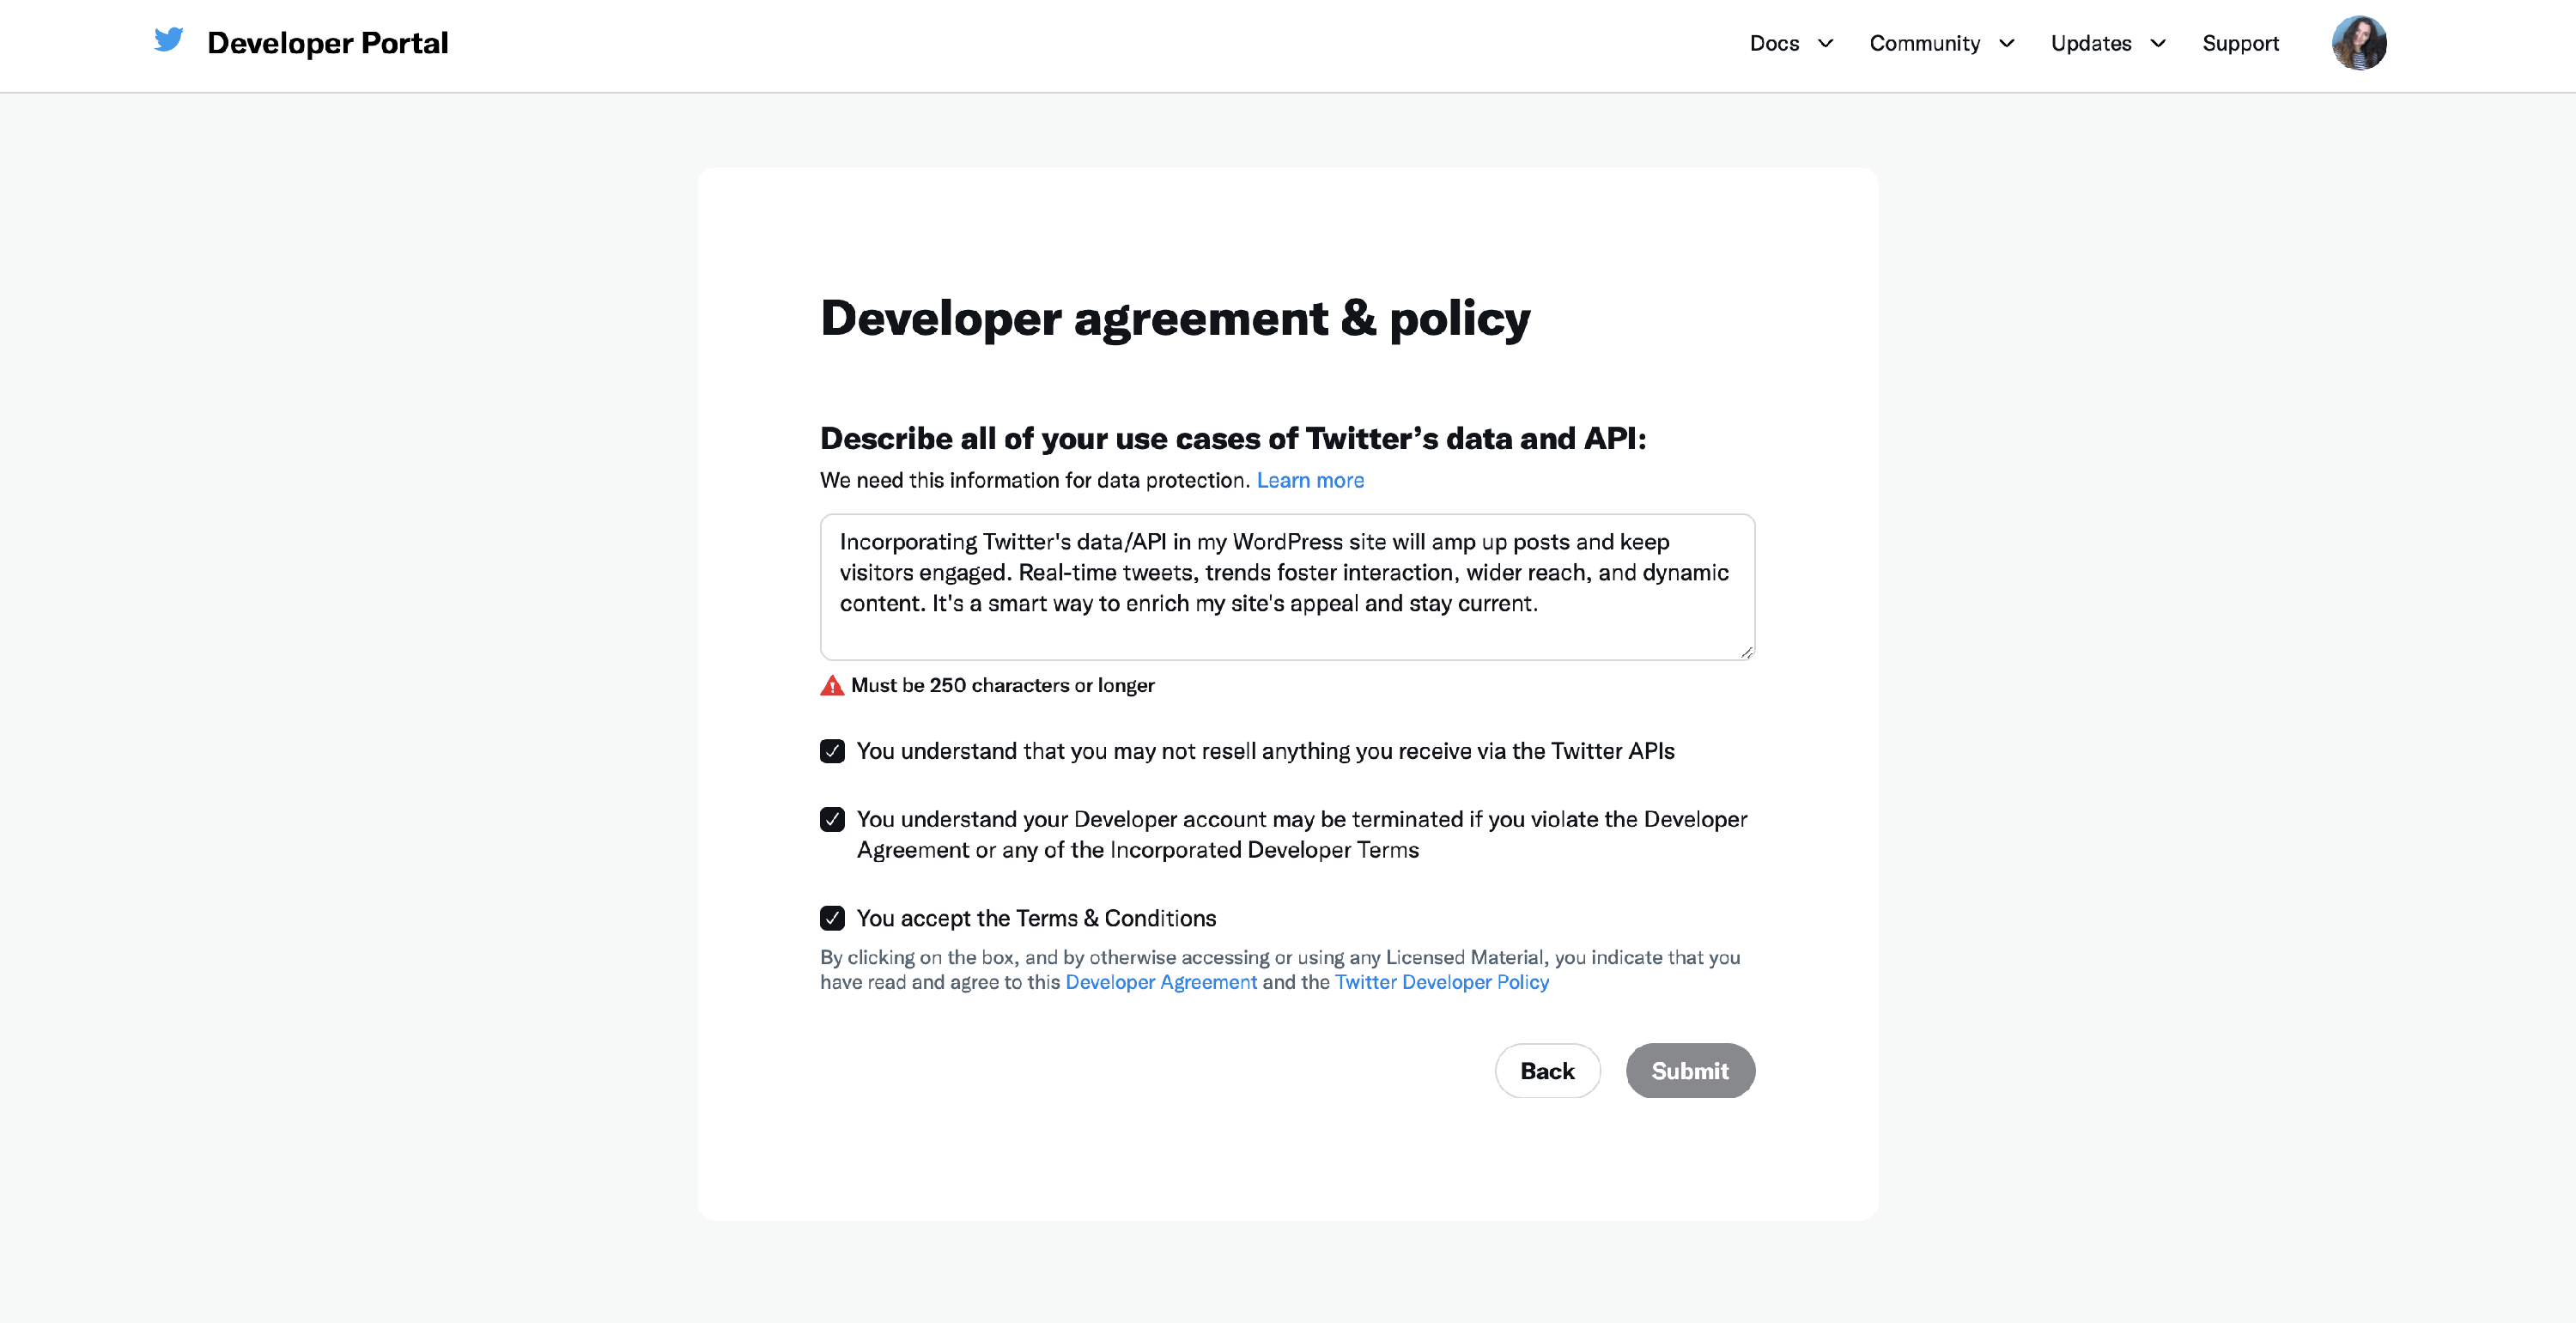
4. After that, agree to all terms and click the Submit button.
Creating the Project
1. On the X Developer Console, navigate to Apps and create a new app or edit the existing one.
2. If it's a new app, enter the application name and select Production under Environment. Click Create New Client Application.

3. When you're done, you will be able to see User authentication settings.
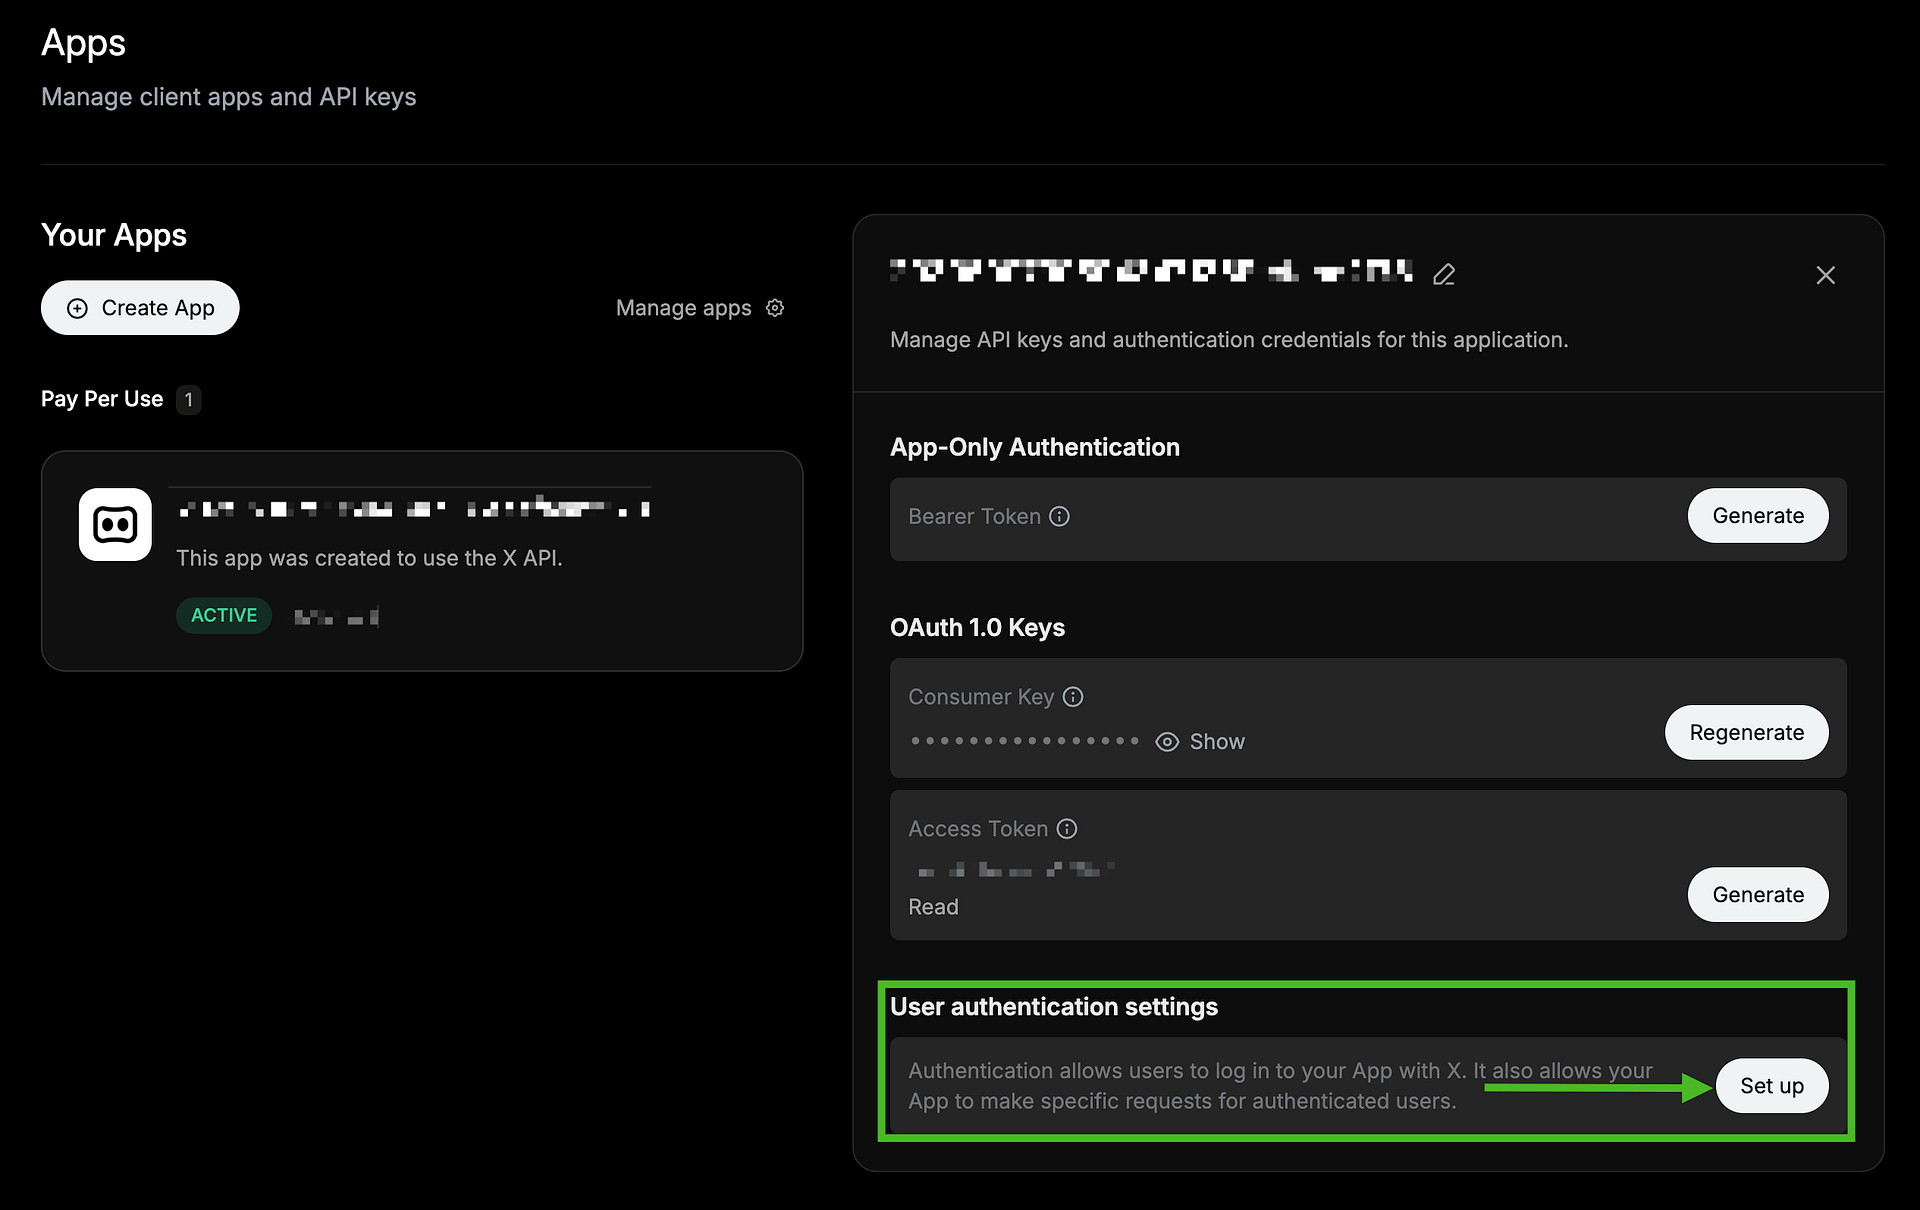
If it's an existing app, look for OAuth 2.0 Keys > Edit settings button.
4. Set the App permissions as follows:
- App permissions: Read and write
- Type of App: Web App, Automated App or Bot
- App info:
https://example.com/wp-admin/admin.php?page=TweetOldPost(replaceexample.comwith your domain) - Callback/Redirect URL:
https://example.com/wp-admin/admin.php?page=TweetOldPost - Website URL:
https://example.com/
5. Locate the OAuth 1.0 Keys > Consumer Key and click to regenerate it.
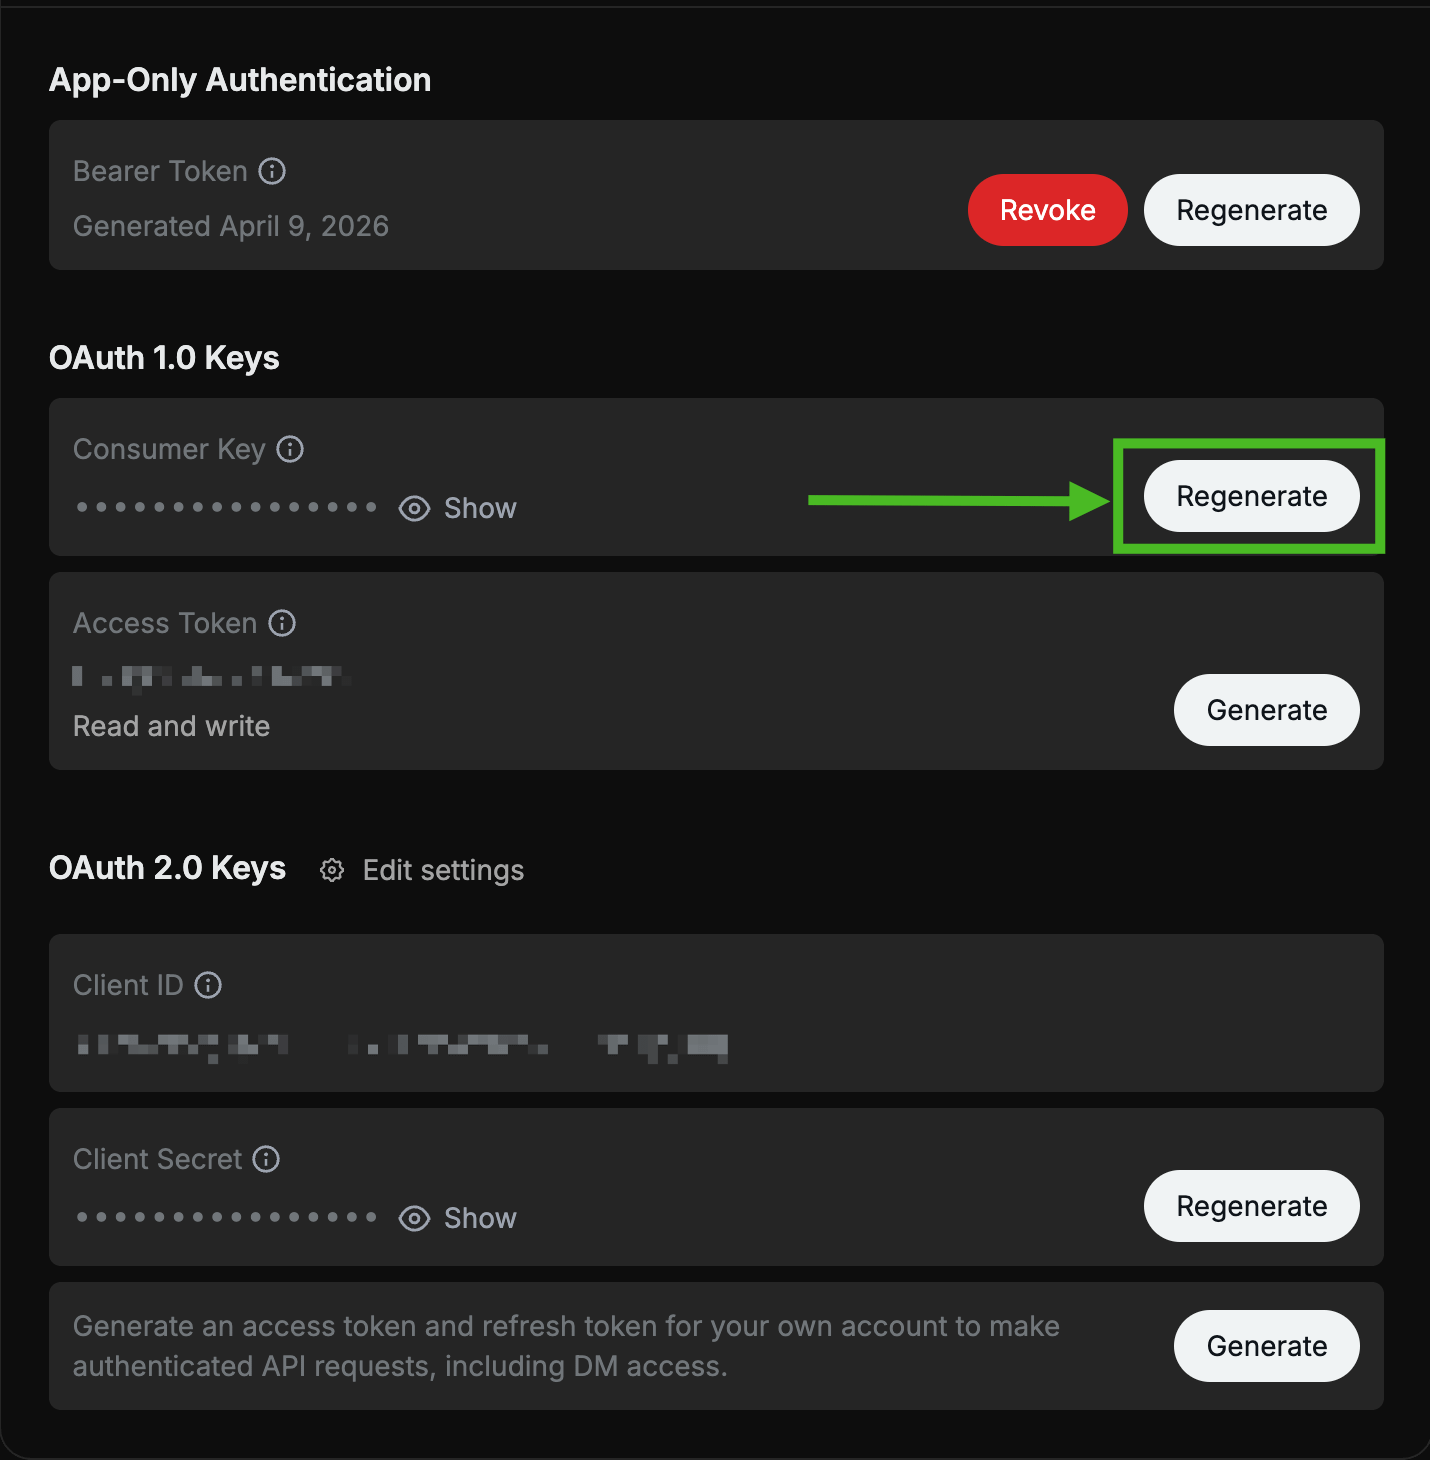
6. Save the Consumer Key and Consumer Secret Key.
7. Go back to the WordPress dashboard and click on Use your own keys, and paste the ones you copied.
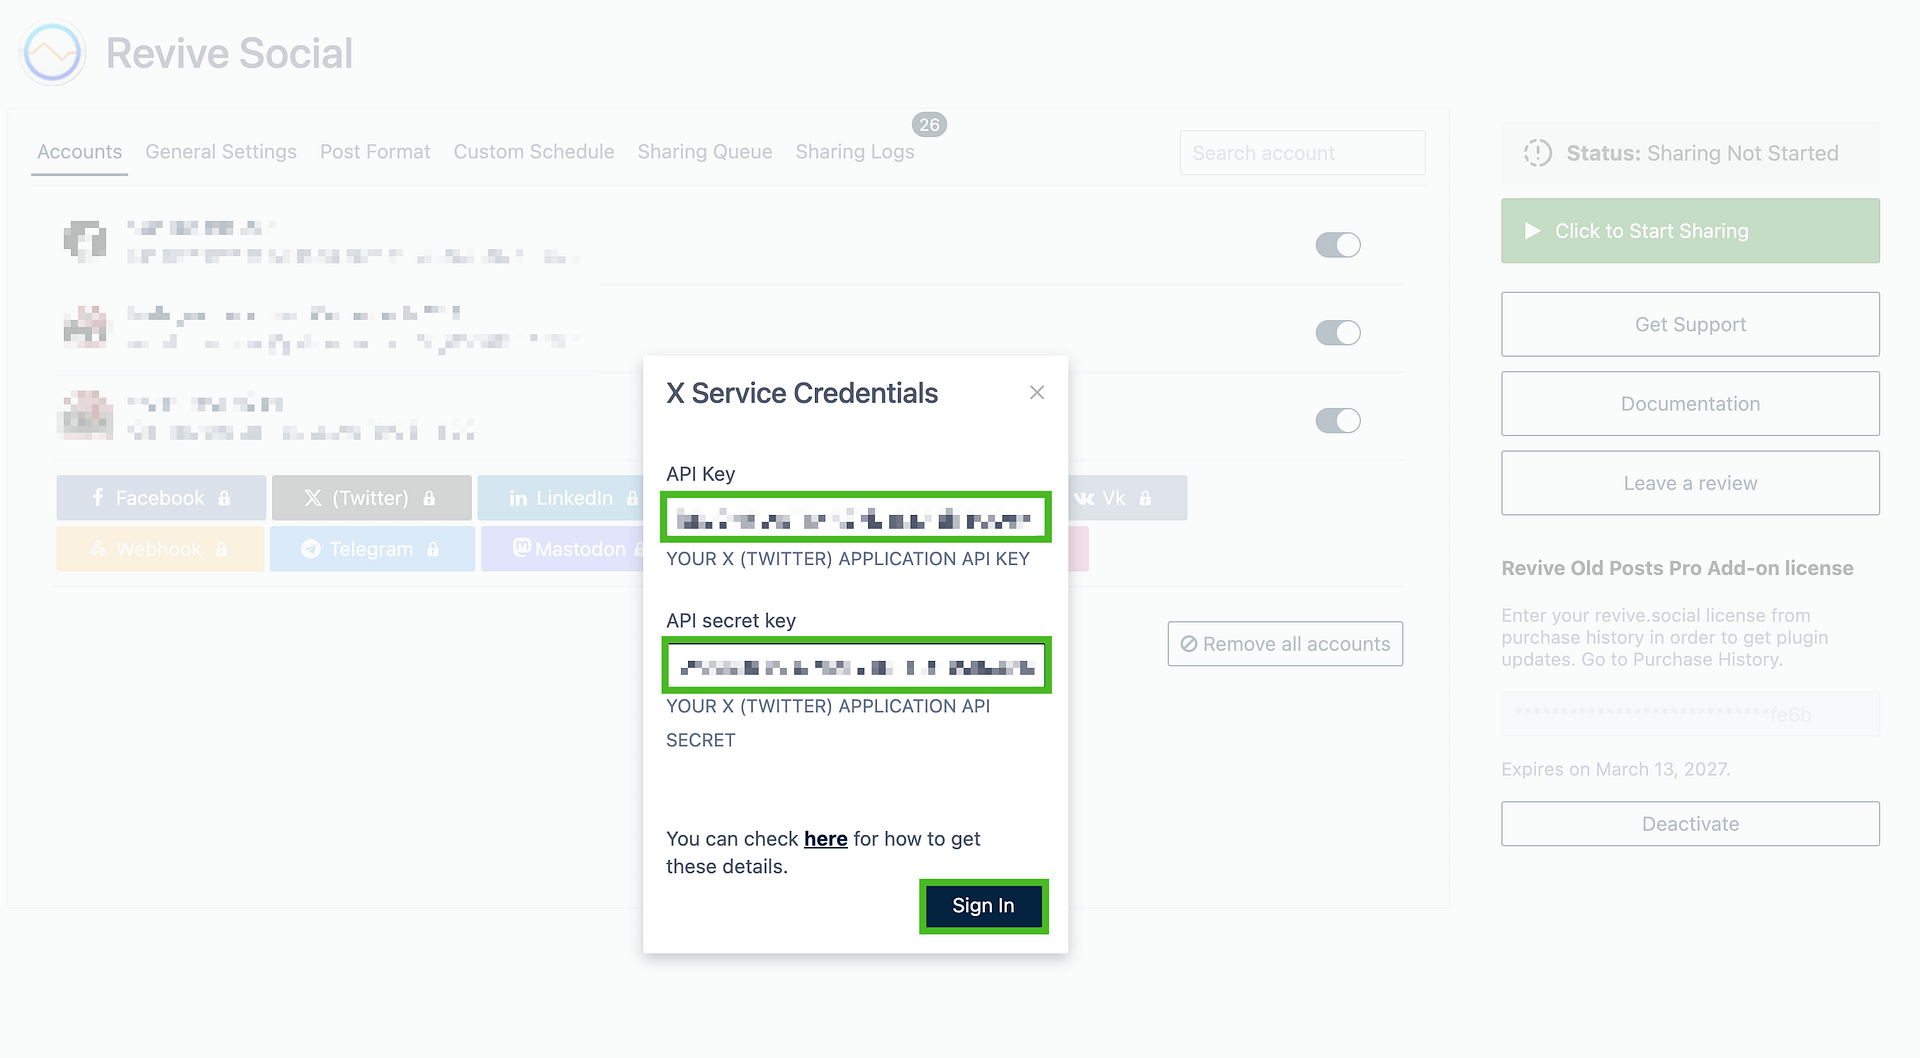
8. Click on Authorize app to start sharing X (Twitter) posts.